


Step-by-Step Guide to Assessing Roof Damage Urgency
How to Assess Roof Damage Urgency After a Storm
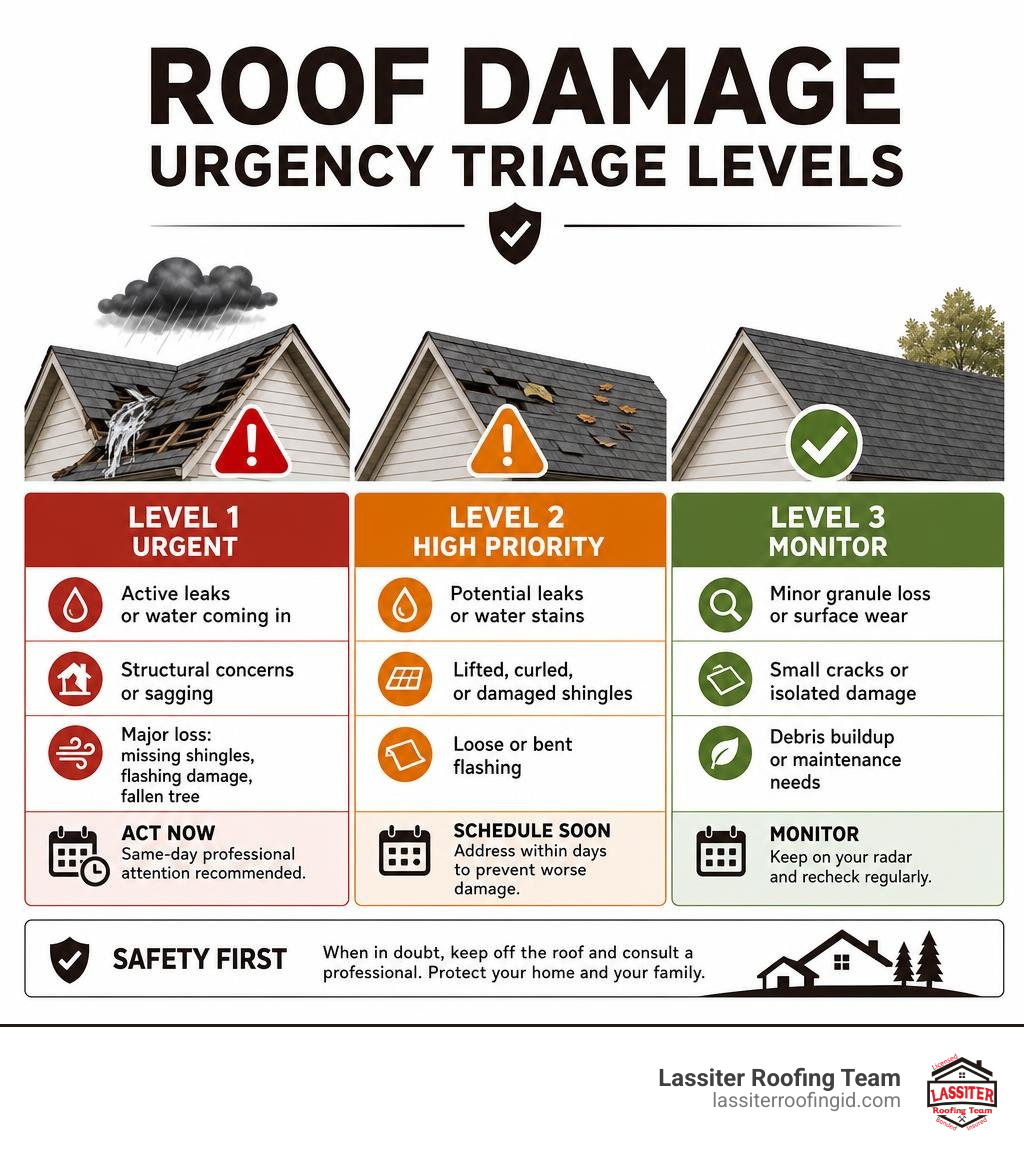
Treat roof damage as urgent when you see active leaking, missing shingles, bent flashing, fallen branches, sagging, or water stains inside your home. Stay off the roof, inspect from the ground and in the attic, photograph what you find, and arrange professional help quickly if water is getting in.
Even damage that looks small can worsen after the next rain. Wind can break shingle seals or crease the shingle mat without tearing shingles away, while hail can bruise shingles and shorten their life. Moisture intrusion also needs fast attention: mold can begin to establish within 24 to 48 hours.
A safe first check should include:
Look for debris, missing materials, dented gutters, and loose flashing from the ground.
Check the attic for daylight, wet insulation, stained decking, musty odors, or sagging wood.
Take dated photos and save receipts for any emergency protection, such as leak containment or tarping.
Call a qualified roofer immediately for active leaks, structural concerns, or damage following severe wind or hail.
I’m Kason Walton, owner of Lassiter Roofing Team, with more than 30 years of experience in construction, real estate, and roofing service across Idaho’s Western Treasure Valley. My work with roof damage inspections, repairs, and replacements helps homeowners sort out what needs immediate action and what can be planned with confidence.
Step 1: Evaluating Common Types and Signs of Roof Damage
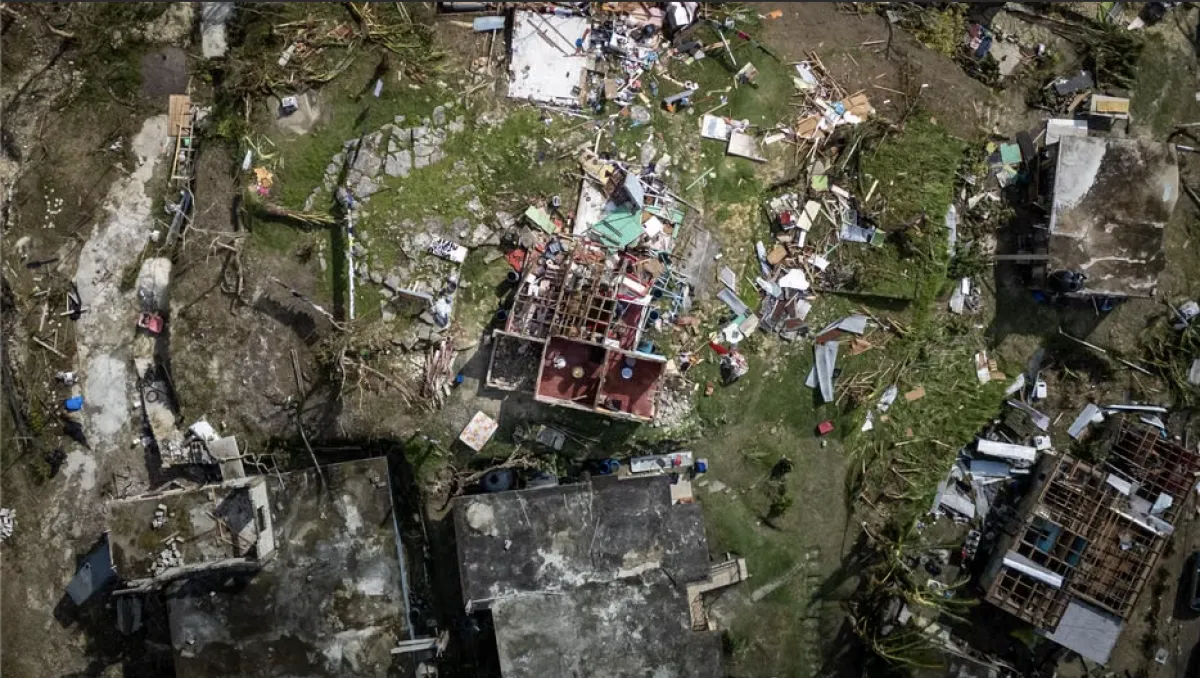
Severe weather exposes every vulnerability in your building envelope. Whether it is sudden wind uplift, heavy hail impact, or intense seasonal temperature swings, roofing materials face relentless physical forces. In places with distinct seasonal shifts, high UV exposure in summer dries out volatile compounds in asphalt, making materials brittle before winter storms arrive.
Wind as low as 45 MPH can cause minor structural damage and branch impact to roofs, while gusts exceeding 58 MPH (the National Weather Service threshold for severe storms) tear loose edge shingles and dislodge ridge caps. Hailstone size directly dictates structural destruction: hail as small as 1 inch in diameter (quarter-sized) can cause functional damage to lightweight composite shingles, while hail must be at least 1 1/4 inches in diameter (roughly half-dollar sized) to cause damage to heavy composite shingles or wood shake shingles.
Beyond acute storms, daily wear plays a major role. Overhanging tree branches scraping the surface strip away protective granules, and failing drainage lines can quickly push moisture back up under your roof deck. When evaluating roofline wear, understanding your fascia soffit and guttering replacement cost can help you plan comprehensive repairs rather than patching single components in isolation.
Identifying Hidden Roof Damage After Wind and Hail Storms
Not all storm impacts produce gaping holes. In fact, the most insidious roof issues hide in plain sight. When high-velocity winds sweep across a roof slope, they generate negative pressure (uplift). This force lifts shingle tabs and breaks the factory adhesive sealant strip. Once unsealed, the shingle flaps in the wind and develops a horizontal fracture across the fiberglass reinforcement mat, known as shingle creasing.
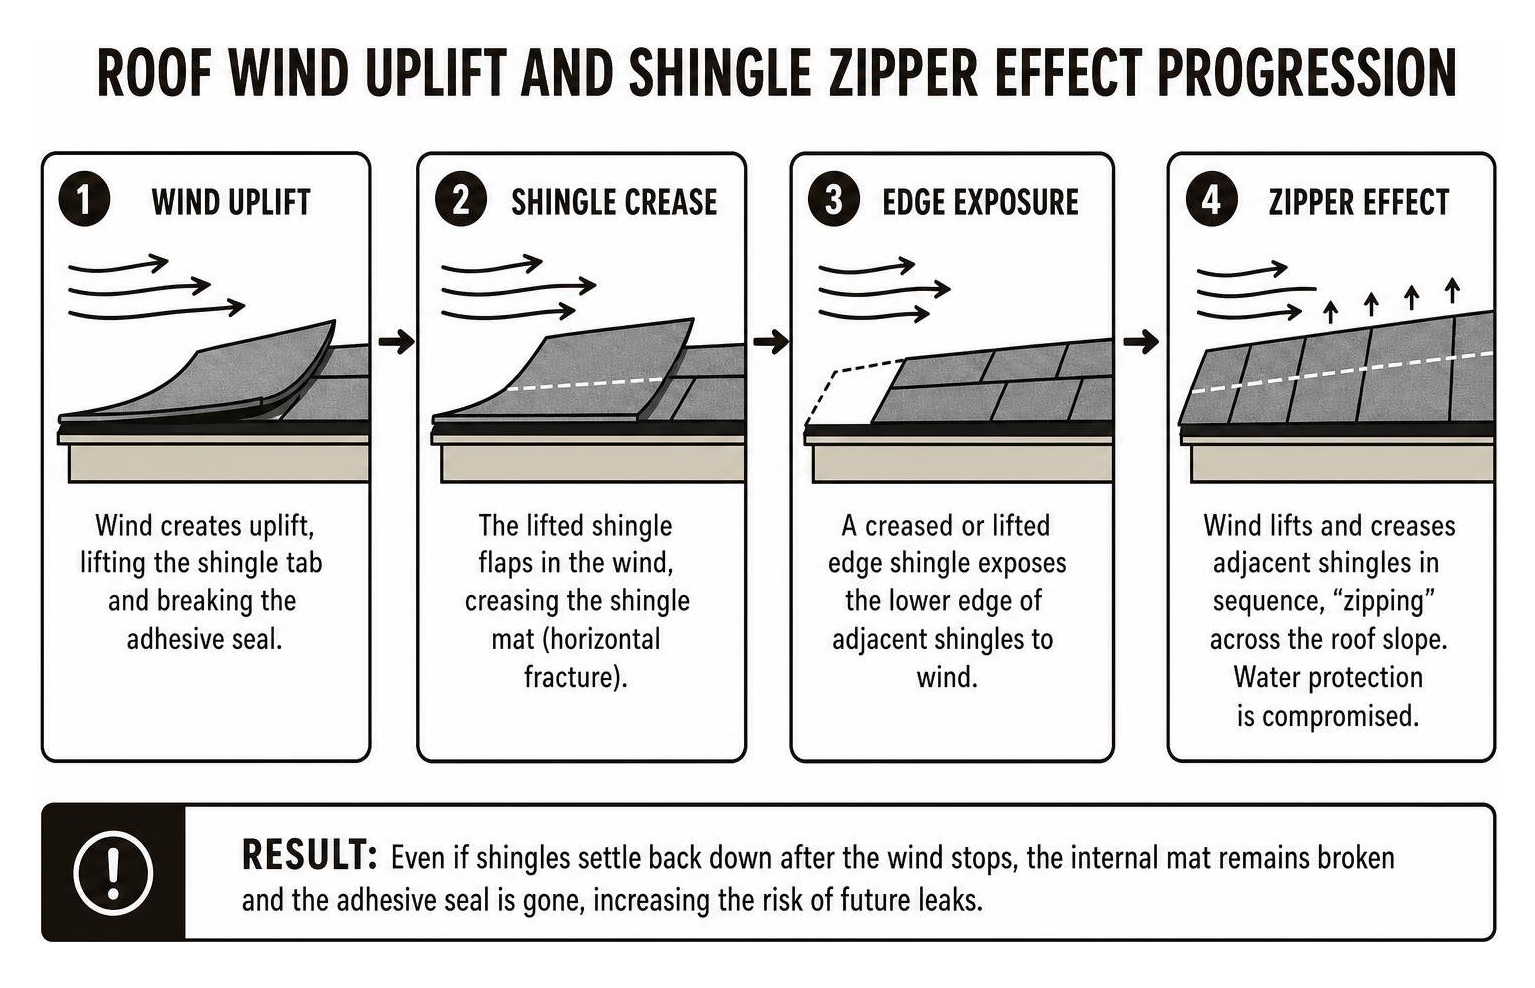
When one tab fails at the eave or rake edge, it exposes the lower edge of adjacent shingles to direct wind currents, triggering the "zipper effect" across the entire slope. Even if these shingles settle back down flat when the wind dies down, their internal structural mat remains broken and their water-shedding seal is gone.
Hail impacts require careful differentiation:
Functional Hail Bruising: A direct hail strike crushes the internal mineral mat, creating a soft, spongy indentation that feels like a bruised apple. This fractures the protective asphalt layer, accelerating UV degradation and causing premature water penetration.
Asphalt Blisters: Caused by trapped moisture or expanding volatile gases within the shingle during extreme heat outgassing. Blisters pop from the inside out, leaving small pockmarks that lack the crushed, indented fiberglass mat bruise characteristic of true hail strikes.
Evaluating collateral damage offers clear validation. If your downspout outlets are clogged with dark granules or your gutters show fresh dimples, your roof shingles took a heavy beating from sudden hail events.
Recognizing Material-Specific Vulnerabilities: Shingle, Metal, and Flat Systems
Every roofing material exhibits its own unique failure profile under physical stress:
Asphalt Shingles: Vulnerable to thermal embrittlement, cracked seal strips, granule shedding, and tab tears. Age compounds these risks; shingles past their mid-teens lose flexibility, causing them to snap rather than flex in heavy wind.
Metal Roofing Systems: A metal roof can last 40 to 70 years, but one bad storm can still cause dents, leaks, loose fasteners, or torn flashing. Thermal cycling causes panels to expand and contract, which can back out exposed screws or split older neoprene washers. For structural metal panels, specialized procedures like corrugated metal roof repair restore panel seam integrity without necessitating a full tear-off.
Low-Slope and Flat Membrane Systems (TPO, PVC, EPDM): Flat roofs depend entirely on continuous, watertight membrane seams. High winds can lift loose perimeter flashing, while hail punctures can pierce aged single-ply sheets, resulting in widespread underlayment saturation. Working with dedicated flat roof repair contractors ensures that membrane welds and drainage basins are tested thoroughly to prevent chronic ponding water.
Step 2: Immediate Safety Protocols and Post-Storm Triage
Your personal safety is the absolute priority after any extreme weather event. Roofing is consistently recognized as one of the most hazardous trades; climbing onto a steep, damp, or structurally compromised roof after a storm introduces severe slip-and-fall hazards. Downed power lines tangled in tree limbs, hidden electrical shorts near attic rafters, and weakened roof decking can turn a simple inspection into a life-threatening scenario.
Take immediate action to stabilize the interior. Mold can establish within 24–48 hours of moisture intrusion after a storm. Immediate post-storm triage requires fast visual confirmation from safe vantage points and prompt temporary containment.
Safe Ground-Level and Attic Inspection Methods
You can gather substantial evidence about your roof's condition without ever leaving the ground:
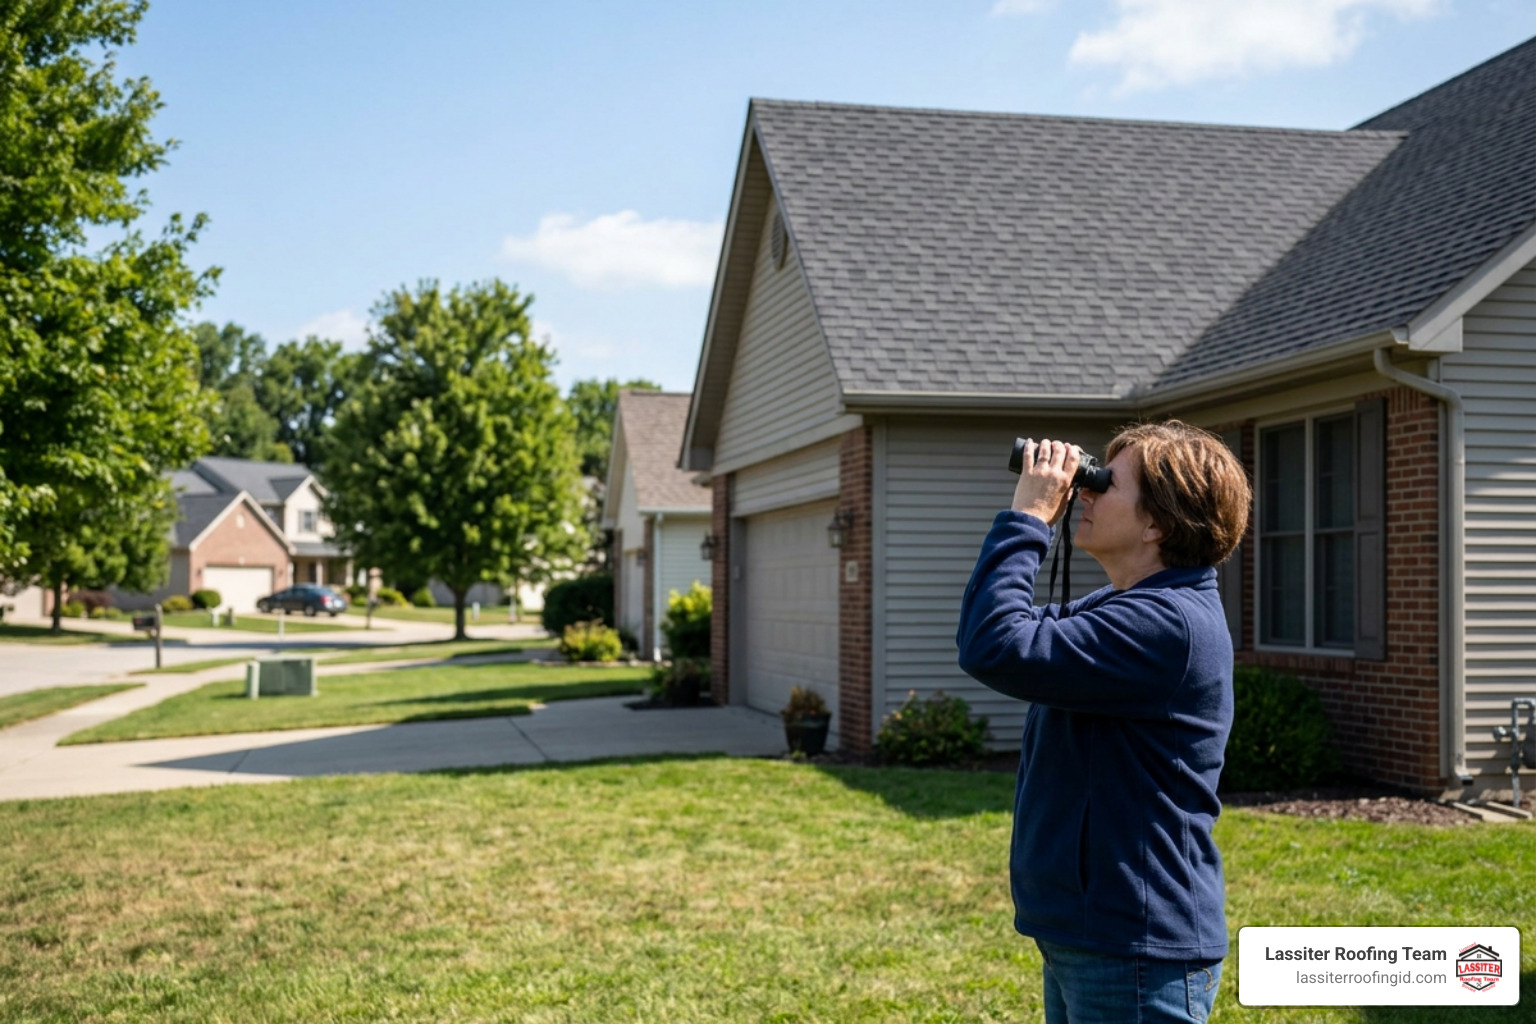
Exterior Perimeter Walk: Step back to the property line with a pair of binoculars. Systematically scan ridge caps, valleys, and rake edges for missing tabs, lifted edges, or buckled flashing.
Examine Collateral Indicators: Look at "soft" exterior metals. Are there heavy dents on your air conditioning condenser fins, painted deck railings, metal mailboxes, or window screens? If ground-level items show severe hail dimpling, the roof surface likely absorbed significant impact energy.
Interior Attic Inspection: Head into your attic during bright daylight with a strong flashlight. Check for:
Direct sunlight pinholes piercing through plywood roof decking.
Damp or compressed fiberglass insulation batts.
Dark, discolored water staining running down rafters, trusses, and vent pipes.
Sagging roof sheathing or persistent musty, humid odors.
Emergency Mitigation and Secondary Loss Prevention
Property insurance policies legally require homeowners to mitigate secondary losses. This means you must take reasonable steps to prevent further water intrusion while waiting for adjusters and roofing crews.
If water is actively entering the living space, place catch buckets beneath drips and punch a tiny pinhole in the center of sagging drywall ceiling bubbles to relieve water weight and prevent ceiling collapse. Outside, emergency tarping should be deployed over exposed areas. Always secure tarps over the roof ridge with 2x4 lumber battens rather than nailing directly through field shingles.
Keep every receipt for tarping materials, plastic sheeting, buckets, and professional emergency dispatch services. These mitigation costs are directly reimbursable under standard property policies. For areas vulnerable to severe ice buildup or wind-driven rain, installing a high-grade ice and water shield during subsequent repairs provides a self-adhering, waterproof underlayment barrier that halts future interior leaks.
Step 3: Assessing Urgency: Repair vs. Full Replacement Decision Matrix
Determining whether your property requires targeted spot repairs or a full structural replacement depends on clear physical thresholds, building codes, and long-term financial viability.
Assessment Factor | Spot Repair / Restoration Candidate | Full Roof Replacement Required |
|---|---|---|
Damage Extent | Isolated to under 20–25% of a single roof slope. | Exceeds 25% of the total roof plane; structural deck rot present. |
Roof System Age | Under 10–12 years old; pliable shingle matting. | Asphalt shingles exceeding 18–20 years; brittle material. |
Material Availability | Current shingle line available with matching dimensions. | Discontinued shingle line (matching impossible under state code). |
Leak Profile | Single localized point around pipe boot or chimney flashing. | Multiple widespread leak paths, damp insulation across attic. |
System Lifespan Reset | Extends service life by 1–3 years temporarily. | Fully resets system warranty with brand-new underlayment. |

Deciding Between Repair and Replacement for Roof Damage
Roofs over 20 years old are usually better served by full replacement than repeated spot repairs. As asphalt shingle roofs typically last roughly 20-25 years, attempting to replace isolated shingles on an aged roof often causes adjacent brittle shingles to crack during the repair process.
Local building codes often enforce the "25% rule," which mandates that if more than 25% of a roof section or overall surface is damaged within a 12-month period, the entire section must be brought up to current building code via complete replacement. Additionally, if your existing shingle line has been discontinued by the manufacturer, finding an exact dimensional and aesthetic match is nearly impossible, making a full replacement necessary to restore code compliance and consistent protection.
Assessing Critical Penetrations, Flashing, and Water Barriers
Roof leaks rarely begin in the open field of a roof; they occur predominantly at junctures, transitions, and penetrations. Flashing seals crucial roof junctions around chimneys, skylights, plumbing vents, and multi-story transitions. When high winds pull flashing away from vertical walls, driving rain channels straight into structural framing.
Proper remediation at penetrations demands exact craftsmanship:
Chimney Junctions: Step flashing must interleave with every shingle course, protected by a continuous counter-flashing embedded into mortar joints. For specialized metal roofing, detailed flashing around chimney metal roof systems prevent sheet metal seam breaches during heavy runoffs.
Wall Terminations: Installing professional cap flashing installation secures wall parapets and low-slope borders against wind lift.
Pipe Boots and Valleys: Degraded rubber boots should be replaced with high-durability synthetic or lead collars, while metal valleys must remain unobstructed to handle bulk rainwater volume.
To better understand the financial scope of addressing these junction points, check our comprehensive guide on Wind Damage Roof Repair: Cost, Fixes, Timeline for transparent pricing standards.
Step 4: Navigating Insurance Claims, Adjusters, and Policy Terms
Filing a property claim requires solid documentation. As soon as storm conditions clear, photograph everything: broad landscape shots showing your entire property, medium-range shots of damaged slopes, and close-up photos of torn shingles or dented metal. Place a coin or measuring tape next to hail bruises to provide immediate visual scale for the adjuster.
Log the exact date, approximate time, and meteorological details of the storm, citing National Weather Service alerts where possible. When insurance adjusters arrive, they typically mark off a 10' x 10' "test square" on multiple roof slopes, counting the density of distinct hail strikes or torn shingles within that 100-square-foot box to determine whether the damage warrants spot repairs or a full roof replacement.
Understanding ACV vs RCV and Deductible Structures
Understanding your policy's payout structure is critical to avoiding unexpected out-of-pocket expenses:
Actual Cash Value (ACV): Pays the current depreciated value of your damaged roof based on its age and prior condition. If a 15-year-old roof with a 20-year lifespan is destroyed, an ACV policy deducts 75% for depreciation, leaving you to pay the remaining balance out of pocket.
Replacement Cost Value (RCV): Covers the actual cost of replacing the roof with brand-new materials of like kind and quality in today's market. The insurer releases the ACV amount initially; once the contractor completes the work and submits the final invoice, the insurer releases the withheld depreciation.
Many insurance policies in coastal and storm-prone states carry a separate wind or hail deductible, often expressed as a percentage of the dwelling coverage (typically 1% to 5% of your home's insured structure value) rather than a flat dollar amount. Be sure to check your policy declarations page to determine your exact deductible obligations.
Managing Claim Adjustments, Denials, and Policyholder Rights
Insurance carriers sometimes attribute storm damage to "pre-existing wear and tear" or deferred maintenance. You have clear rights as a policyholder:
Challenge Denials with Physical Proof: Providing prior routine maintenance invoices and pre-storm inspection photos helps disprove carrier claims of homeowner neglect.
Invoke the Appraisal Clause: If you and your carrier have a dispute over the true financial cost or extent of the damage, most standard policies contain an appraisal clause. This allows you to hire an independent appraiser to determine the fair loss value without going to court.
Verify Underwriting Records: Property claim filings are tracked across insurers via the Comprehensive Loss Underwriting Exchange (CLUE). Ensure that any closed, unpaid, or withdrawn claims are not misclassified as paid structural losses.
Schedule Professional Verification: Having an experienced roofing contractor on-site during the adjuster's walkthrough ensures that subtle issues—like creased shingles, damaged flashing, and unsealed tabs—are fully documented. Scheduling a Free Roof Inspection gives you a comprehensive, independent damage assessment before opening or settling your claim.
Step 5: Preventative Maintenance and Long-Term Fortification
Proactive maintenance protects your roof system and preserves your property's long-term value. Simple seasonal care prevents minor defects from turning into emergency repairs during the next severe storm.
Maintain Tree Clearances: Trim overhanging tree branches so they remain at least 10 feet away from the roofline. This prevents wind-whipped branches from scouring away protective granules and eliminates easy access paths for rodents and pests.
Protect Gutter Systems: Blocked gutters force water back beneath the roof eaves, rotting the fascia board, soffit, and structural rafter tails. Upgrading with professional guttering installation near me ensures seamless drainage lines that channel high-volume storm runoff away from your foundation.
Safe Moss and Algae Removal: Never pressure-wash an asphalt shingle roof. High-pressure water strips off protective ceramic granules and forces water directly under the underlayment. Instead, clear moss using an air broom or soft bristle brush, then apply a targeted zinc or copper sulfate treatment to inhibit spore regrowth.
Upgrade to Impact-Resistant Materials: When reroofing, consider Class 4 impact-resistant shingles or heavy-gauge standing seam metal panels. Many insurance providers offer annual premium discounts for installing impact-rated materials. For flat and low-slope projects, consulting experienced flat roof contractors in my area helps you choose UV-reflective, tear-resistant membranes built to withstand ponding and foot traffic.
Frequently Asked Questions about Roof Damage
How can I tell if hail damage is functional or cosmetic?
Functional hail damage compromises the roofing material's structural ability to shed water and protect the home. On asphalt shingles, functional damage includes cracked, punctured, or bruised fiberglass mats that expose the bitumen underlayer to rapid UV decay and leaks. On metal roofs, functional damage fractures the protective paint or anti-corrosion coating (exposing bare metal to rust) or deforms standing panel seams and fasteners. Cosmetic damage consists solely of shallow surface dents or scuffs that do not impair waterproofing, seam integrity, or the material's expected lifespan.
What should I do if my insurance company denies my roof damage claim?
Start by carefully reviewing the insurer’s written denial letter to identify the exact policy exclusions cited (such as wear and tear or manufacturing defects). Next, hire an independent, licensed roofing professional to complete a detailed damage report with timestamped photographs and local meteorological storm data confirming the event. If the insurer still refuses to re-evaluate the claim, you can formally invoke your policy’s appraisal clause to resolve the loss dispute or submit a complaint to your state Department of Insurance for regulatory review.
How long do I have to file an insurance claim after a storm?
Claim filing windows depend on your specific policy terms and state insurance regulations, typically ranging from 180 days to two years from the date of the loss event. However, most insurance contracts require policyholders to give "prompt notice" of damage and take immediate steps to mitigate secondary water intrusion. Waiting months to report damage can result in claim denials if the carrier argues that unaddressed leaks caused preventable interior rot or mold.
Conclusion
Assessing roof damage urgency requires quick, safe action: inspecting your property from the ground, checking attic spaces for early moisture signs, taking clear photographic records, and bringing in licensed professionals before minor defects turn into major structural repairs. Lassiter Roofing provides complete residential, commercial, and agricultural roofing services—including the installation, repair, replacement, and inspection of metal, shingle, and TPO/flat roofs—throughout Idaho’s Western Treasure Valley. With over 30 years of industry experience, individually quoted competitive pricing, and our dependable 5-year workmanship warranty, our team ensures your home remains fully protected across every season. Visit Lassiter Roofing today or Request Free Estimate to get an honest, expert assessment of your roof's condition.


