


Stop the Drip: The Ultimate Guide to Corrugated Metal Roof Repair
Why Corrugated Metal Roof Repair Can't Wait
Corrugated metal roof repair is something most homeowners need to tackle at some point — even on a roof built to last decades.
Here's a quick overview of the most common fixes:
Loose or backing-out fasteners — Replace with neoprene-washer screws driven straight through the high ribs
Failed seam sealant — Remove old sealant, clean bare metal, apply butyl tape or polyurethane sealant
Small holes or rust spots — Wire brush to bare metal, apply rust-inhibiting primer, patch with matching metal or rubberized flashing tape
Leaking panel overlaps — Clean, degrease, and re-seal end laps and side laps with butyl tape or high-solids polyurethane
The good news? A corrugated metal roof can last up to 100 years with proper care. But even the toughest roof has a weak point — and it's almost never the panel itself.
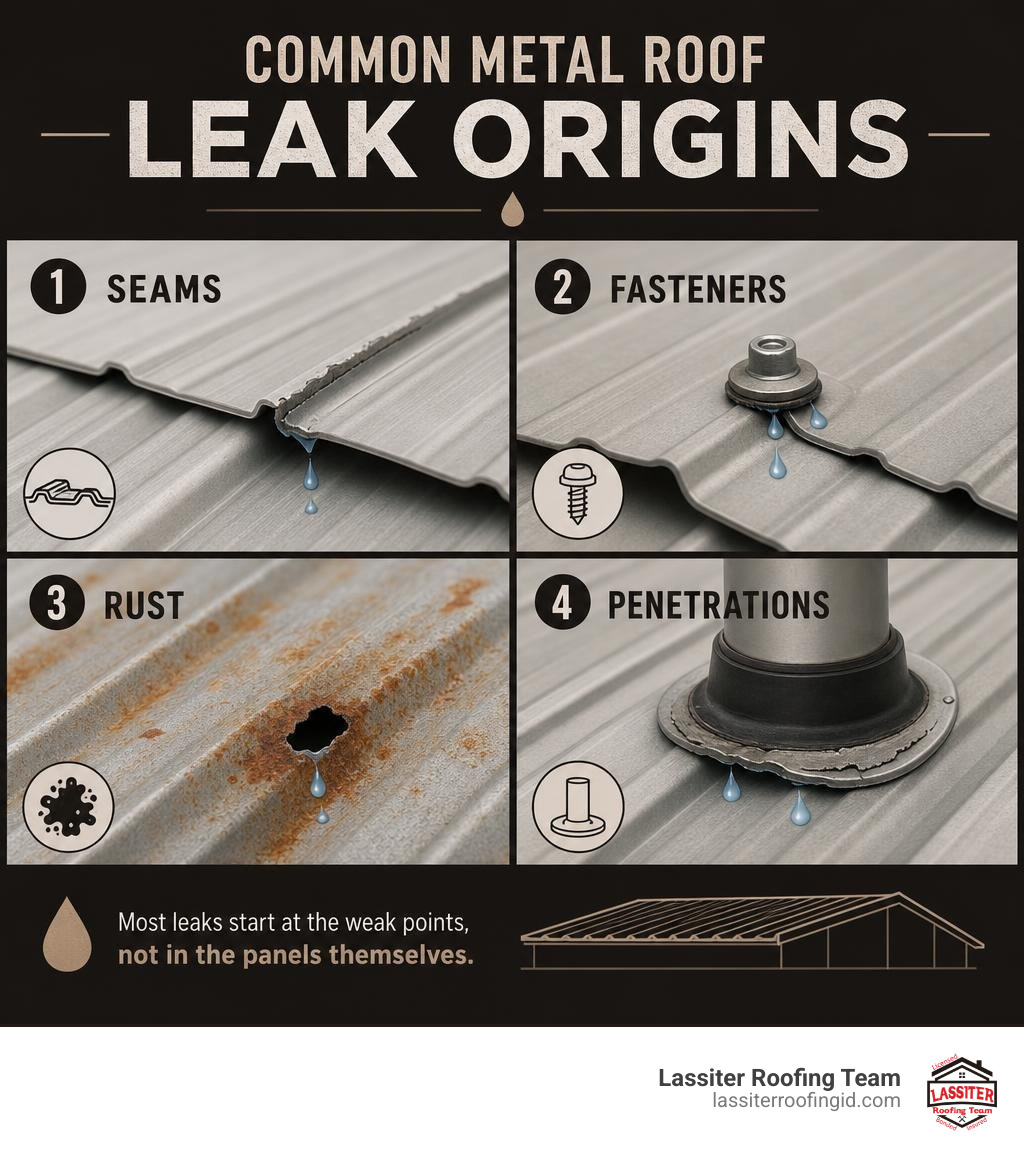
95% of metal roof leaks trace back to seams, fasteners, and penetrations — not the metal panel failing. A small gap in a seam or a single backed-out screw can let water in and quietly cause hundreds of dollars in interior damage before you notice a drip.
That's the problem with metal roof leaks: by the time you see water inside, damage has already started.
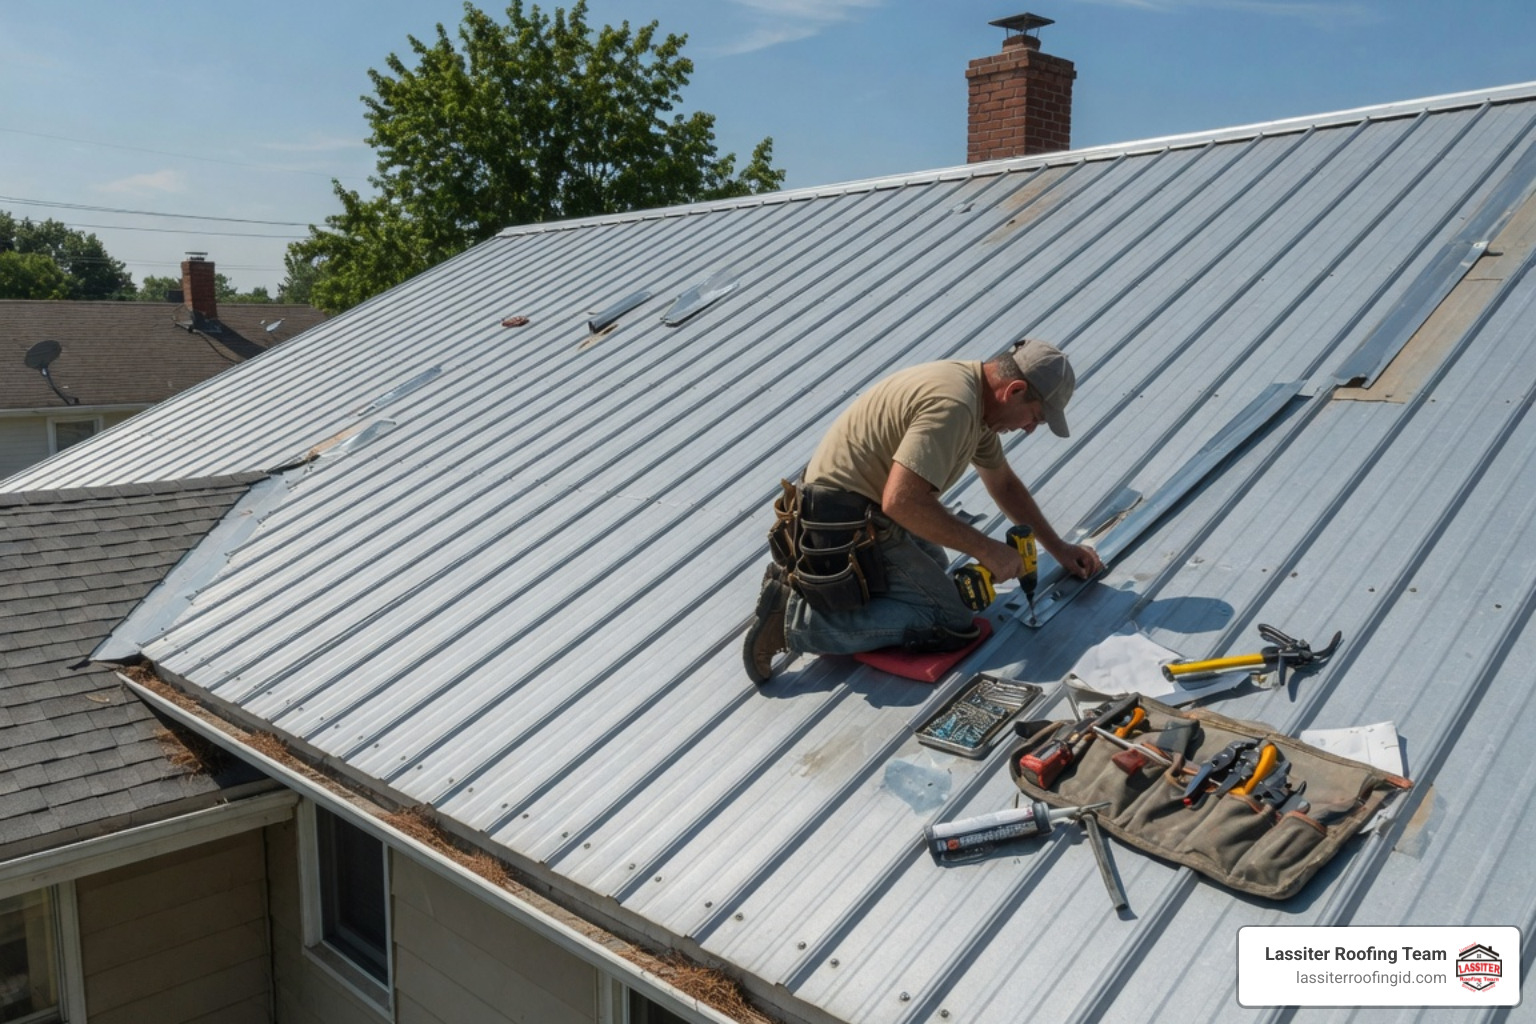
I'm Kason Walton, owner of Lassiter Roofing Team, and with over 30 years of roofing experience across Idaho's Western Treasure Valley, I've seen how a simple corrugated metal roof repair — caught early — saves homeowners from costly structural damage. Let's walk through exactly how to find the leak, fix it right, and keep it from coming back.
How to Locate Roof Leaks and Understand Their Root Causes
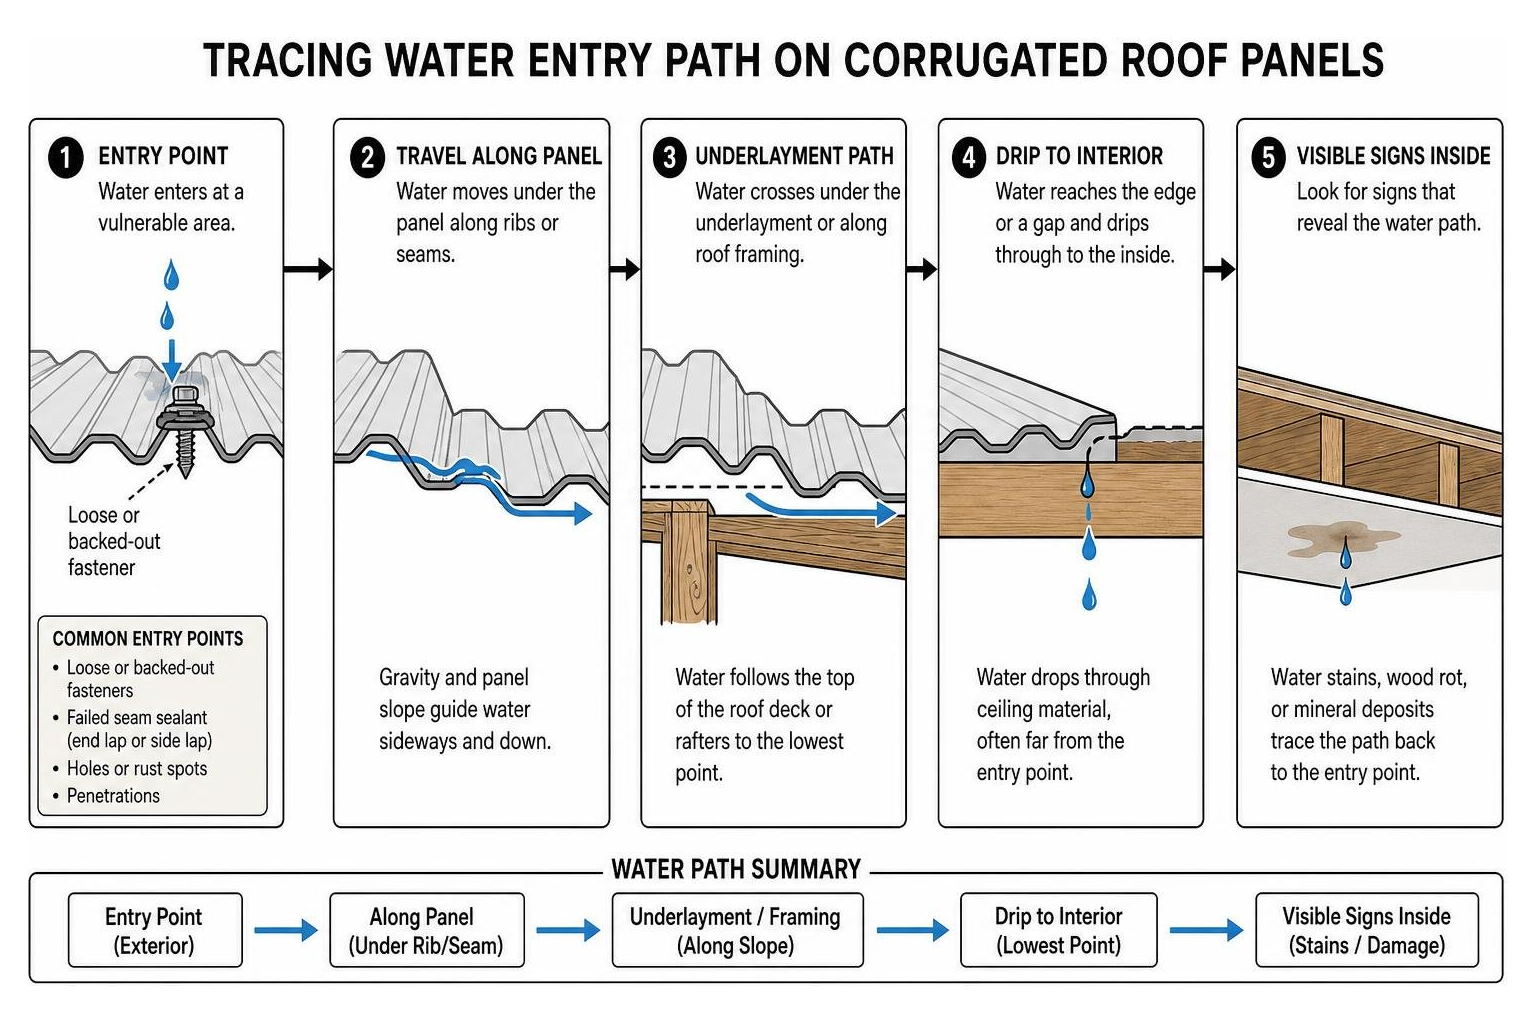
Finding the exact entry point of a metal roof leak can feel like playing detective. Water is sneaky. It rarely drips straight down from the spot where it enters the roof. Instead, water enters through a gap on the exterior, runs along the underside of the corrugated sheet or top of a roof rafter, and finally drops through your ceiling yards away from the actual roof opening.
To pinpoint the exact leak location, follow this process:
Perform an Attic Inspection During Daylight Hours: Head up into your attic or crawlspace on a bright, sunny day. Turn off all artificial lights. Look up toward the roof deck for any bright pinpricks of sunlight shining through. If light can get in, water definitely can. Mark those spots on the rafters with bright tape.
Perform a Simulated Rainfall Test: If an interior visual check doesn't reveal the breach, grab a garden hose and a helper. Have your helper stand inside the attic with a flashlight while you station yourself on the roof. Start spraying water at the lowest point of the roof (the eaves) and slowly work your way up toward the ridge. Keep the hose on each 5-foot section for 3 to 5 minutes before moving up. When your helper spots water dripping inside, stop immediately — you’ve found your breach.
Trace the Water Path: Look for water stains, dark timber rot, or white mineral deposits running along the underside of the panels down to the ceiling joists.
Understanding why these leaks happen in the first place helps prevent them from happening again:
Thermal Expansion and Contraction: Steel and aluminum panels continuously expand in afternoon heat and contract during cool nights. A 20-foot steel panel can move nearly 1/4 inch between daily extreme temperature swings! Over time, this constant shifting stresses fasteners and pulls seam sealants apart.
Backing-Out Fasteners: As the metal sheets move, screws gradually back out or work their holes wider. The protective rubber washers age, crack under intense UV light, and fail to maintain a water-tight seal.
UV Breakdown and Seam Deterioration: Direct sunlight bakes exposed caulking and sealants. Standard silicone caulks dry out, crack, and shrink within 1 to 3 years.
Corrosion and Environmental Stressors: In coastal areas, salt air accelerates seam deterioration 40% faster than inland regions. Meanwhile, high winds, heavy snow loads, and debris accumulation in ridged channels create localized water dams that force water upward into lap joints.
Essential Tools, Materials, and Preparation for Corrugated Metal Roof Repair
Attempting a repair with improper tools or standard hardware store caulk is guaranteed to fail during the next storm. Metal roofing demands materials designed specifically to withstand thermal movement, UV rays, and raw weather.
Required Tools and Materials Checklist
Hardware & Fasteners: Self-tapping metal roofing screws with oversized EPDM neoprene washers (typically 1/4-inch larger than existing screw heads).
Sealants: High-solids polyurethane sealant or heavy-duty butyl tape sealant (avoid standard silicone or latex caulks).
Surface Prep Equipment: Wire brush, non-woven abrasive pad, plastic scraper, putty knife, and 80-grit sandpaper.
Cleaners: Trisodium Phosphate (TSP), isopropyl alcohol, or dedicated metal roof degreaser.
Patching Supplies: Rust-inhibiting primer, exterior-grade metal roof paint, UV-resistant rubberized butyl flashing tape, or matching 26-gauge/29-gauge metal panel pieces.
Safety Gear: Full fall-protection harness, secure anchor point, ladder standoffs, safety goggles, heavy cut-resistant gloves, and soft rubber-soled non-slip boots.
Prior to starting any work, consult a comprehensive safety guide like this resource on How to Fix Corrugated Roof Sheets on Your House to ensure your ladder, pitch calculations, and harness rigging meet DIY safety standards.
Surface Preparation: The Step You Cannot Skip
The single biggest mistake homeowners make is applying fresh sealant or tape directly over dirt, old cracking caulk, or surface rust. New sealants will stick to the grime rather than the metal, peeling off in the first rainstorm.
Scrape Off Old Material: Use a putty knife or plastic scraper to remove all failed, dried sealant down to bare metal.
Remove Oxidation: Wire-brush any rusted or chalky painted surfaces to remove loose scales.
Degrease Completely: Wipe down the seam or hole area thoroughly with isopropyl alcohol, acetone, or TSP. This removes invisible dirt and grease. Let the metal dry completely before applying primers or sealants.
Step-by-Step Guide to Corrugated Metal Roof Repair Techniques

Whether you are dealing with broken seam sealants, backing-out screws, or localized rust holes, taking a systematic approach ensures a watertight repair that lasts for decades. Nearly 70% of US homes with metal roofs report maintenance issues requiring attention within their first 20 years. Doing the work correctly today prevents interior structural damage tomorrow.
Before pulling out your drill, evaluate the overall extent of the damage. Here is how DIY repair costs stack up against professional restoration:
Repair Scenario DIY Estimated Cost Professional Contractor Cost Expected Repair Lifespan Loose Screws (10–20 Fasteners) $20 – $50 $300 – $500 10–15 Years Seam Resealing (per 50 ft) $100 – $200 $500 – $1,200 8–15 Years Small Hole / Rust Patching $50 – $100 $350 – $600 5–10 Years 5-Sheet Panel Replacement $100 – $300 $500 – $1,000 30+ Years Full Roof Elastomeric Coating $400 – $800 $1,500 – $4,000 10–20 Years
Fixing Loose Fasteners and Seams During DIY Corrugated Metal Roof Repair
Fastener failure is responsible for a massive percentage of active leaks. When steel panels expand and contract, traditional fasteners can pull loose or back out entirely.
Remove Old Fasteners: Back out the loose or damaged screw. Inspect the wooden purlin or metal framing underneath. If water has entered the screw hole, the wood framing might be slightly softened.
Pre-Fill the Screw Hole: Inject a small dab of polyether or high-solids polyurethane sealant directly into the exposed screw hole. This seals the interior threading against moisture intrusion.
Select an Oversized Screw: Replace the old screw with an oversized metal roofing screw equipped with a fresh EPDM neoprene washer. If the original screw was a #10 size, upgrade to a #12 or #14 screw so the wider threads grip tightly into the existing hole.
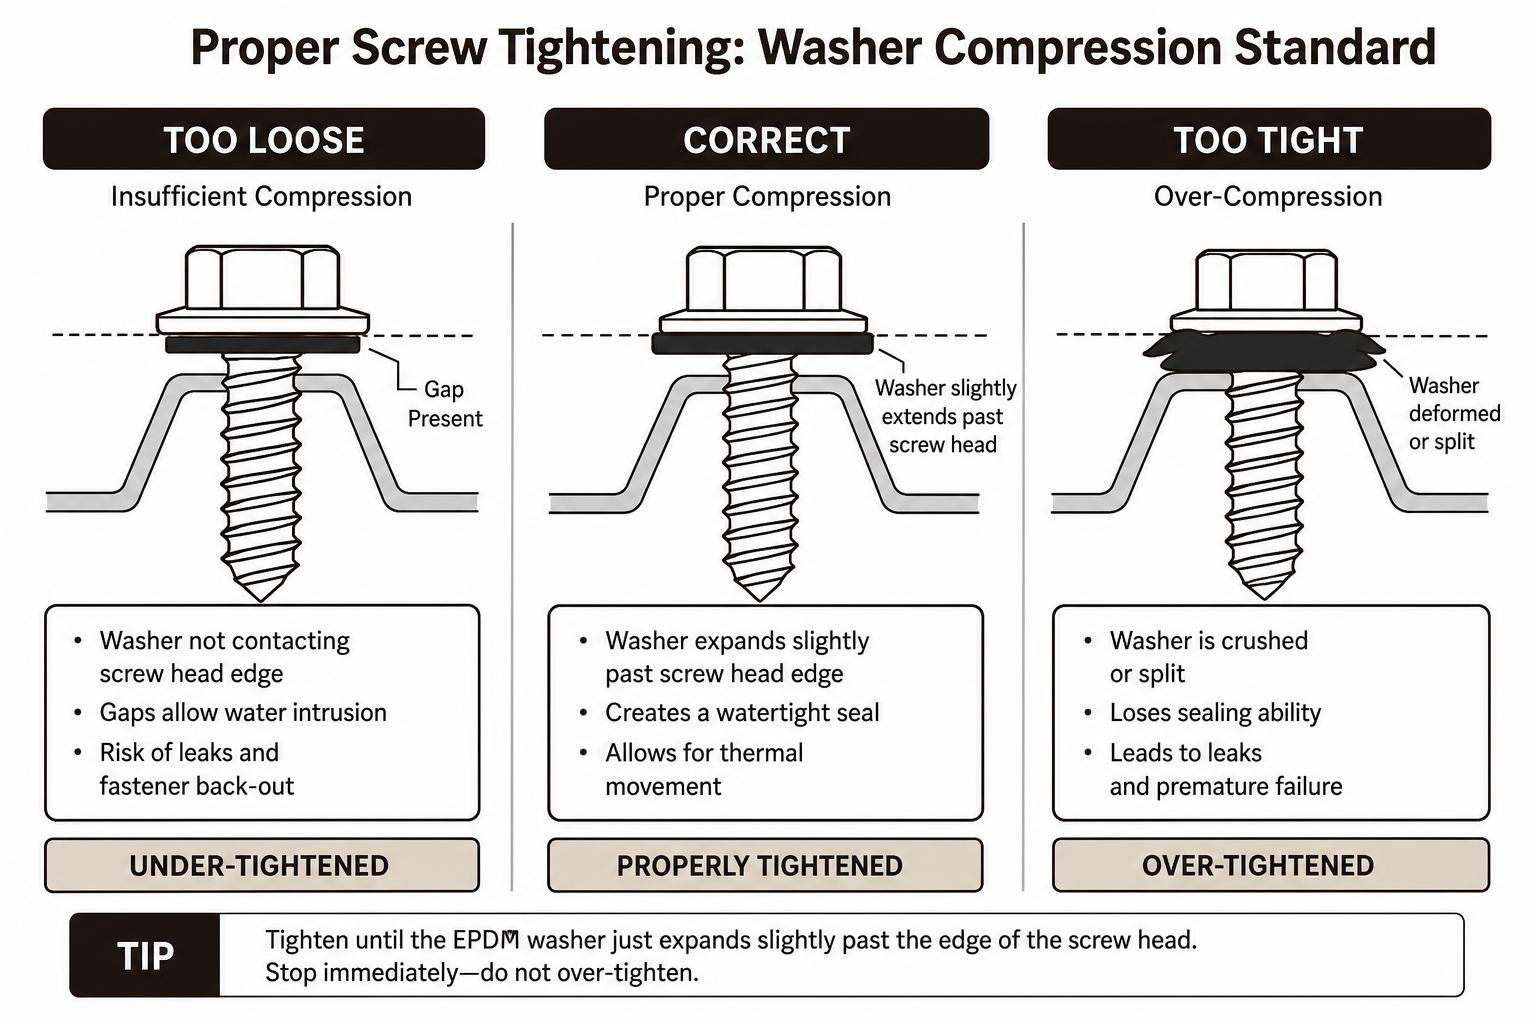
Drive at a Straight 90-Degree Angle: Always drive screws straight into the surface. Driving screws at an angle distorts the rubber washer, leaving a open gap on one side.
Tighten to Proper Compression: Tighten the screw until the EPDM washer expands slightly past the edge of the metal screw head. Do not over-tighten! Over-tightening crushes and splits the rubber washer, causing it to fail within months.
Fasten on High Ribs for Corrugated Metal: Ensure fasteners are secured through the raised ridges (high ribs) whenever possible on corrugated metal roof applications, allowing water to freely run down the low channels without swamping the screw washer.
Patching Holes and Treating Rust in Corrugated Metal Roof Repair
If branches, hail, or severe oxidation have left physical punctures or rust spots on your corrugated sheets, address them immediately before rust eats through entire panels.
Step 1: Mechanical Rust Removal
Scrape away loose rust scales using a stiff wire brush and 80-grit sandpaper until you reach bright, un-oxidized metal. If you leave underlying rust untreated beneath a patch, oxidation will continue eating away at the panel underneath.
Step 2: Apply Rust-Inhibiting Primer
Coat the bare metal with a high-quality zinc-rich rust-converting primer. Allow it to cure fully according to the manufacturer's instructions.
Step 3: Patching Punctures and Pinholes
For minor pinholes and small cracks, applying UV-resistant rubberized butyl tape is a fast, durable solution. Review this guide on How to Patch a Sudden Leak in a Corrugated Metal Roof Using Rubberized Flashing Tape for emergency profile-matching steps.
Apply Valley-to-Ridge: Press the flashing tape starting deep inside the corrugated lower valley first, then roll it firmly up and over the high ribs using a handheld steel roller. Working valley-to-ridge prevents internal air pockets and stretching tension that cause tape edges to lift over time.
Maintain a 3-Inch Margin: Always extend flashing tape or metal sheet patches at least 3 inches beyond the damage in every direction.
Metal Sheet Patching for Larger Holes: Cut a piece of matching gauge sheet metal 4 to 6 inches larger than the hole. Apply a continuous bed of polyurethane sealant around the hole perimeter, press the metal patch down over the sealant, and secure the patch with self-tapping neoprene screws spaced 3 inches apart around the patch perimeter.
How to Properly Seal Overlapping Seams and End Laps
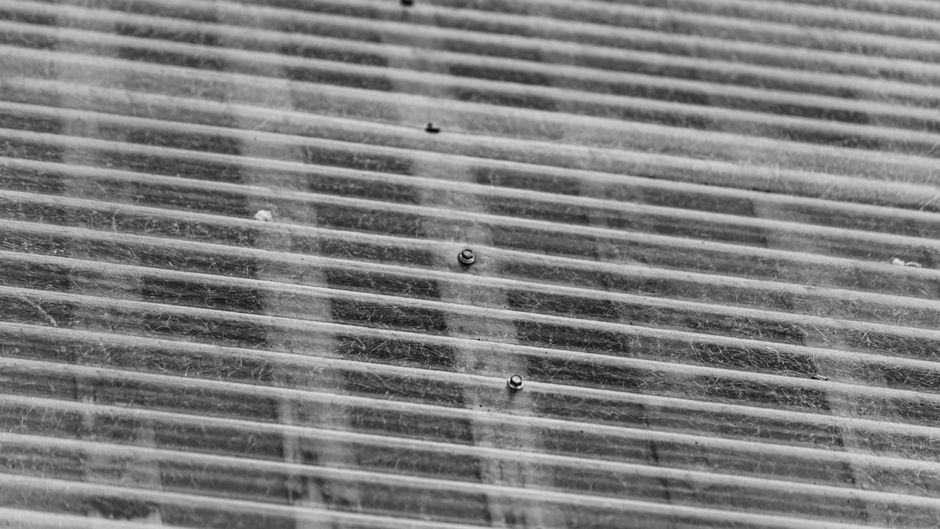
Corrugated metal roofs rely heavily on mechanical overlaps to shed water. When wind-driven rain hits horizontal end laps or vertical side laps, water can get drawn upward between the sheets by capillary action if the internal seal breaks down.
For step-by-step lap details, consult this comprehensive resource on How to Seal Metal Roof Seams Guide.
Sealing Horizontal End Laps (Where Upper Panels Overlap Lower Panels)
Horizontal end laps require a minimum 6-inch panel overlap. To seal an existing leaking end lap:
Clean out the gap between the overlapping sheets using compressed air, a wire brush, and degreasing solvent.
Insert a heavy bead of polyurethane sealant or slide a continuous strip of double-sided butyl tape directly between the overlapping metal panels.
Clamp or press the upper sheet firmly against the lower sheet to compress the sealant.
Drive self-tapping screws through the high ribs across the overlap to secure the joint mechanically.
Sealing Vertical Side Laps
Vertical side laps must overlap by 1 to 2 full corrugation ribs, facing away from prevailing local winds.
Clean and degrease the exposed outer edge of the side lap seam.
Apply a continuous 1/4-inch to 3/8-inch bead of high-solids polyurethane sealant along the joint edge at a 45-degree angle.
Tool the Sealant Profile: Immediately smooth and tool the sealant bead using a plastic contour tool within 5 to 10 minutes of application. Tool the sealant so the top and bottom edges melt flush into the metal surface, creating a slight concave profile that sheds water easily. Never use bare fingers to tool sealant, as natural body oils prevent proper sealant adhesion!
In coastal or high-UV areas, salt-air corrosion and extreme temperature swings degrade traditional caulking fast. Always select marine-grade polyurethane or heavy butyl sealants rated for temperatures above 150°F and heavy UV exposure.
When to DIY vs. Calling a Professional Roofing Contractor
While handling small corrugated metal roof repair projects personally builds homeownership confidence and saves cash, working on heights carries inherent risks. Falls account for over 30% of home repair injuries!
Use this quick guideline to decide whether to grab your tools or call a licensed roofer:
When DIY Makes Sense
The roof pitch is low (under 4/12 pitch / 18.5 degrees).
Repairs are confined to isolated spots (under 10 panels, loose screws, or pinhole patches).
You have dry, clear weather conditions and proper fall-protection equipment.
When You Should Hire a Professional Roofing Contractor
Steep Roof Pitch: The roof slope exceeds a 6/12 pitch or sits higher than two stories off the ground.
Extensive Structural Damage: Internal timber purlins or rafters are rotted, sagging, or soft to the touch.
Aging System: The roof is over 20 years old with widespread rust perforations across multiple panels (requiring multi-sheet or full roof replacement).
Lack of Safety Equipment: You do not possess specialized harness gear, non-slip footwear, or roof anchors.
Frequently Asked Questions About Metal Roof Maintenance
What is the best sealant for corrugated metal roof seams in high-UV or coastal areas?
The absolute best sealants for exposed corrugated metal seams in harsh UV or salt-air environments are high-solids polyurethane sealants and butyl tape sealants.
Avoid generic clear silicone caulk! Silicone has poor long-term adhesion to coated metal, degrades rapidly under intense ultraviolet light, becomes brittle in freezing temperatures, and cannot be painted. Polyurethane and butyl materials remain flexible across extreme hot and cold cycles, resisting salt-air breakdown for 15 to 30 years.
Can I use rubberized flashing tape for a permanent repair on corrugated metal?
Yes, high-quality rubberized butyl flashing tape with a aluminum or UV-resistant backing provides a durable, multi-year repair for pinholes, minor cracks, and small seam gaps. However, for the patch to last long-term, surface preparation is vital. The substrate must be completely wire-brushed, degreased with isopropyl alcohol, and dry. Roll the tape firmly using a handheld roller from the corrugated valleys outward to the high ribs to ensure 100% surface contact without air pockets.
How do I fix a leaking screw hole on a corrugated metal roof?
To repair a stripped or leaking screw hole, back out the original screw completely. Clean any surface dirt and rust around the hole. Inject a flexible polyether or polyurethane sealant directly into the hole, then drive an oversized metal roofing screw equipped with a fresh EPDM neoprene washer straight through the opening into the wooden framing below. Tighten until the rubber washer expands slightly past the screw head without crushing.
Conclusion
A leaking corrugated roof doesn't mean you need to spend thousands on a full roof replacement. By catching small breaches early, clearing away surface oxidation, replacing failed neoprene washer screws, and sealing overlap seams with high-performance polyurethane or butyl sealants, you can stop drips in their tracks and extend your roof's lifespan for decades.
Safety always comes first. Always check weather conditions, use proper fall protection gear, and never step directly onto corrugated panel ridges or unsupported sheet centers.
When repairs involve steep slopes, widespread structural damage, or extensive panel replacements across your property, turn to the experienced team at Lassiter Roofing Team. Serving home, agricultural, and business owners throughout Idaho's Western Treasure Valley for over 30 years, we back our metal roof installations and structural repairs with competitive pricing and an industry-leading 5-year workmanship warranty.
Don't wait for the next heavy rainstorm to turn a tiny seam gap into an expensive repair. Inspect your corrugated metal roof today, follow these step-by-step techniques, or contact our team for an expert roof consultation!


