


The Ultimate Guide to Ice and Water Shield Roof Underlayments
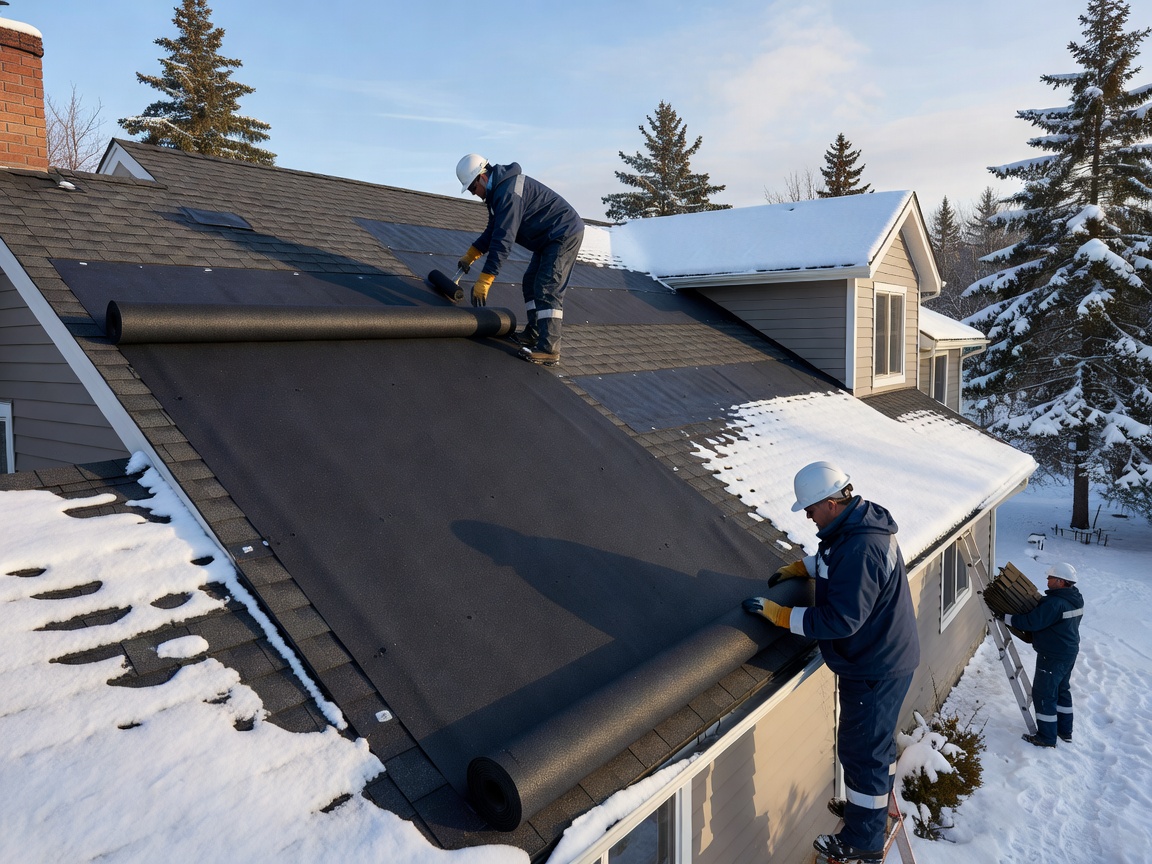
Ice and water shield is a heavy-duty, self-adhering waterproofing membrane engineered to protect vulnerable parts of a roof from standing water, ice dams, and wind-driven rain. Unlike conventional underlayments that are tacked down with staples or plastic cap nails, this specialized material features a thick rubberized asphalt compound backed by a tough, slip-resistant polyethylene surface film.
When applied during a roof installation or tear-off, the release liner on the underside is peeled away, allowing the aggressive adhesive layer to bond directly to the wooden roof deck (plywood or OSB). Because it fuses directly to the wood substrate, water cannot travel underneath the membrane even if moisture gets past your primary roofing material, whether that's asphalt shingles, metal panels, slate, or tile.
To meet rigorous industry standards, high-performing self-adhered underlayments undergo testing under ASTM D1970. This specific standard evaluates critical physical properties such as deck adhesion strength, flexibility in freezing weather (remaining crack-free down to -20°F), and nail sealability. Reviewing official Technical product specifications demonstrates how these strict manufacturing guidelines ensure that the membrane remains flexible and elastomeric across extreme seasonal temperature swings.
Understanding the Mechanics of Ice and Water Shield
The magic behind ice and water shield lies in its self-sealing ability. When a roofer drives a shingle nail through the membrane, the modified rubberized asphalt compound naturally wraps around the shank of the fastener. It acts like a custom liquid gasket, hugging the nail tighter as ambient heat warms the roof deck.
In a traditional roof system using basic paper underlayment, every single nail creates a microscopic hole in the moisture barrier. If an ice dam forms or heavy winds force water upward underneath the shingles, water finds those nail holes and seeps directly into the attic. With ice and water shield, those penetrations remain completely sealed against hydrostatic pressure.
Most premium self-adhered membranes come with a split-back release liner, which allows our crew to accurately position a 36-inch wide sheet along roof edges, eaves, or valleys before peeling the backing away in controlled sections. This split-back design prevents wrinkles, air pockets, and misalignment during application, guaranteeing a smooth, uniform leak barrier that promotes maximum water shedding down the roof pitch.
Ice and Water Shield vs Synthetic Underlayment and Felt Paper
When planning a roof replacement, homeowners often wonder why they cannot simply use one type of underlayment across the entire roof deck. To understand the overall system, it helps to compare the three primary types of underlayments used in residential roofing today: traditional asphalt-saturated felt paper, woven synthetic underlayment, and self-adhering rubberized asphalt membranes.
Asphalt-saturated felt paper (commonly known as #15 or #30 felt) was the industry standard for decades. Made of recycled paper fibers saturated with asphalt, felt paper provides basic temporary weather protection. However, it tears easily under foot traffic, absorbs moisture, wrinkles when wet, and degrades rapidly under direct heat.
Synthetic underlayments, crafted from woven polypropylene or polyethylene, have largely replaced traditional felt over the last 15 to 20 years. Synthetic options are incredibly lightweight, highly tear-resistant, cover large areas quickly, and shed water effectively. However, synthetic underlayments are mechanically attached with cap nails and do not bond to the roof deck, nor do they self-seal tightly around nail shanks under standing water.
Ice and water shield serves a completely different role than synthetic or felt underlayment. It is a full waterproof barrier with very low vapor permeability—typically well under 0.5 perms (and down to 0.05 perms on high-end membranes). Because it acts as an impenetrable vapor barrier, it is designed for targeted placement in high-risk areas rather than serving strictly as a shed barrier for the open roof field.
Property / Feature Traditional Felt Paper (#15/#30) Synthetic Underlayment Self-Adhering Rubberized Asphalt (Ice and Water Shield) Primary Function Basic water shedding Tough water shedding for roof field Watertight membrane & fastener gasket Attachment Method Staples or cap nails Cap nails or broadhead fasteners Fully self-adhered (peel-and-stick) Nail Sealability None (leaks around holes) None (requires continuous slope flow) High (self-seals gasket-tight around nails) Vapor Permeability ~5 to 10 perms (breathable) ~1 to 7 perms (semi-breathable) <0.5 perms (impenetrable vapor barrier) Deck Adhesion No adhesion No adhesion Aggressive structural bond to deck Typical Application Area Legacy roofs / Low-budget repairs Main roof slopes (roof field) Eaves, valleys, eaves, flashings, penetrations Material Cost $0.05 – $0.10 / sq. ft. $0.15 – $0.30 / sq. ft. $0.50 – $1.75 / sq. ft.
Critical Installation Locations on Sloped Roofs
Because ice and water shield is a premium, non-permeable material, strategic placement is key to building a resilient roofing system without trapping unwanted moisture inside your home.

When we evaluate a home in Idaho’s Western Treasure Valley, we identify high-stress water flow zones where snow buildup, drifting, or rain concentration are most likely to cause leaks. Reviewing Self-adhered roof protection details helps clarify how membrane layout guards specific roof intersections:
Roof Eaves: The bottom edges of the roof are where ice dams form. As snow melts on upper roof sections and runs down to the cold, unheated overhang, it freezes into solid ice. Backed-up meltwater pools behind this ice barrier and forces its way under shingles.
Valleys: Roof valleys are internal channels where two roof planes meet. They carry massive volumes of water during heavy downpours and collect deep snow drifts during winter storms.
Roof Penetrations: Areas around chimneys, skylights, plumbing vent pipes, exhaust fans, and dormer walls are notorious leak points due to thermal expansion and movement between different building materials.
Low-Slope Roof Transitions: Roof pitches between 2:12 and 4:12 do not shed water as rapidly as steep roofs. Applying self-adhered underlayment across these lower slopes prevents water backup during heavy windstorms.
Eave and Valley Protection Guidelines
Proper eave installation requires strict adherence to building code standards. According to the International Residential Code (IRC), in regions where ice dams are common, the ice barrier membrane must extend from the lowest edge of the eave to a point at least 24 inches inside the exterior wall line of the home.
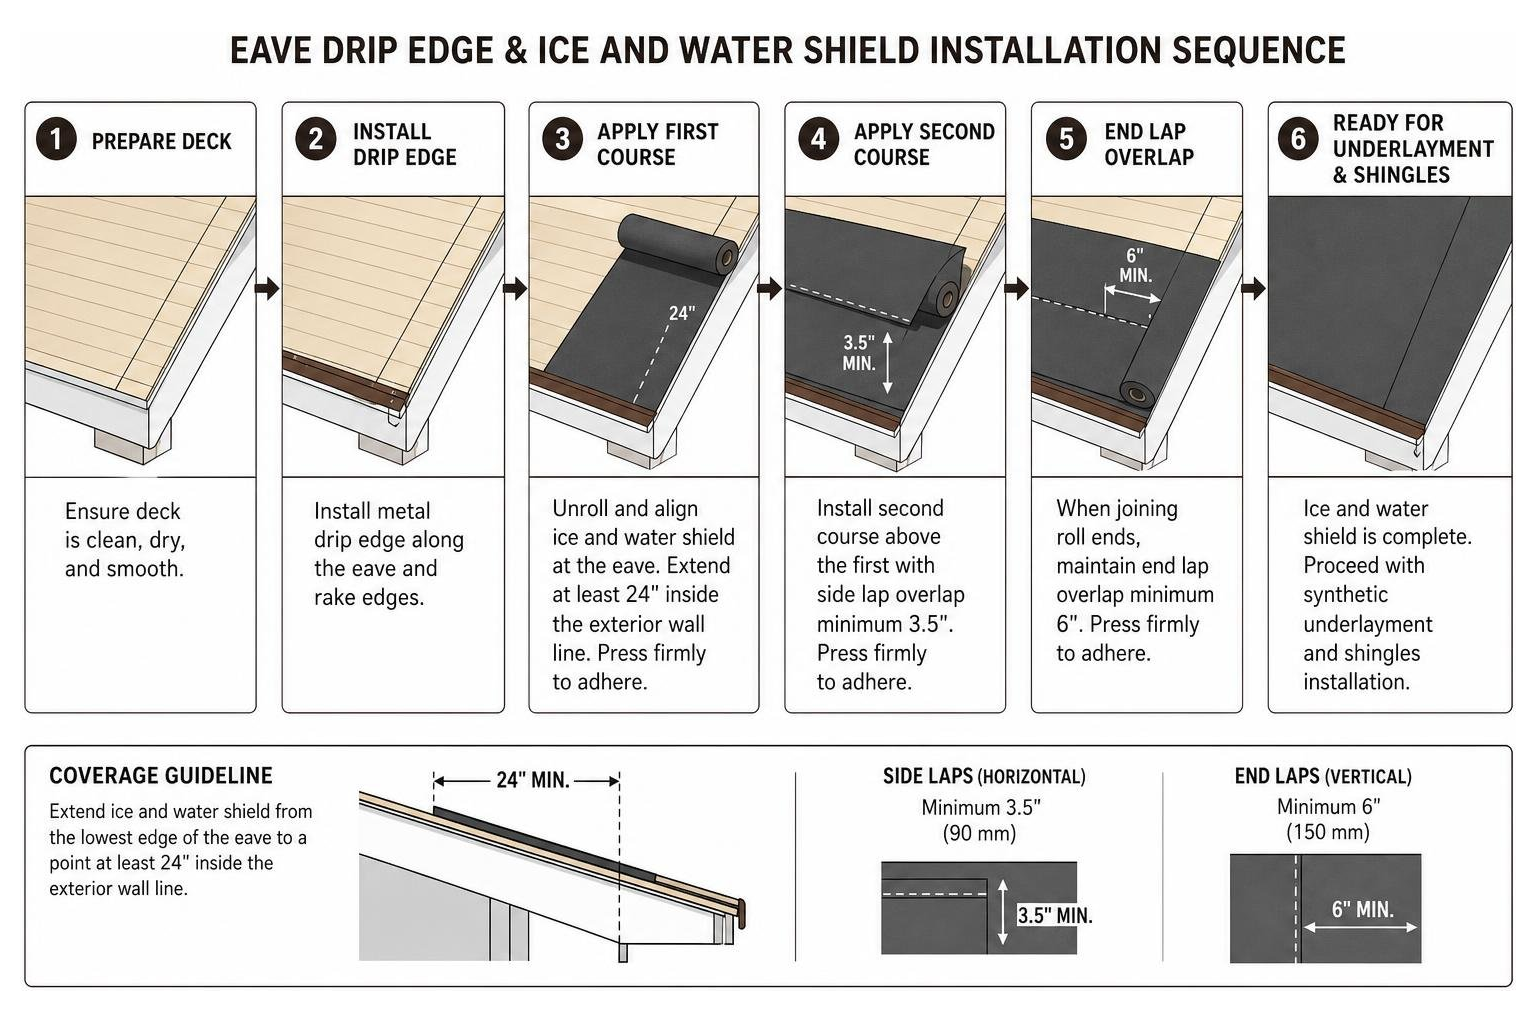
Depending on your soffit overhang width, achieving this 24-inch interior boundary often requires running two courses (rows) of 36-inch wide membrane along the eaves.
When layering multiple courses of ice and water shield, installation sequence is everything:
Side Laps: Horizontal overlaps between adjacent rows must be a minimum of 3.5 inches (90 mm).
End Laps: Vertical overlaps where two roll ends join must be a minimum of 6 inches (150 mm).
Water Flow Management: Always work from the lowest point of the roof upward so every lap shingle-laps over the layer beneath it, allowing gravity to shed water smoothly down the roof.
Drip edge flashing placement at the eave is another critical detail. Modern best practice dictates installing the ice and water shield directly onto the clean wooden deck first along the eave edge, and then installing the metal drip edge over top of the membrane. This prevents water from running behind the fascia board or trim. Along the side edges of the roof (the rakes), the metal drip edge goes onto the wood deck first, and the underlayment overlaps on top.
For roof valleys, we install a continuous, full-width (36-inch) roll centered right down the middle of the valley intersection before any course of standard field underlayment is laid down. This gives the valley double protection where water velocity is highest.
High-Temperature Requirements for Metal Roofing Systems
If you are replacing a shingle roof with a standing seam or exposed-fastener metal roofing system, standard rubberized asphalt ice and water shield is not suitable.
Metal roofs transfer extreme heat directly into the underlayment. On hot summer days, dark metal paneling can easily reach surface temperatures between 180°F and 220°F. Standard rubberized asphalt membranes begin to soften and break down around 160°F to 180°F, which can cause the liquid asphalt adhesive to bleed, melt, or run down out of the joints onto your fascia or gutters.
To accommodate high heat, specialized high-temperature (HT) self-adhered membranes are engineered with polymer-modified asphalt or 100% butyl adhesives. High-temp ice and water shields carry service temperature ratings up to 240°F—and butyl-based options tolerate up to 300°F. These HT membranes retain their structural integrity, resist melting, provide extended UV ratings (often up to 90 to 120 days), and are chemically safe for sensitive metals like copper, zinc, and standing seam steel panels.
Best Practices for Application and Deck Preparation
Even the highest-grade self-adhering membrane will fail if it is installed on a poorly prepared deck or applied under improper weather conditions. Follow these essential field best practices during installation:
Surface Deck Cleaning: The wooden deck must be smooth, continuous, completely dry, and entirely free of dust, sawdust, old roofing nails, and loose debris. Dust creates a barrier that prevents the self-adhering backing from forming a permanent chemical bond with the wood.
Application Temperatures: Most self-adhered membranes require air, material, and roof deck temperatures to be at or above 40°F (5°C) during application. If installed in freezing weather, the adhesive tack is drastically reduced, requiring temporary mechanical fasteners or specialized deck primers to ensure proper adhesion.
Managing Exposure Windows: While some high-temp membranes can remain exposed for up to 90 or 120 days, standard ice and water shield membranes should generally be covered by shingles or metal within 30 to 60 days to prevent UV degradation from sunlight.
Accident Prevention: The split-back release film removed during installation is extremely slick. Workers must clear release paper from the roof deck immediately to eliminate slip hazards on steep roof slopes.
Attic Ventilation and Moisture Control: Because self-adhered rubberized asphalt is an absolute vapor barrier (<0.5 perms), it seals off air flow through the roof deck. Proper attic insulation paired with balanced soffit (intake) and ridge (exhaust) ventilation is vital to prevent warm, moist indoor air from condensing underneath the roof deck during winter.
Frequently Asked Questions About Roof Underlayment Protection
Is self-adhering membrane required by building codes?
Yes, in many regions building codes explicitly mandate self-adhering ice barrier membranes. The International Residential Code (IRC) specifies that an ice barrier must be installed in locations where the average January temperature is 25°F (-4°C) or lower.
However, even in mid-climate zones or valleys where local building codes might technically waive the requirement based on broad regional averages, freeze-thaw cycles still occur regularly. Installing ice and water shield along eaves, valleys, and penetrations provides essential protection against unpredictable winter storms and early spring rain delays.
Can full roof deck coverage cause attic moisture problems?
Yes, covering 100% of a residential roof deck with non-permeable ice and water shield can lead to significant moisture traps if the attic is not engineered for it.
Because rubberized asphalt has a vapor permeance under 0.5 perms, applying it across the entire roof creates an unvented exterior vapor seal. Moisture rising from cooking, showers, and heating inside the home can get trapped in the attic space, condensing on the underside of the cold plywood decking. Over time, this trapped moisture leads to deck rot, mold growth, and wet insulation.
For standard residential attics, the smartest strategy is targeted placement: apply self-adhering membranes along high-vulnerability leak points (eaves, valleys, penetrations) and cover the remaining open roof field with a high-quality, breathable synthetic underlayment.
How much does self-adhered underlayment cost per square foot?
The material cost for standard ice and water shield typically ranges between $0.50 and $1.75 per square foot, depending on the brand, membrane thickness (usually 40 to 57 mils), and heat rating. Specialty high-temperature butyl membranes sit at the top of that price range.
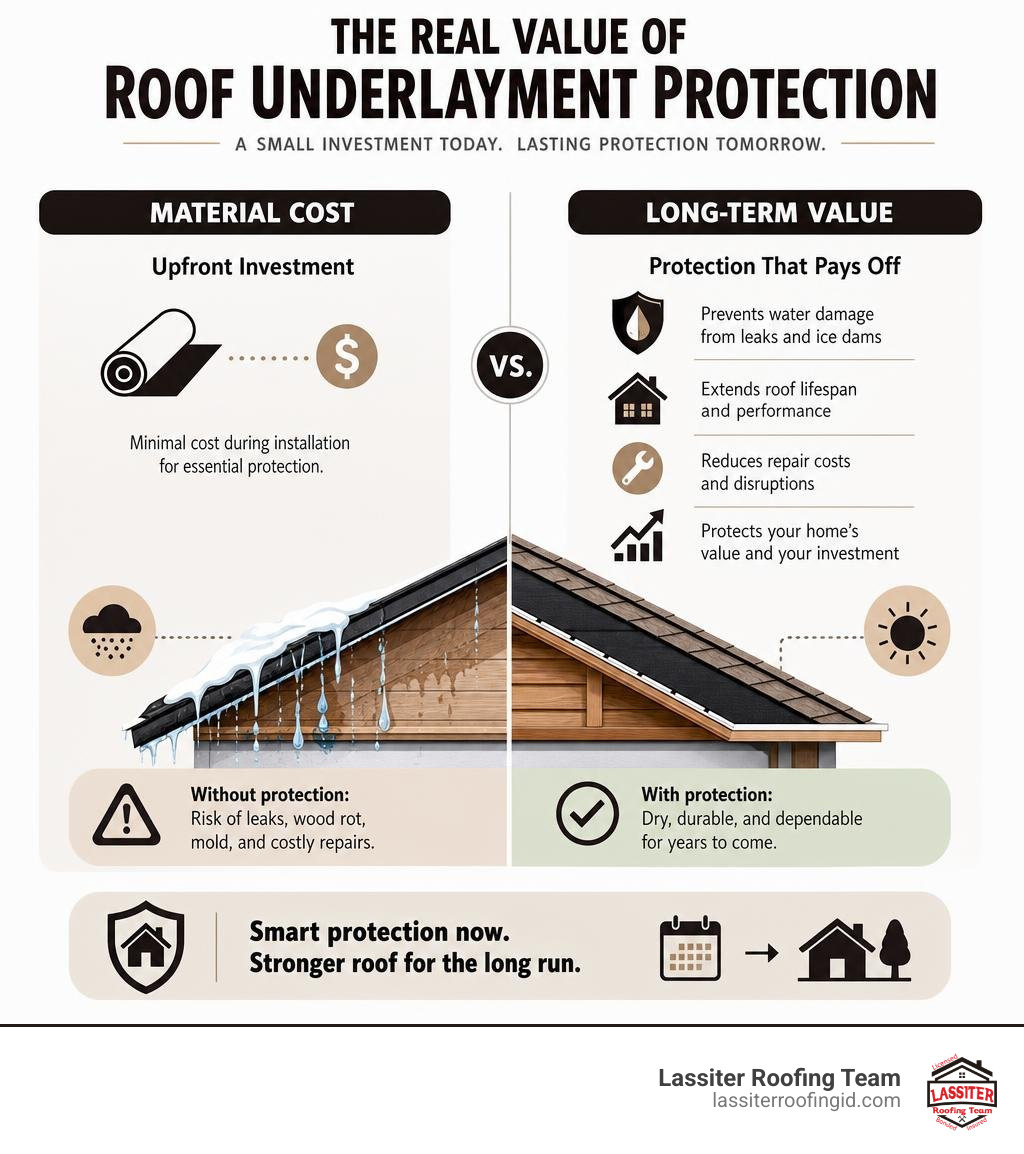
When calculated as part of a comprehensive full roof replacement, adding self-adhered membrane to eaves, valleys, and key flashing zones usually adds only $300 to $800 total to the project investment. Considering that repairing a single hidden eave leak or rotted deck section can easily cost thousands of dollars in interior sheetrock, insulation, and paint repairs, high-quality leak barriers offer exceptional return on investment.
Conclusion and Roofing System Recommendations
A reliable roof system is much more than just the outer layer of shingles or metal panels you see from the street—it is a carefully integrated assembly of deck preparation, secondary waterproofing barriers, flashing details, and attic ventilation. Installing a top-tier ice and water shield along your roof's eaves, valleys, skylights, and penetrations ensures that even when severe winter ice dams form or driving summer rains hit, your home stays completely dry.
With a expected service life of 25 to 50 years, high-performance self-adhered membranes safeguard your structural roof deck for the entire lifespan of your primary roofing material.
At Lassiter Roofing, we bring over 30 years of hands-on experience to every residential, commercial, and agricultural project across Idaho's Western Treasure Valley. Whether you are dealing with winter ice dam concerns or planning a complete roof upgrade, our team provides custom, competitive quotes backed by our signature 5-year workmanship warranty. Contact us today to schedule your free comprehensive roof assessment through our Roofing replacement and inspection services!


