



Tile Roof Leak Troubleshooting and Repair Made Simple
Why Tile Roofs Leak and How to Locate the Source
To fix a tile roof leak, you must locate the water entry point, access the damaged area, and repair the underlying waterproof barrier. The core repair process involves tracing the leak uphill along framing rafters to pinpoint the deck penetration, propping up overlapping tiles with timber shims, disengaging fasteners to remove cracked or slipped tiles, and patching deteriorated underlayment with self-adhering modified bitumen slid under the sound felt above. Finally, reseat the sound tiles into their interlocking tracks and anchor replacements with specialized roofing adhesive.
The Underlayment Fallacy: Why Visually Sound Tiles Leak
Even when every tile looks pristine, leaks occur because of what roofers call the Underlayment Fallacy. Concrete and clay tiles act like overlapping armor scales that shed roughly 95% of bulk rainfall, while the remaining 5%—driven by wind, capillary draw, or joint gaps—makes its way beneath the tiles.
The true waterproof barrier protecting your roof deck and home interior is the underlayment installed directly against the decking. This creates a substantial lifespan gap:
Clay barrel tiles can easily endure for 50 to 100+ years.
Concrete interlocking tiles routinely last 40 to 50 years.
Standard Type II (30-lb) organic felt underlayment generally lasts only 20 to 30 years.
In high-heat environments or areas with intense sun and moisture, that organic felt can degrade even faster. Over time, heat causes the asphalt saturant in organic felt to dry out, curl, and become brittle. When water inevitably gets beneath aging tiles, the dried-out felt paper cracks, allowing moisture straight onto the wooden decking.
Even if you have sturdy clay tiles, understanding clay tile underlayment lifespan helps explain why intact surface tiles cannot compensate for an aged membrane underneath. Furthermore, when a single tile slips or cracks, it exposes that aging felt to direct ultraviolet (UV) sunlight, causing the membrane beneath to break down completely in just a matter of weeks.
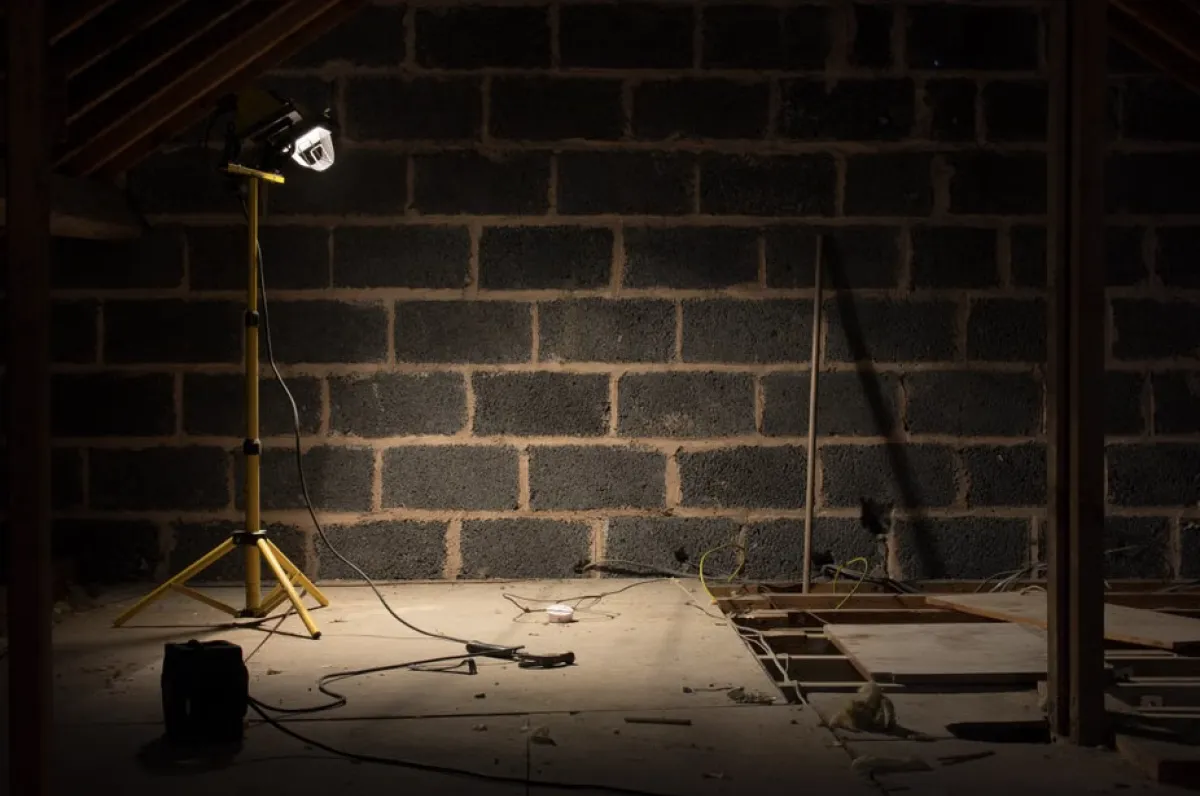
Pinpoint the Entry Point: Attic Tracing and Water Testing
Water is a master of misdirection. Because gravity pulls water downward along framing rafters and horizontal roof battens, the water stain on your living room ceiling is rarely located directly below the exterior breach. Finding the true source requires a systematic diagnostic approach.
1. The Attic Rafter Trace Grab a high-lumen flashlight and head into your attic during a rainstorm or shortly after. Do not simply look above the ceiling stain. Instead:
Locate the wet spot on the attic floor or drywall.
Look directly upward to the nearest rafter or truss.
Follow the rafter uphill toward the roof ridge. Water frequently penetrates high on a slope, runs down the top edge of a rafter for 10 or 15 feet, and drops off at a nail point or joint.
Look for dark water tracks, rusted framing nails, silt trails, or patches of white efflorescence and mold.
Measure the distance from the wet roof penetration to a known landmark, such as a plumbing vent pipe or the central ridge board. This gives you exact coordinates when you head onto the roof.

2. The Controlled Garden Hose Test If the weather is dry, you can simulate rain using a two-person hose test. One person stays in the attic with a flashlight and a phone or radio, while the other manages the garden hose outside.
Always test from low to high:
Start at the lowest point of the suspected roof slope or valley.
Run a gentle, low-pressure stream of water over a localized 3-foot section for 2 to 3 minutes. Never blast water upward under the tile laps with high pressure.
Have the attic spotter watch for signs of active moisture.
Move slowly upward toward the ridge, testing transition zones, pipe flashings, and valleys one section at a time. Testing bottom-to-top ensures you pinpoint the exact entry elevation without flooding the entire slope and getting a false positive.
When to Call a Pro vs. DIY to Fix Tile Roof Leak Issues
Safety Risks and Proper Tile Walking Techniques
Tile roofs present unique safety challenges. Aside from high pitch and steep heights, walking on tile can feel like stepping on loose ball bearings if dust or algae is present. More importantly, improper foot placement will instantly snap brittle clay and concrete tiles under your body weight, turning a minor leak into dozens of broken tiles.
If you must traverse a tile roof to carry out an inspection or repair, keep these non-negotiable safety rules in mind:
Wear the right gear: Use soft, flexible, rubber-soled footwear with excellent grip, and always rig an OSHA-compliant fall protection harness anchored to a structural ridge point.
Distribute your weight: Never step directly on the fragile center crown (the high arch) of barrel tiles or the unsupported center of flat tiles.
Step on the lower third: Step only on the bottom third of the tile where it overlaps the tile below it, resting directly over the horizontal structural wood batten beneath.
Span multiple tiles: Whenever possible, rest your foot across the interlocking seams of two adjacent tiles to distribute your weight evenly.
Use crawl boards: For steep pitches or fragile historic clay tiles, lay down specialized foam walk cushions or plywood crawl boards padded with closed-cell foam to spread your weight across several square feet.
If your roof pitch is steep, your tiles are weathered clay, or the leak spans large structural valleys, attempting a DIY fix is hazardous. In those situations, calling an experienced crew protects both your personal safety and the physical integrity of your roof.
Essential Tools and Materials to Fix Tile Roof Leak Points
If you have confirmed that the repair involves an accessible area with an isolated broken tile or small underlayment tear, assemble the right commercial-grade roofing materials before beginning:
Flat pry bar and wooden shims: Essential for lifting adjacent tiles gently without cracking them.
Tile ripper (slate bar): A specialized hooked metal tool designed to slip under tiles, catch hidden installation nails, and shear or pull them cleanly.
Self-adhering modified bitumen membrane: High-performance, self-sealing waterproof membrane such as Ice and Water Shield to create watertight patches over wood decking.
Plastic cap roofing nails: Wide-head mechanical fasteners that hold underlayment without tearing paper or wicking moisture.
Polyurethane or tri-polymer roofing sealant: Flexible, UV-resistant sealants for flashing transitions and lap joints. Avoid standard silicone caulk or thick asphalt roof cement on visible tile surfaces.
Expanding tile adhesive foam or polyurethane tile mastic: Designed specifically to anchor replacement tiles securely to battens without having to drive new nails through your newly patched membrane.
Replacement tiles: Matching the exact profile, width, and interlocking lug configuration of your existing roof.
Step-by-Step Guide to Repair Broken Tiles and Underlayment
Step-by-Step Process to Safely Fix Tile Roof Leak Damage
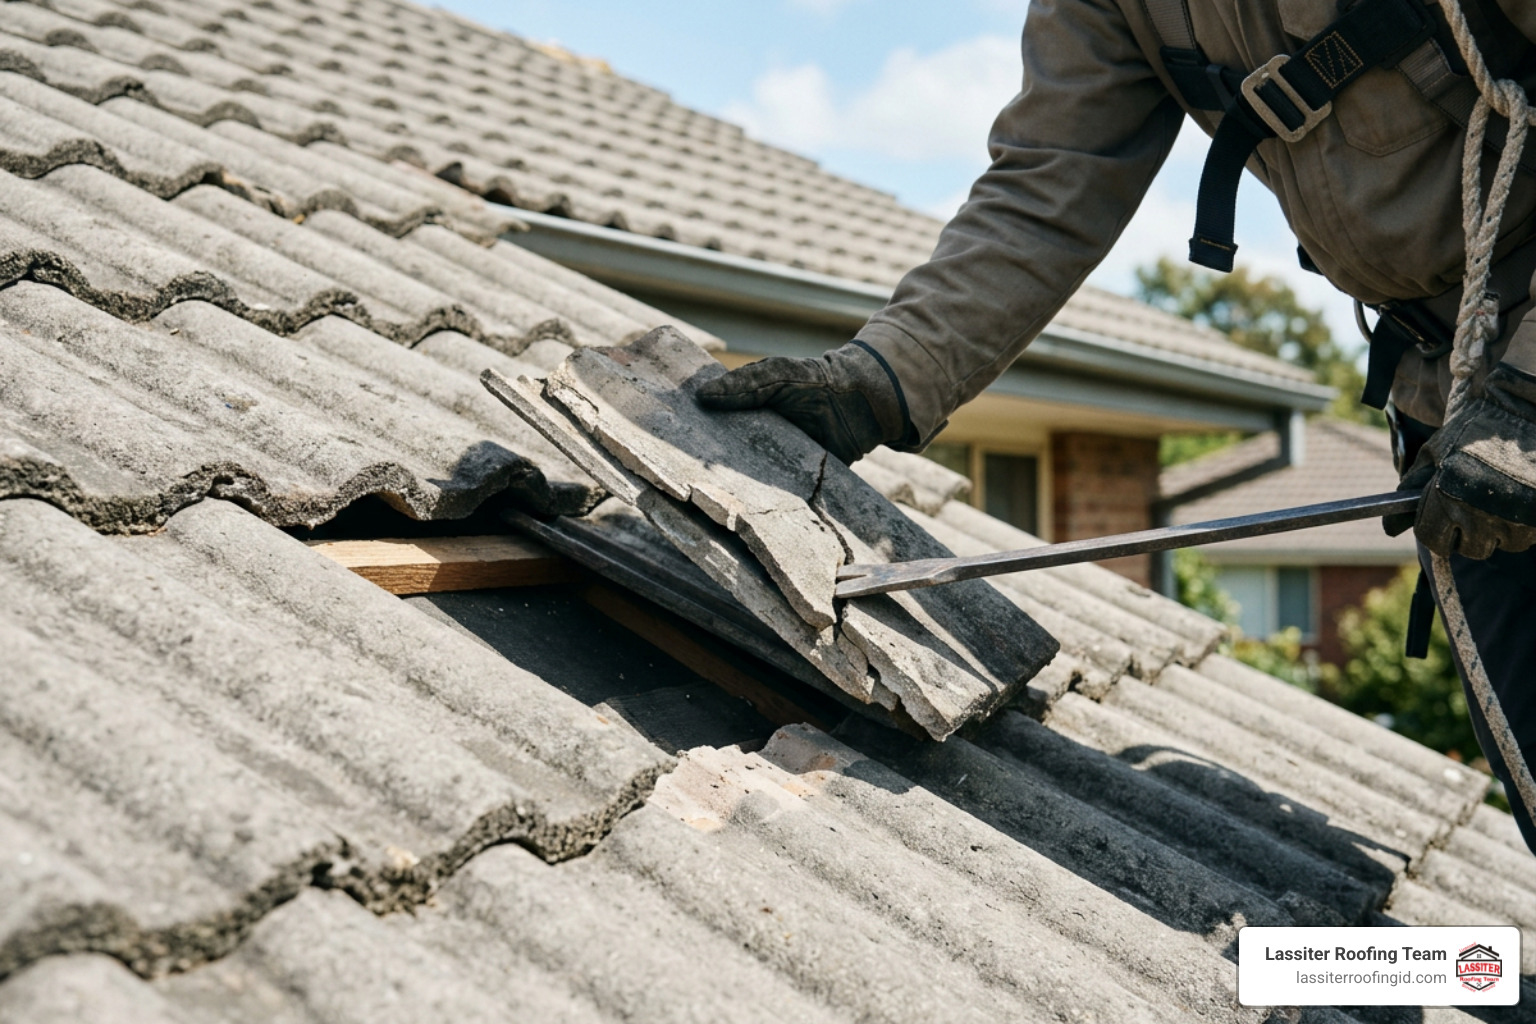
When an isolated cracked tile has compromised the underlayment beneath it, follow this systematic process to make a permanent, watertight repair.
Step 1: Relieve Surrounding Pressure and Elevate Adjacent Tiles
Using two wooden wedges or small timber shims, gently pry and prop up the two overlapping tiles situated directly above and to the left of the broken piece. Lifting them 1 to 2 inches takes the load off the damaged tile and gives you room to work without snapping adjacent tiles.
Step 2: Disengage Fasteners and Extract the Damaged Tile
Slide your flat pry bar or tile ripper beneath the damaged tile. Locate the nail securing the top lug to the batten. Carefully pry the nail free or use the tile ripper hook to cut the fastener. Once free, carefully rotate and slide the damaged tile down and out of the interlocking track.
Step 3: Clear and Expose the Substrate
To fix damaged underlayment properly, you must clear adequate workspace. Remove a small cluster of surrounding tiles (typically a 2x2 or 3x3 grid), numbering their undersides with chalk so you can reinstall them in their exact original order. Sweep away all dirt, loose granules, and accumulated organic debris from the exposed felt.
Step 4: Patch the Underlayment Membrane
Inspect the felt paper for tears, punctures, or dry rot. Cut away loose, rotten felt cleanly with a utility knife. Cut a piece of self-adhering modified bitumen membrane that extends at least 6 inches beyond the damaged area on all four sides.
Crucial rule: Always slide the top edge of your patch underneath the existing sound underlayment upslope from the repair. This preserves the natural shingles lap, directing descending water over the patch rather than behind it. Fasten the edges using plastic cap nails, and run a bead of polyurethane sealant along the exposed seams.
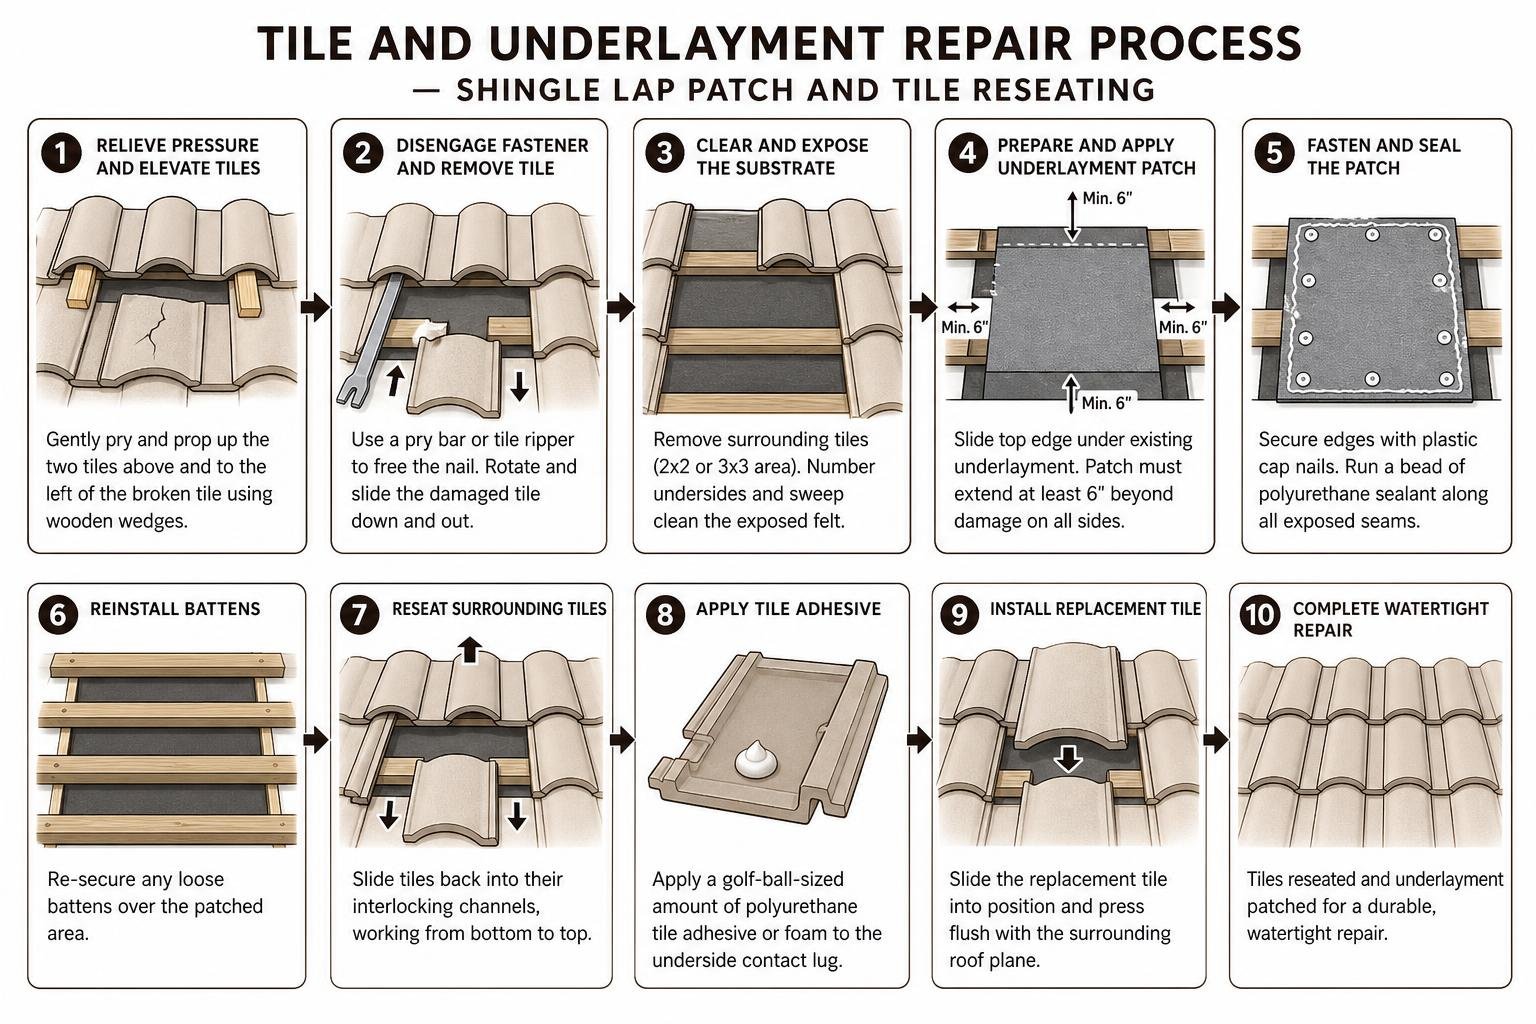
Step 5: Reinstall Battens and Reseat Tiles
Re-secure any loose wooden battens over the patch. Slide your sound tiles back into their interlocking channels, moving from bottom to top. For the final replacement tile, apply a golf-ball-sized dollop of polyurethane tile adhesive or specialized tile foam to the underside contact lug where it meets the batten, then slide it flush with the surrounding roof plane.
Flashing Failures, Valleys, and Plumbing Vent Boots
Even when tiles and underlayment are sound across the field of the roof, leaks frequently occur at structural transitions:
Plumbing Vent Pipe Boots: The rubber neoprene collars that seal around plumbing exhaust vents have an expected lifespan of 10 to 15 years. Over time, sunlight causes the rubber to dry rot and split. Replacing the collar or slipping an aftermarket silicone repair sleeve over the vent pipe stops these leaks instantly.
Tile Valleys: Roof valleys handle intense concentrations of rushing water. Leaves, pine needles, and moss routinely accumulate in the hidden channels under valley tile cuts. This debris forms a natural dam, forcing runoff sideways past the metal valley flanges onto unprotected decking. Clearing valleys and ensuring valley metal flashings have a clean center channel prevents sudden overflow during downpours.
Wall and Chimney Flashing: Metal headwall and side wall flashings require flexible step transitions. Just as in complex applications like flashing around chimney metal roof systems, tile roof transitions rely on precise overlap geometries. Seal any deteriorated masonry counter-flashing joints with polyurethane sealant rather than brittle mortar.
Mortar Caps and Hip Pointing: Traditional sand-and-cement mortar beds on hips and ridges crack over a 5 to 10-year cycle due to building settlement and thermal expansion. Replace missing mortar with flexible acrylic pointing compounds that expand and contract without fracturing.
Tile Roof Repair Costs and Long-Term Solutions
Fixing a tile roof leak can range from a quick afternoon component fix to a major structural overhaul. Understanding how costs are structured helps you evaluate contractor estimates accurately.
Repair Scope | What Is Included | Typical Cost Range | Time Required |
|---|---|---|---|
Minor Tile Repair | 1–3 cracked/slipped tiles replaced, minor sealing | $200 – $500 | 1 – 2 Hours |
Flashing / Pipe Boot Repair | Vent collar replacement, chimney reflashing, valley clear | $400 – $900 | 2 – 4 Hours |
Localized Underlayment Patch | 3x3 tile grid removal, deck repair, membrane patch | $500 – $1,500 | Half Day to 1 Day |
Extensive Barrel Tile Restoration | Multi-point leak tracking, mortar repointing, flashing | $1,500 – $3,500 | 1 – 2 Days |
Full Lift-and-Relay (2,000 sq. ft.) | Remove & salvage all tiles, new synthetic underlayment | $6,000 – $10,000+ | 3 – 5 Days |
When evaluating older roofs, review detailed concrete tile leak repair considerations to understand whether multiple small patches remain cost-effective compared to systemic renewal.
The "Lift and Relay" Alternative to Full Replacement
If your roof is 20 to 30 years old and experiencing recurring leaks across multiple slopes, you do not necessarily need to buy an entirely new tile roof. Because your concrete or clay tiles likely have decades of structural life remaining, you can opt for a Lift and Relay (also called a tile reset).
In a lift-and-relay project, our crew carefully removes, bundles, and salvages your existing exterior tiles. We strip away the deteriorated 20-year-old organic felt down to the bare wooden decking, replace any damaged plywood or fascia, and install heavy-duty, modern synthetic underlayment rated for 30+ years. Finally, we reinstall your original tiles using fresh fasteners, clips, and flashing. This restores full 30-year waterproofing performance to your home at roughly half the cost of a complete tile replacement.
If you are dealing with unexplained water stains, schedule a free roof inspection with our team to determine whether a targeted repair or a lift-and-relay is the most cost-effective solution.
Preventative Maintenance to Stop Future Tile Leaks
A tile roof is a high-performance system that rewards proactive care. Incorporating a few simple maintenance habits can easily add 10 to 15 years to the lifespan of your underlayment:
Biannual Valley and Gutter Clearing: Clear accumulated leaves, twigs, and pine needles from open valleys and gutter channels every spring and late fall. Keeping water moving freely prevents backup underneath eaves.
Tree Branch Clearance: Maintain at least a 6-foot clearance between overhanging tree branches and your roof tiles. This prevents heavy branches from dropping during windstorms and eliminates the abrasive scraping that cracks tile edges.
Gentle Moss and Algae Removal: Never allow thick moss to bridge the gaps between interlocking tiles, as moss holds moisture and forces water laterally. Avoid pressure washers, which can fracture tiles and blast water straight past underlayment laps. Instead, use a soft-bristled brush and an eco-friendly roof wash treatment.
Maintain Attic Ventilation: High attic temperatures bake asphalt felt underlayment from below, accelerating thermal degradation. Ensure your soffit vents, ridge vents, and gable louvers remain clear and unobstructed.
Coordinate Low-Slope Intersections: Many residential properties feature tile roofs that transition into flat sections over porches or garages. Working with qualified flat roof repair contractors ensures that transition flashings between flat membrane roofs and steep tile sections are sealed against standing water.
Frequently Asked Questions About Tile Roof Leak Repair
Can you use roof sealant or caulk to repair a cracked tile?
Applying polyurethane roofing sealant to a hairline crack can serve as a temporary emergency measure, but it is not a permanent fix. Smearing caulk or silicone over the surface of cracked tiles often traps water inside the tile assembly, accelerating moisture damage to the underlayment below. Replacing the cracked tile with a matching unit is always the standard, permanent solution.
How long does tile roof underlayment last before needing replacement?
Traditional Type II (30-lb) asphalt-saturated organic felt typically lasts 20 to 30 years under normal conditions. In areas with high summer heat and humidity, organic underlayment can begin failing in as little as 15 to 20 years. Modern self-adhering synthetic polymer membranes generally last 25 to 35+ years.
Will homeowners insurance cover a leaking tile roof?
Standard homeowners insurance policies typically cover sudden, accidental damage caused by covered perils—such as a tree limb falling during a storm or wind tearing tiles away. However, insurance generally excludes damage resulting from gradual wear and tear, deferred maintenance, or aging underlayment reaching the end of its natural lifespan.
Professional Tile Leak Solutions
Diagnosing and repairing a tile roof leak requires looking beyond the surface tiles to address the waterproof underlayment and flashing systems underneath. Whether you are dealing with an isolated broken tile or systemic underlayment aging, addressing leaks promptly protects your framing, drywall, and living space from costly water damage.
At Lassiter Roofing, we bring over 30 years of hands-on roofing experience across Idaho’s Western Treasure Valley. We provide clear assessments, competitive pricing, and a comprehensive 5-year workmanship warranty on our repair and replacement projects. When you need dependable help, you can contact us directly or request free estimate today to have our team restore lasting protection to your home.


