



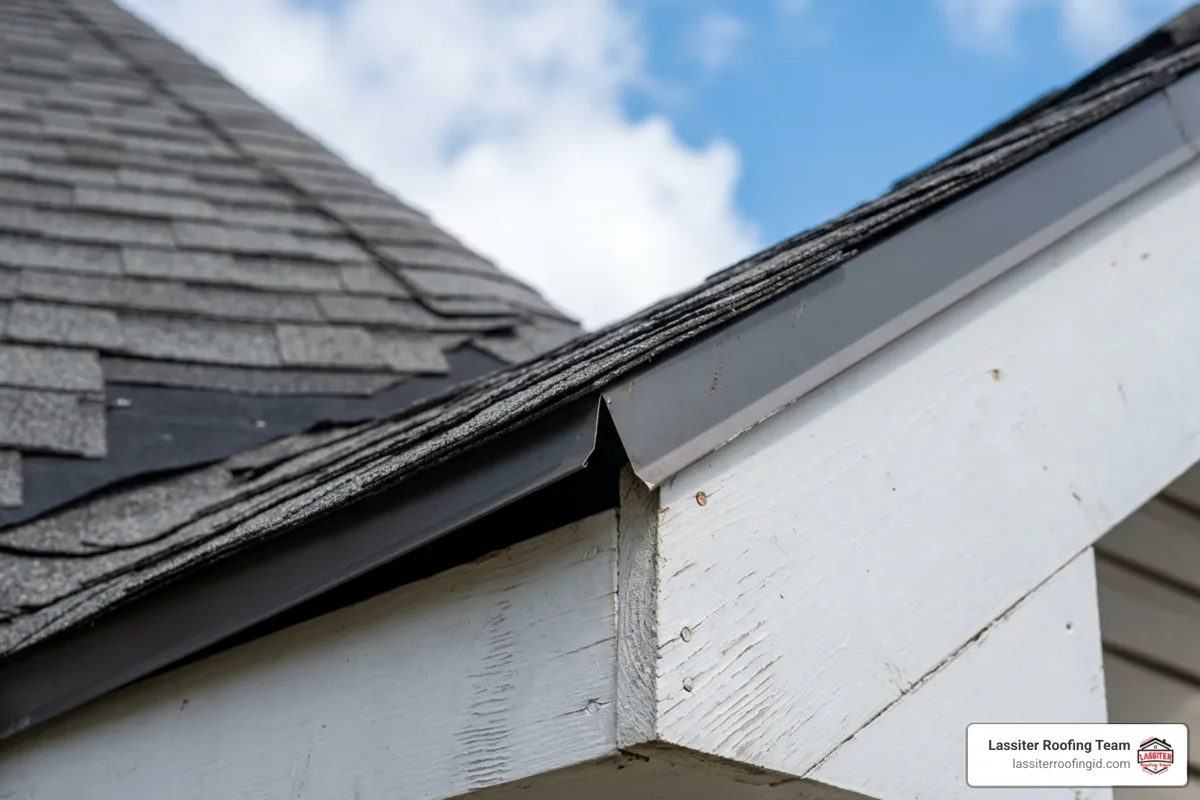
Mind the Gap Between Roof Drip Edge and Fascia Board
Get the Gap Right Between Drip Edge and Fascia
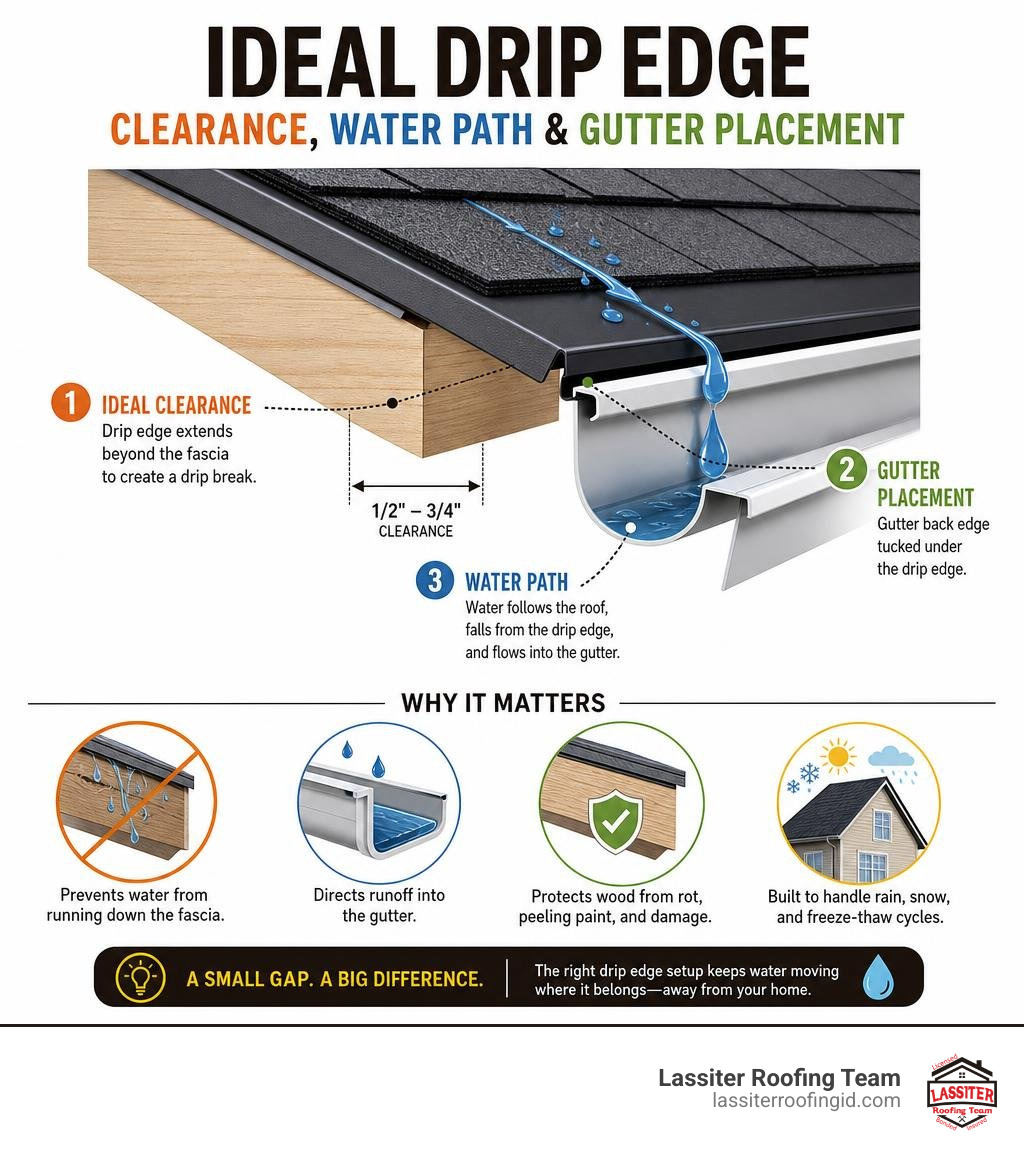
A fascia board drip edge should extend past the fascia enough to let water fall free into the gutter, not run down the wood. Avoid installing the metal flush against the fascia. A small clear space creates a drip break that stops surface tension and capillary action from pulling water back toward the board.
For most roof edges, the practical goal is simple:
Let the drip edge project beyond the fascia rather than end flush with it.
Keep the gutter's back edge tucked under the drip edge so runoff enters the gutter.
Use a proper spacer or approved edge profile when needed to maintain a clear drainage channel.
Follow the roofing manufacturer's detail for exact overhang, fasteners, and underlayment placement.
That gap matters more than it may seem. When water repeatedly touches wood fascia, it can cause peeling paint, rot, damaged roof decking, and costly repairs - especially after Treasure Valley rain, snow, and freeze-thaw cycles.
I'm Kason Walton, owner of Lassiter Roofing Team. With more than 30 years in roofing, construction, and real estate, I have seen how correct fascia board drip edge spacing helps prevent small roof-edge problems from becoming major water damage.
The Role of the Fascia Board Drip Edge in Roof Perimeter Protection
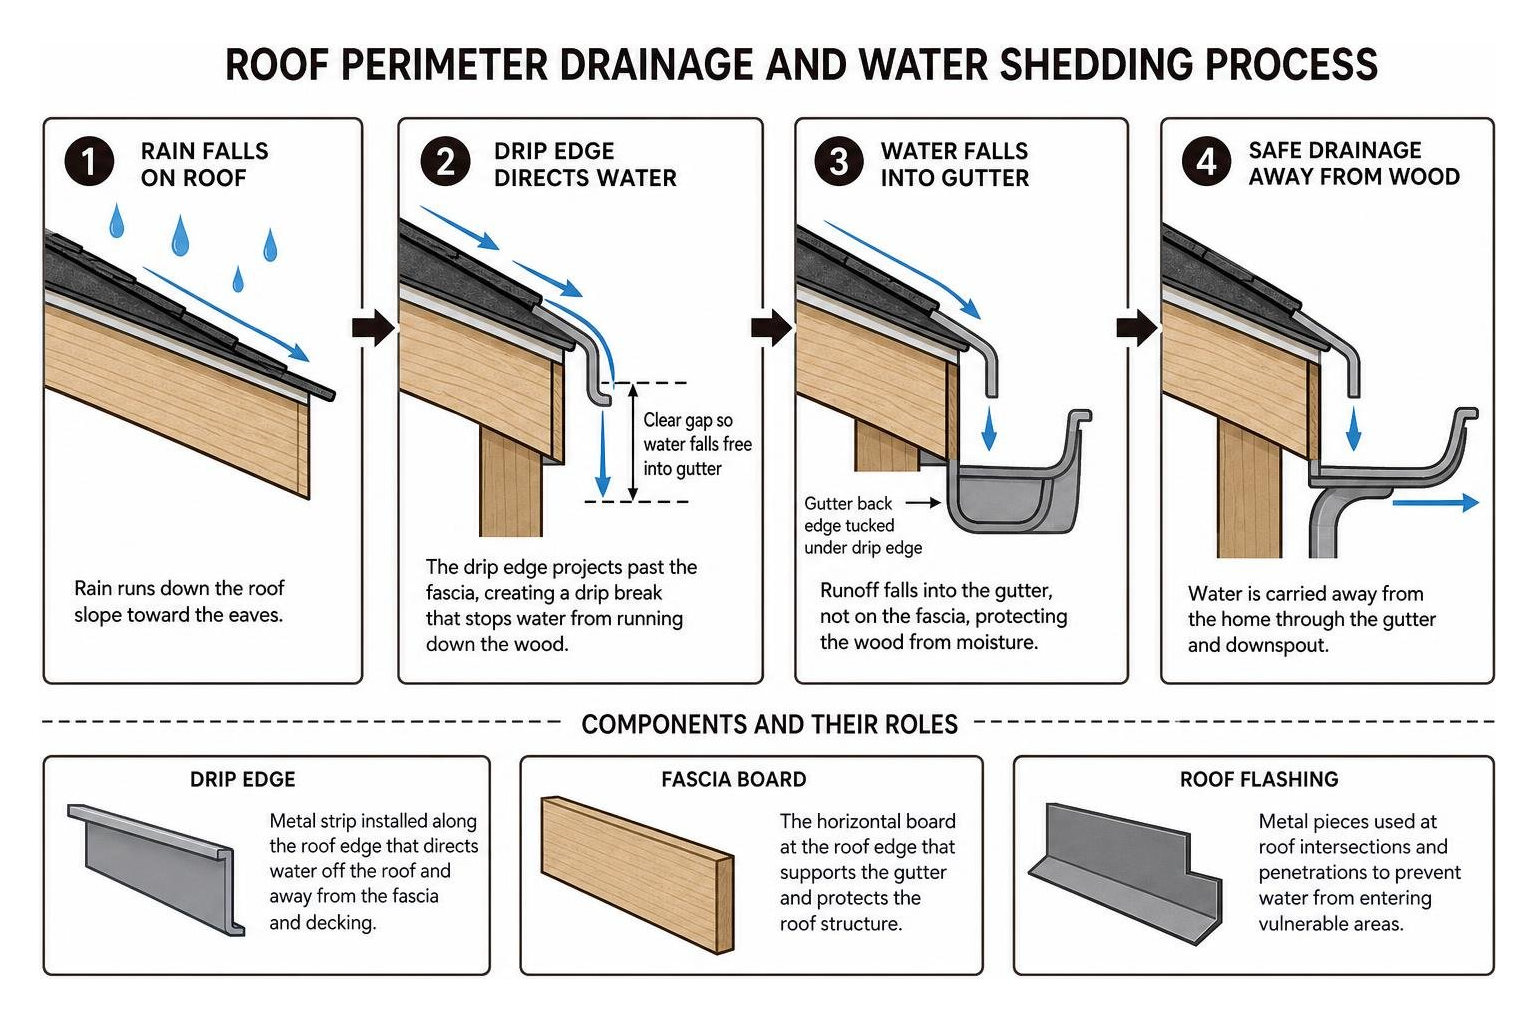
A roof perimeter handles extreme weather stress. Rain running down the roof pitch gains momentum, and without proper perimeter drainage, it curls around the shingle lip or membrane boundary. The primary job of a drip edge is water management: kicking runoff outward away from the structural wood decking and vertical trim.
Executing a proper roof installation means ensuring that every component at the roof edge works as a continuous drainage plane. When the perimeter edge is neglected, moisture migrates backward under the decking, compromising structural fasteners and causing costly structural damage long before leaks appear inside your living room ceiling.
Drip Edge vs. Fascia vs. Roof Flashing
Homeowners often mix up drip edges, fascia boards, and roof flashing. While they work together, each has a dedicated function:
Fascia Board: The horizontal, vertical-facing board mounted at the roof's lower eaves and rake edges. It acts as the structural mount for your gutters and encloses the attic rafter tails.
Drip Edge: An L-shaped or T-shaped metal profile with a distinct bottom kickout angle. It mounts to the roof deck, overlaps the fascia, and forces water to detach into the gutter or away from the structure.
Roof Flashing: Thin metal pieces installed at vulnerable roof transitions (like sidewalls, chimneys, valleys, and parapets) to divert bulk water onto shedding surfaces. For example, specialized wall transitions require specific steps, much like cap flashing installation techniques designed to seal horizontal parapet masonry.
Material Profiles and Modern Color Trends
Selecting the right profile shape and base metal dictates both structural performance and exterior curb appeal.
Material Profile / Type | Common Gauges / Thickness | Key Performance Traits | Aesthetic Best-Fit |
|---|---|---|---|
L-Style Aluminum | 0.019" – 0.032" | Lightweight, corrosion-proof, cost-effective | Standard residential asphalt shingle roofs |
T-Style (D-Metal) | 0.024" – 0.040" | Extended deck flange with built-in fascia drip lip | Architectural shingles & heavy rainfall eaves |
Commercial 2-Piece Cleat | 22–24 ga. Steel / 0.040–0.063" Alum | Heavy wind uplift resistance; concealed fasteners | Commercial TPO/PVC flat roofs & modern builds |
Galvanized / Galvalume Steel | 24–26 ga. Steel | High structural rigidity, excellent impact defense | High-wind regions, agricultural & metal roofing |
Architectural Copper | 16 oz. / 20 oz. Cold Rolled | Lifetime durability; develops natural protective patina | Historic restorations, custom tile, high-end cedar |
Modern roof design has moved beyond standard mill-finish aluminum and plain white trim. Premium architectural builds frequently specify factory-applied 70% PVDF finishes (such as Kynar 500® coatings) carrying 30-year finish warranties against chalking and fading. Matte black, dark bronze, and custom siding-matched trim colors are popular choices across the Western Treasure Valley, providing crisp exterior contrast.
Determining the Proper Gap Between Drip Edge and Fascia
The space between your metal drip edge and the fascia board serves as a physical capillary break.
When rain runs down an eave, surface tension causes the liquid to grip metal surfaces. If the vertical drop of the drip edge rests flush against the wood fascia, water uses capillary action to climb behind the metal and saturate the timber.
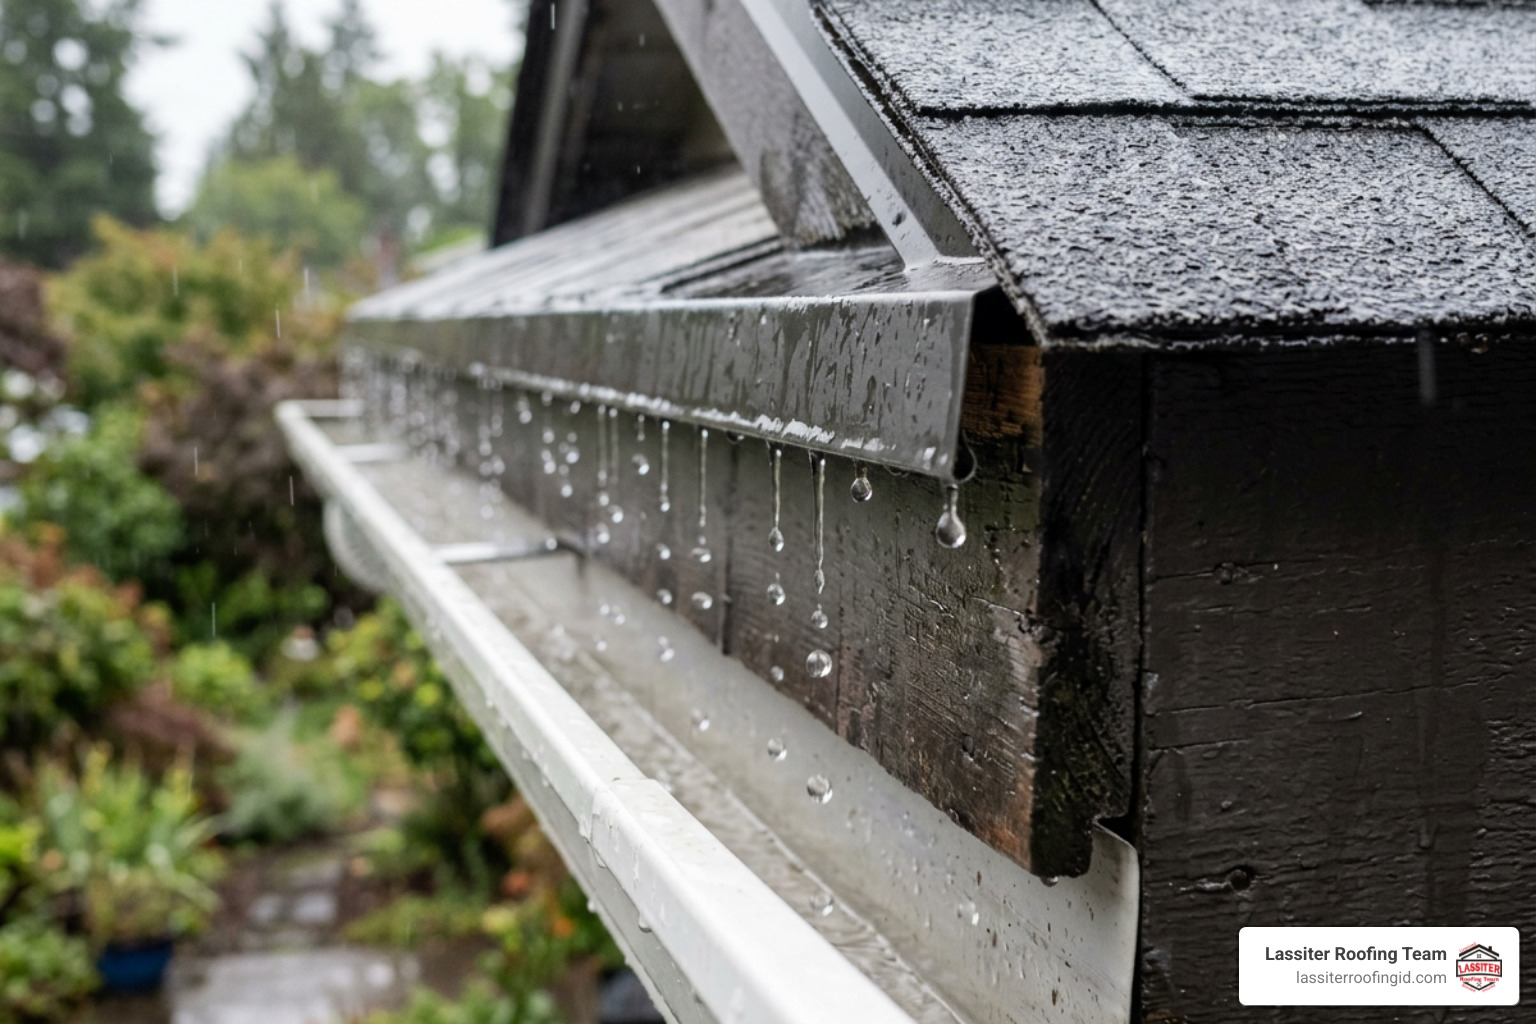
Leaving a clean clearance gap—typically between 1/4 inch and 1/2 inch from the vertical leg to the fascia face, or utilizing a kickout angle at the bottom lip—ensures water weight overcomes surface tension, causing droplets to fall straight down into the gutter trough. On older builds or retrofits with warped lumber, roofers often nail a 1x2 wood spacer strip behind the drip edge to guarantee this water-shedding channel remains unobstructed.
Why Direct Contact Between Fascia and Metal Edge Causes Rot
When drip edge metal is nailed flush to wood, water gets trapped between the non-porous metal back and the porous timber front. This creates a chronic moisture pocket.
Trapped water causes:
Wood fiber breakdown leading to fungal wet rot.
Blistered, peeling exterior paint.
Freeze-thaw splitting during winter cold snaps as trapped moisture expands.
Premature structural failure that elevates your overall fascia, soffit, and guttering replacement cost.
Integrating Gutters with the Fascia Board Drip Edge
A properly integrated roof edge requires gutters to be mounted correctly beneath the drip edge. The back flange of the gutter trough should always slip under and behind the downward projection of the drip edge.
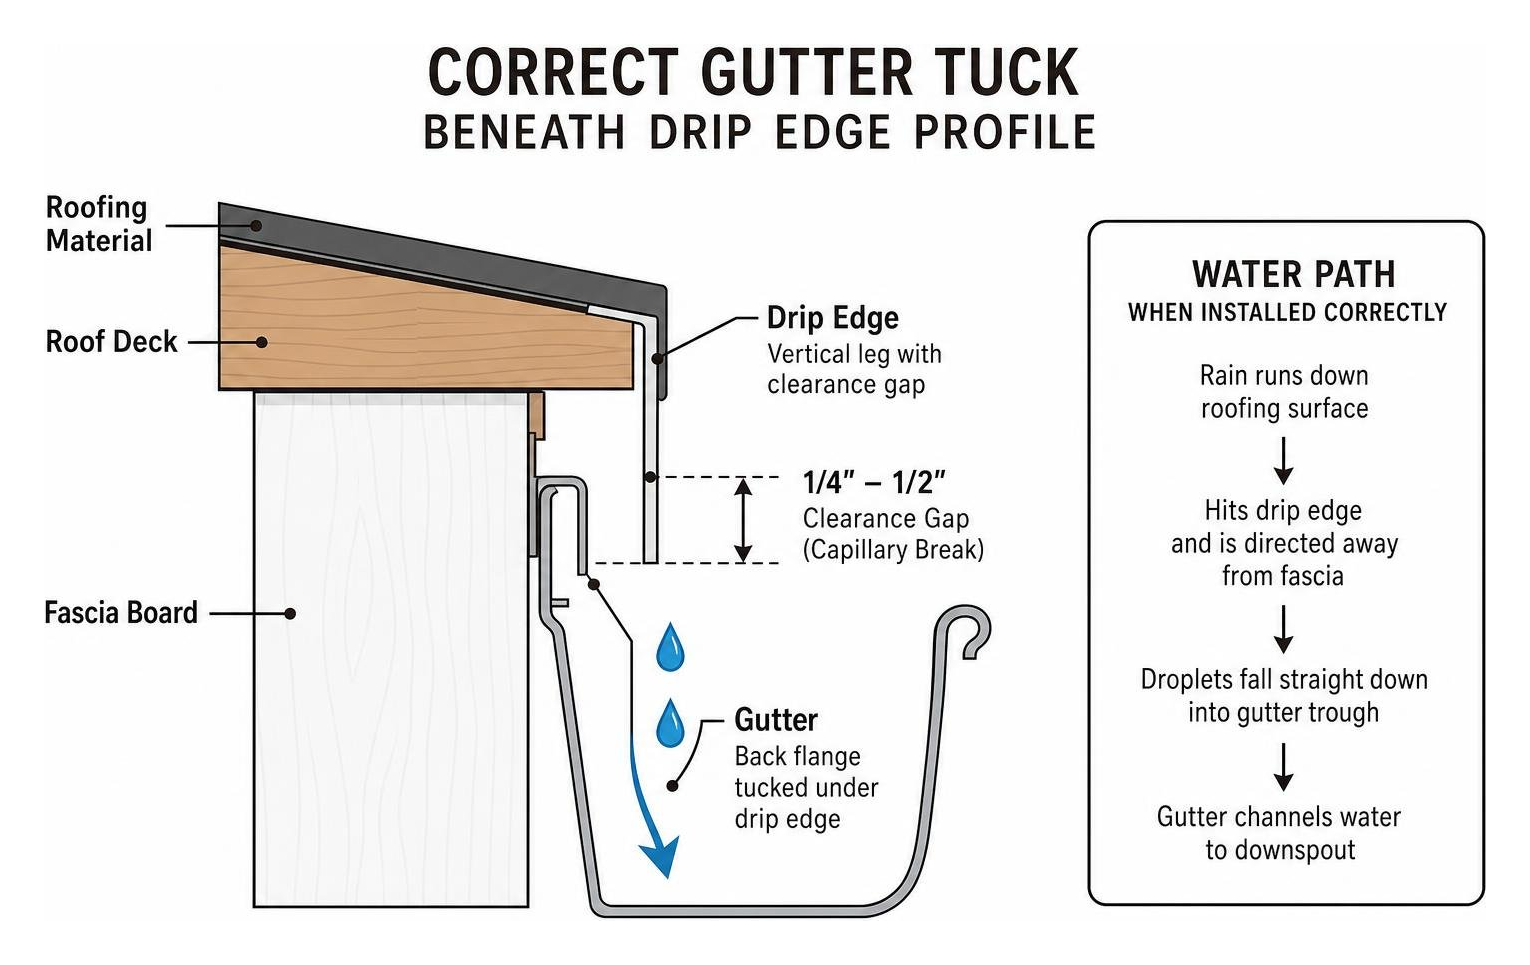
When gutters are mistakenly hung over the drip edge, runoff spills behind the gutter trough, streaming down the soffit and home foundation. If you are experiencing persistent backflow or gutter overflow, hiring a team for professional guttering installation ensures the drop-in alignment, gutter slope, and metal clearance are calibrated to catch high-volume downpours.
Step-by-Step Installation and Membrane Integration
Modern commercial and high-performance residential installations often utilize engineered edge systems. These systems combine continuous anchor cleats, slotted expansion holes, and factory splice plates to guarantee water tightness.
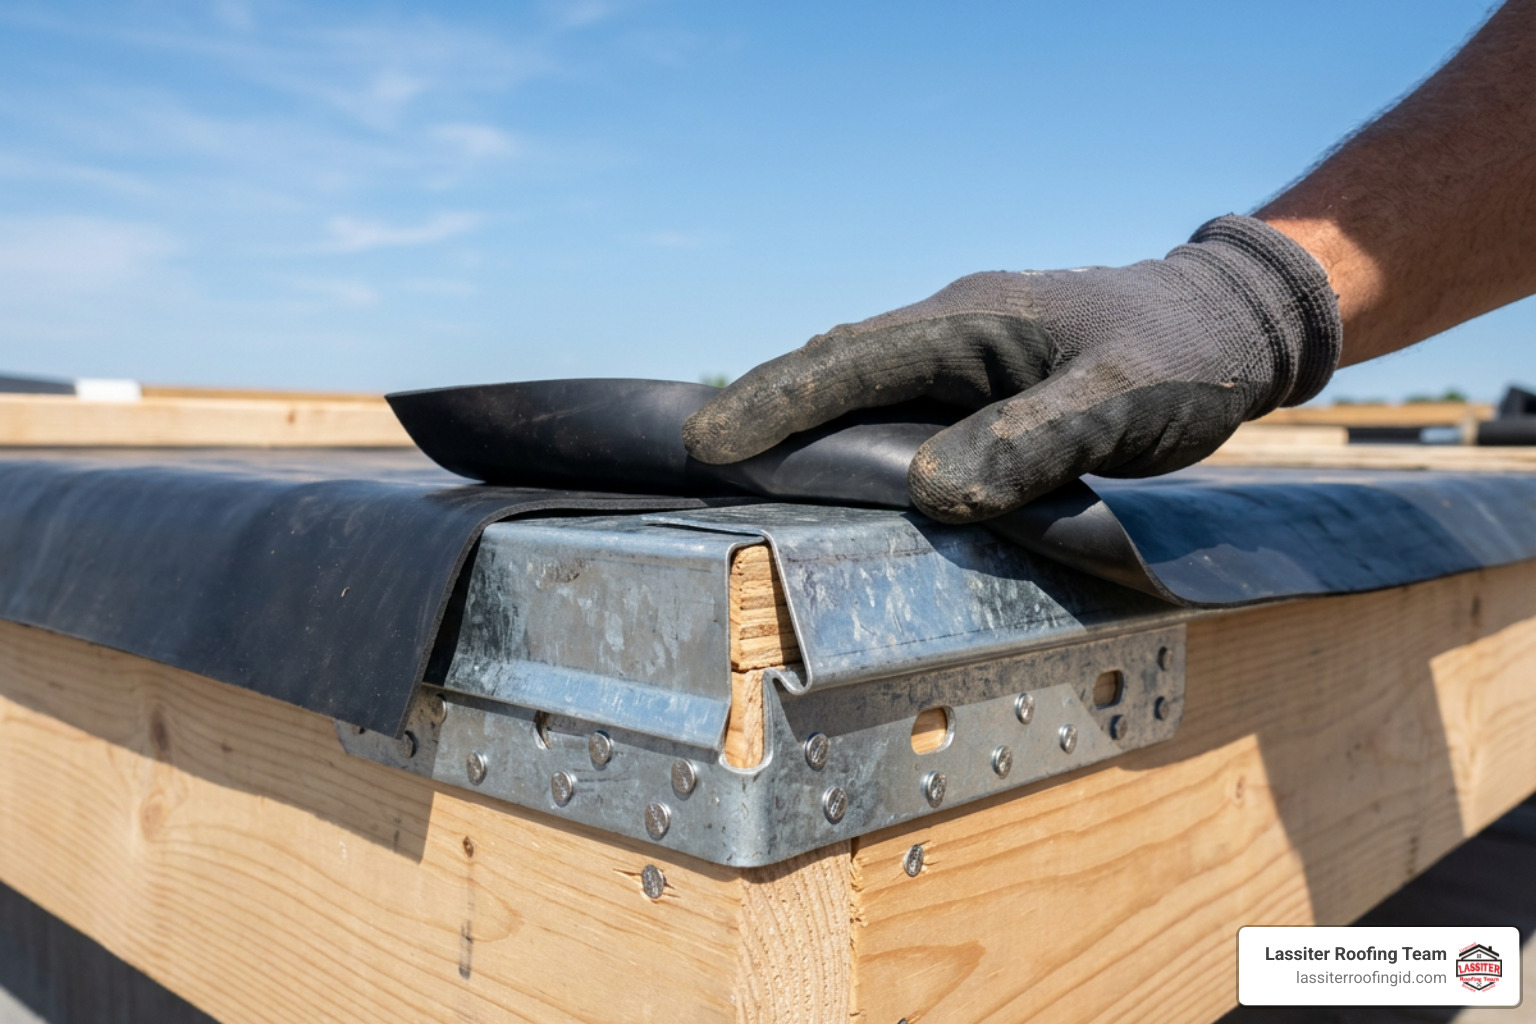
High-grade products like the Johns Manville drip edge technical specifications showcase the engineering behind commercial perimeter systems:
Continuous Cleat Placement: A 22-gauge galvanized steel anchor cleat is positioned along the roof perimeter edge over the wood blocking and fastened with 1-1/2" stainless steel ring-shank nails spaced 12" on center through pre-slotted holes.
Thermal Expansion Spacing: 12-foot drip edge fascia sections are snapped or hooked over the cleat, maintaining a 1/8-inch expansion gap between section ends (and 1/4-inch over internal splice plates) to absorb metal expansion without buckling.
Splice Plates and Joint Sealant: Splice plates coated with non-curing polyether or elastomeric sealant are positioned under the joints to block wind-driven rain.
Membrane Tie-In (Strip-In): The roof membrane extends past the roof nailer, overlapping the top metal flange by at least 1-1/2 to 3 inches.
Installing a Fascia Board Drip Edge on Single-Ply and Shingle Roofs
Installation protocols vary depending on whether you are working with steep-slope shingles or low-slope single-ply membranes.
For single-ply applications (TPO and PVC), the perimeter flashing must be hot-air welded directly to a strip-in ply or membrane target strip. Any raw membrane edges subject to occasional ponding require a bead of cut-edge sealant.
For steep-slope roofs, follow these standard steps:
Eave underlayment layering dictates that the drip edge installs directly onto the bare roof deck sheathing, with the ice-and-water barrier or synthetic underlayment layered over the top metal flange.
At the gable rakes, reverse the order: apply the underlayment first over the roof deck edge, then install the rake drip edge over the underlayment to protect against wind-driven side rain.
Our crews regularly follow these manufacturer details across both shingle roofing installation and complex metal roof and siding installation projects. In every case, following manufacturer guidelines—such as the ATAS perimeter drip edge system guidelines—ensures code compliance and lasting perimeter integrity.
Building Codes, Wind Uplift Standards, and Testing Compliance
Roof edges bear the highest aerodynamic lift forces during high-wind storms. Building codes mandate perimeter edge systems that resist severe blow-off pressures.
ANSI/SPRI/FM 4435/ES-1: The primary national standard referenced in the International Building Code (IBC) for low-slope perimeter roof edges.
Design Pressure Performance: High-performance commercial edge profiles are lab-tested to withstand design pressures exceeding 230 to 266 psf horizontally and vertically without structural cleat failure.
Regional Approvals: Severe storm regions demand specialized testing, such as Miami-Dade County Notice of Acceptance (NOA) approvals for high-velocity hurricane zones.
Engineered systems, including the Hickman Roofer's Edge Drip Fascia testing and installation guide, demonstrate how continuous cleats and tested fastening patterns prevent wind peel from ripping the perimeter roof membrane away from the structure.
Common Installation Mistakes and Long-Term Maintenance
Small installation errors can cause major roof failures.
Flush Nailing Against Trim: Forcing the downward leg tight against the fascia traps rain through surface tension.
Galvanic Incompatibility: Nailing standard galvanized or aluminum flashing directly to copper or modern ACQ (alkaline copper quaternary) pressure-treated timber causes rapid chemical corrosion. An isolation barrier (such as a self-adhering modified bitumen membrane) must separate incompatible materials.
Improper Fasteners: Using smooth-shank roofing nails instead of corrosion-resistant ring-shank nails lowers wind-uplift hold.
Seasonal preventative maintenance keeps perimeter edges performing well:
Bi-Annual Inspections: Check eaves each spring and autumn for metal deflection, missing ring-shank fasteners, cracked sealant joints, or sagging gutters.
Debris Clearing: Clear pine needles and leaf blockages from gutter troughs so backed-up water cannot submerge the drip edge kickout.
Timely Gutter Repair: If your gutters pull away or show rust staining at the back seam, schedule a prompt guttering replacement to keep runoff flowing smoothly.
Frequently Asked Questions about Drip Edge and Fascia Spacing
How much of a gap should be left between the drip edge and the fascia board?
A clearance gap of 1/4 inch to 1/2 inch between the bottom vertical drop of the drip edge and the face of the fascia board is standard. This space breaks water surface tension, preventing capillary back-draw and ensuring roof runoff drops freely into the gutter.
Does the drip edge go over or under the roof underlayment?
Along the horizontal eaves, the drip edge is installed under the roof underlayment (directly against the wood decking) so any underlayment moisture drains over the metal flange. Along the sloped rakes (gables), the drip edge installs over the underlayment to seal the edges against wind-driven lateral rain.
Can an improperly spaced drip edge void roofing manufacturer warranties?
Yes. Major shingle and single-ply roofing manufacturers specify exact perimeter flashing details to validate their wind and leak warranties. Installing drip edges flush against fascia boards, omitting required expansion gaps, or neglecting ANSI/SPRI ES-1 standards can void coverage for moisture intrusion or wind blow-off damage.
Conclusion
A well-installed roof perimeter does more than frame your home—it serves as the front line of moisture defense. Maintaining the correct clearance gap between your metal drip edge and fascia board stops rot, preserves structural decking, and keeps drainage moving into your gutters.
At Lassiter Roofing Team, we bring over 30 years of hands-on experience, individually quoted competitive pricing, and our 5-year workmanship warranty to every project in Idaho's Western Treasure Valley. Whether you need an eave inspection, an engineered commercial edge system, or help installing a high-performance ice and water shield along vulnerable roof eaves, our team is ready to help protect your home.


