



Don't Tile Over the Problem: Easy Broken Roof Tile Repairs
Fix Cracked Roof Tiles Before Water Gets Underneath
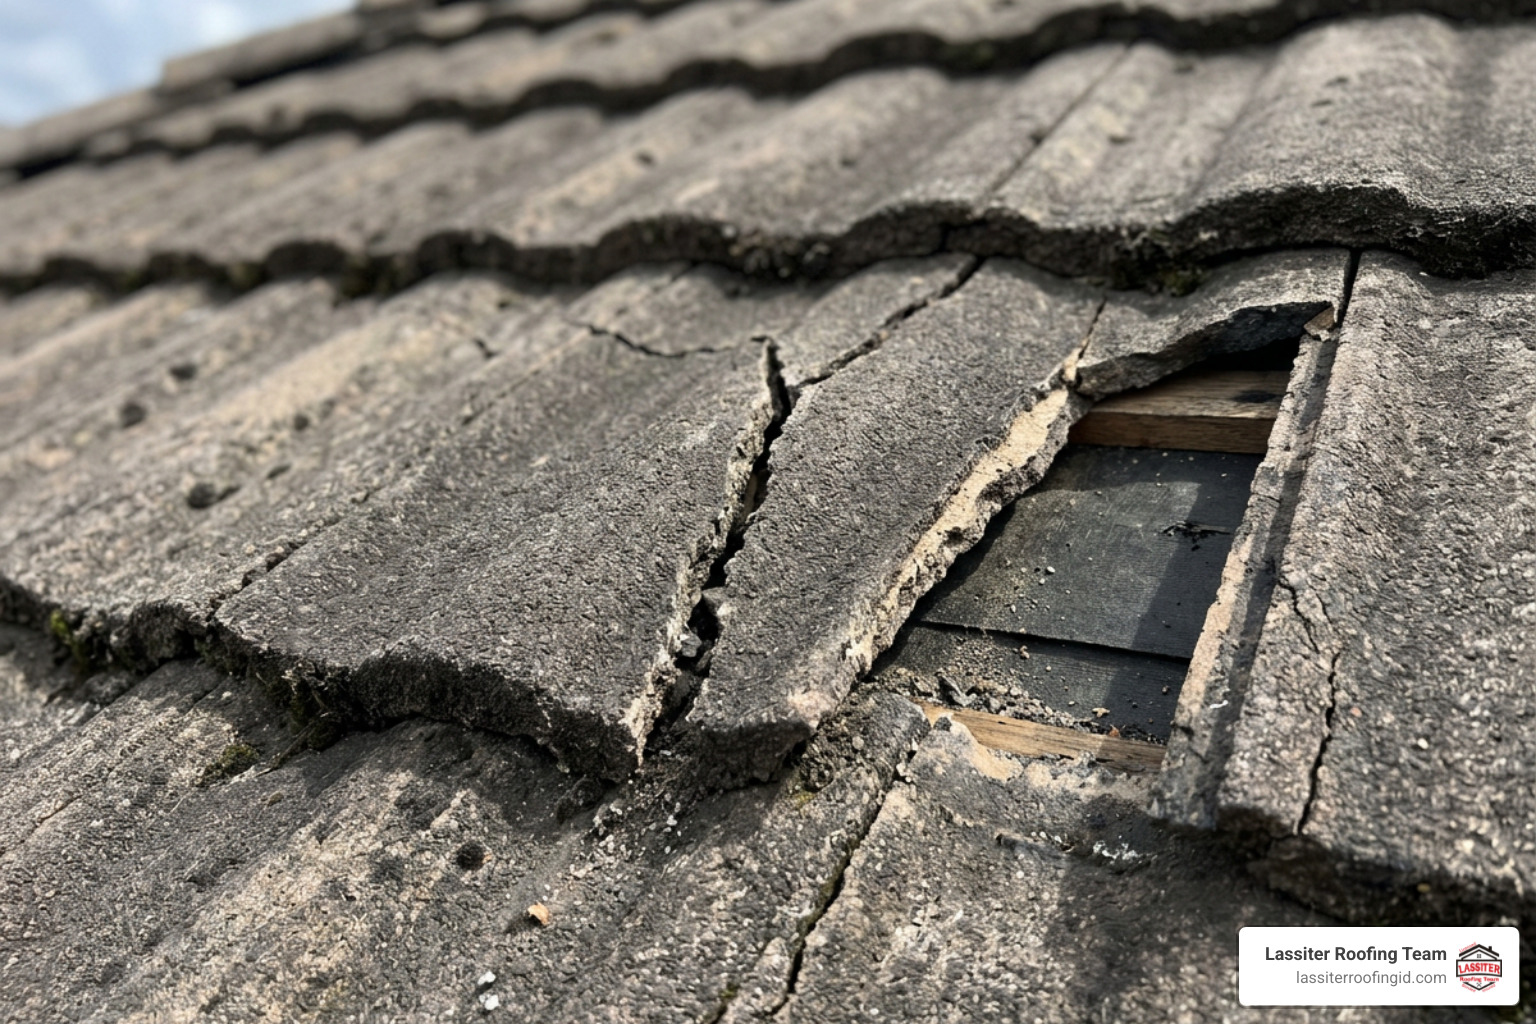
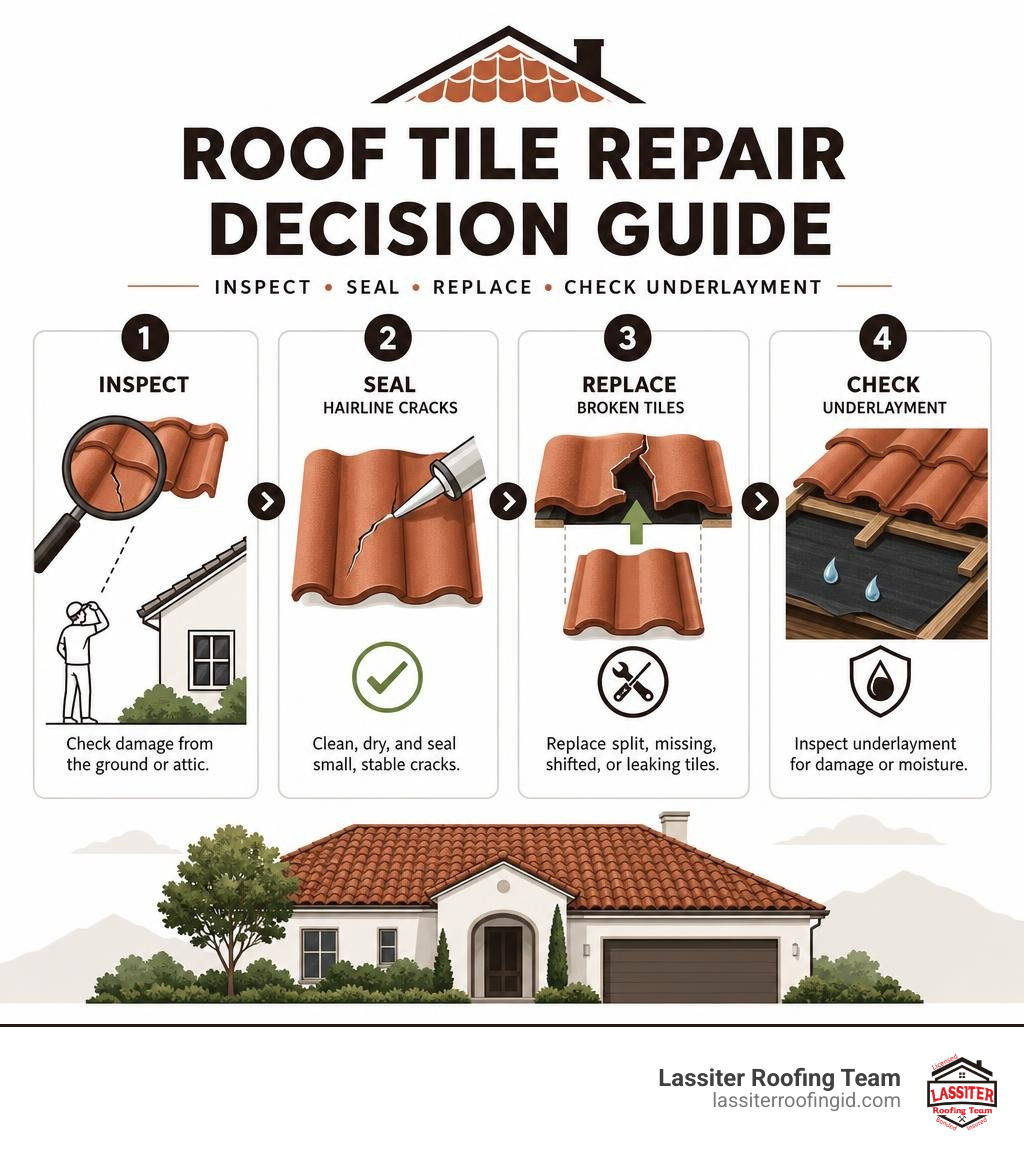
For cracked roof tile repair, start by checking the damage from the ground or attic - not by walking across the roof. A small, stable hairline crack may be sealed with a tile-compatible exterior polyurethane or MS polymer sealant after the tile is cleaned and dried. A split tile, missing piece, shifted tile, or active leak usually calls for replacement and an inspection of the underlayment beneath it.
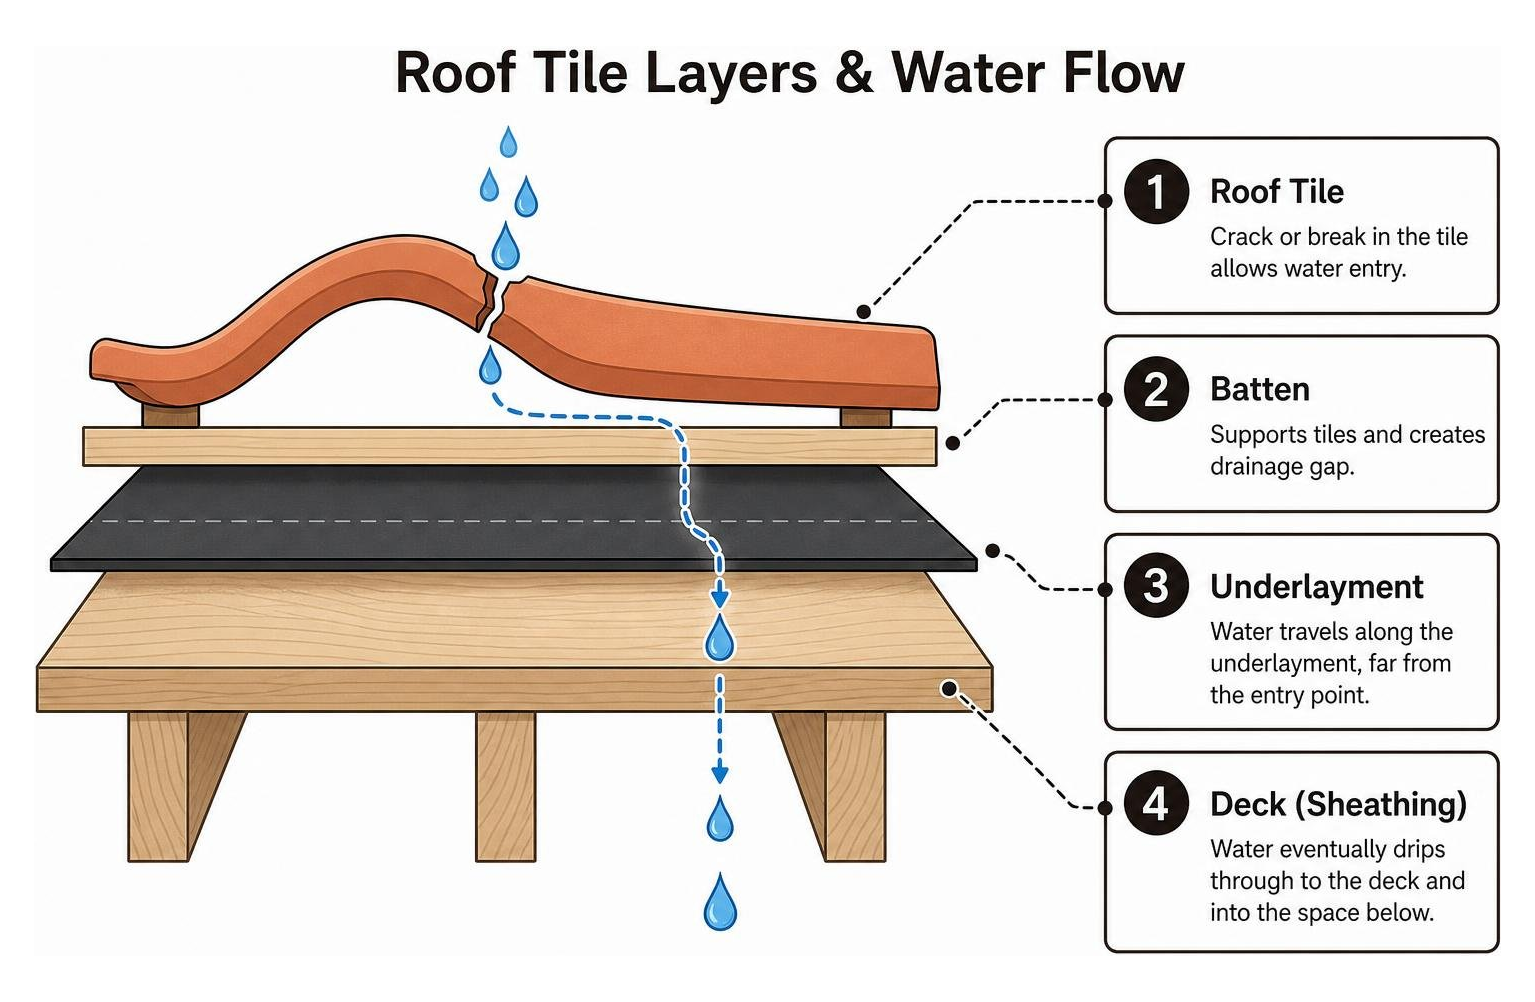
Roof tiles can last 50 years or more, but they are not the roof's only water barrier. Tiles shed most rain; the underlayment below them does the waterproofing work. That underlayment often lasts only 20 to 25 years, so a visible crack can be a simple tile issue - or a sign that water has reached a deeper layer.
Do not ignore a damaged tile. Rain can travel along underlayment, battens, or framing before it appears as a ceiling stain, which means the indoor leak may not sit directly below the broken tile. This guide will help you decide when to seal, replace, or call a roofer before minor damage becomes a costly leak.
I'm Kason Walton, owner of Lassiter Roofing Team, with more than 30 years of construction and roofing experience serving residential, commercial, and agricultural properties in Idaho's Western Treasure Valley. In the next sections, I will break down cracked roof tile repair into safe, practical steps and explain when professional help is the better value.
Diagnosing Broken Tiles: Underlying Causes and Inspection Protocols
Before grabbing a ladder and a tube of adhesive, you need to understand what you are dealing with. Catching a fracture early prevents thousands of dollars in water remediation down the road. However, running onto a tile roof carelessly is the fastest way to turn one broken tile into a dozen.
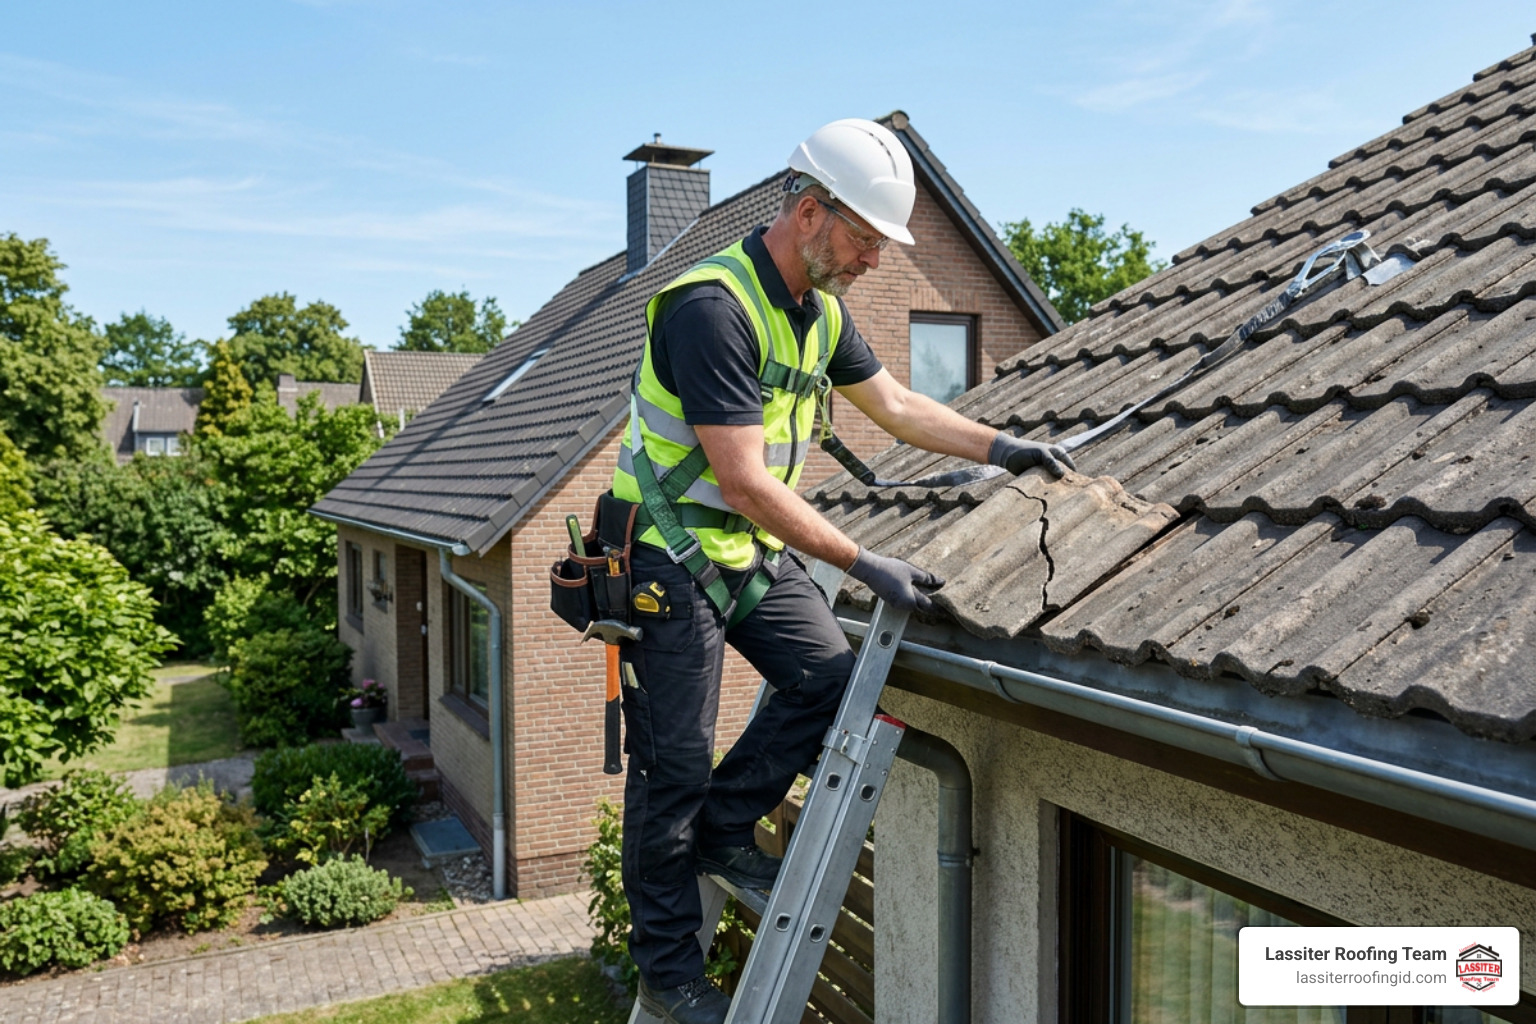
When conducting an initial assessment, keep your feet firmly on the ground whenever possible. Grab a pair of high-powered binoculars or use a camera with a decent optical zoom to scan the roof slopes line by line. Alternatively, modern high-resolution drone surveys have become an industry standard because they allow us to photograph hairline checks, slipped shingles, and damaged ridge caps without exerting any physical weight on brittle roofing materials.
Next, head into your attic space or roof cavity on a bright, sunny afternoon. Switch off your attic lights and scan the roof deck above:
Look for visible shafts of daylight, which immediately reveal displaced, slipped, or shattered tiles.
Check timber rafters and battens for dark water staining, localized rot, or white efflorescence marks.
Inspect the insulation batts or blown-in cellulose directly below roof valleys, penetrations, and lower eaves for damp spots or mildew odors.
Water is sneaky. Moisture entering through a fractured tile at the upper ridge can trickle down an underlayment membrane for 20 feet before dropping onto a ceiling joist. The indoor stain rarely lines up directly beneath the external breach.
Common Causes of Tile Cracking
Why do heavy, durable tiles fail in the first place? While concrete and clay tiles are exceptionally tough against fire and rot, they are remarkably brittle under direct impact or concentrated pressure.
Foot Traffic: The single most common cause of tile breakage is improper foot placement by homeowners or third-party contractors (such as HVAC technicians, solar installers, satellite dish fitters, or window washers). Stepping on the unsupported center or thin bottom lip of a tile will snap it instantly.
Falling Debris and Storms: High winds frequently send tree branches crashing into the roof. Hailstones can also crack the outer glaze and core matrix of older clay and concrete tiles.
Thermal Shock and Freeze-Thaw Cycles: As ambient temperatures fluctuate between scorching midday sun and freezing nights, tiles expand and contract. In cold climates, moisture trapped inside tiny microscopic fissures freezes, expands, and splits the tile along its structural veins.
Natural Aging and Brittleness: As decades pass, terracotta tiles lose their internal moisture flexibility and become increasingly fragile.
Wind Uplift and Structural Settling: Strong windstorms can lift unsecured tiles, rattling them against adjacent fasteners until the nail holes fracture.
Assessing the Damage for Cracked Roof Tile Repair
When examining a compromised tile, you must categorize the severity of the damage to choose the correct repair path. We recommend looking closely at the essential tips and techniques for cracked tile repair to determine whether a simple surface touch-up will hold.
Ask yourself these four diagnostic questions:
Is it a hairline crack or a clean structural break? A fine fracture across the dry face of a tile is far easier to manage than a piece that has split completely through to the underlayment.
Has any tile material broken away? If a corner or large fragment is missing, surface sealant cannot restore the continuous water barrier.
Is the interlocking watercourse compromised? Roof tiles rely on hidden side channels (laps) to channel runoff. If the hidden drainage channel underneath the lap is broken, water will run directly onto the underlayment regardless of how nicely you glue the top surface.
Has the tile shifted out of alignment? Slipped tiles indicate broken fixing clips or rusted nail heads that require physical resetting rather than adhesive bonding.
Inspecting Underlayment and Sub-Roof Components
A roof tile is essentially a durable sunshade and rain deflector—the waterproof underlayment beneath it does the actual heavy lifting. If a cracked tile has been ignored through several rainy seasons, water intrusion will rot the organic felt or synthetic membrane underneath.
When lifting or removing broken tiles, carefully evaluate the surrounding sub-roof elements:
Underlayment Integrity: Check for brittle, torn, or rotted roofing felt. If the underlayment is degraded, replacing only the surface tile is like putting a fresh bandage over an uncleaned wound.
Roof Battens: Ensure the horizontal wood battens supporting the tile nibs are dry, free of active fungal decay, and securely anchored to the roof trusses.
Flashing Details: Inspect nearby transition points. Wall abutments, valleys, and chimney penetrations are notorious leak zones. If your property features mixed roof materials, taking the time to inspect the flashing around chimney metal roof transitions ensures that adjoining roof planes remain completely watertight.
Seal or Replace: Making the Right Decision
Homeowners frequently ask if they can simply caulk every cracked tile they see. While modern sealants are extraordinary, they are not magic. The decision between sealing and replacing rests on structural integrity, drainage paths, and long-term durability.
Consulting a trusted guide on sealing vs replacing broken tiles helps avoid making temporary patches that fail during the next heavy storm.
Damage Type Recommended Action Expected Longevity Main Technical Reason Stable Hairline Crack (no missing fragments, intact channel) Seal in place with polyurethane or MS polymer 3 to 7+ years Tile retains mechanical shape; sealant acts as an elastomeric moisture shield. Complete Clean Snap (2 large pieces, fully accessible) Bond pieces edge-to-edge with structural adhesive 5 to 10 years Works well if removed and bonded across the full width, including the hidden watercourse. Shattered Tile / Missing Corners Full Tile Replacement 30 to 50+ years Structural load capacity is gone; broken drainage channels will leak under heavy downpours. Compromised Underlayment Below Tile Tile Lift + Underlayment Patch + Replacement 20 to 25 years Surface sealants cannot fix decayed waterproofing felt sitting on the wooden deck. Deteriorated Mortar Along Ridge/Hip Re-pointing / Re-bedding with fresh mortar 10 to 15 years Cracked mortar allows wind-driven rain to blow horizontally beneath caps.
Minor Hairline Cracks vs. Structural Fractures
A superficial hairline crack that does not penetrate through the entire thickness of the tile can generally be sealed effectively without dismantling the surrounding roof course. Because the tile’s weight-bearing profile remains intact and the pieces have not shifted, an exterior-grade, flexible elastomeric sealant will keep water out.
In contrast, structural fractures—where the tile is split into multiple pieces, crushed underfoot, or missing its interlocking lug—demand full replacement. Never rely on standard silicone or expanding foam to hold shattered pieces together; these materials degrade quickly under intense ultraviolet light and cannot withstand seasonal thermal expansion.
Sourcing Matching Replacement Tiles
When replacement is required, finding a matching tile profile is your next task. Installing a flat tile into a curved barrel roof course will leave massive gaps that allow wind-driven rain to enter freely.
To source the right replacement:
Identify the Material: Determine whether your roof uses concrete, terracotta (clay), slate, or composite synthetic tiles.
Check for Manufacturer Stamps: Look at the underside of an intact spare tile (or carefully inspect an attic space) for stamped manufacturer names, model numbers, or profile codes (e.g., Monier, Eagle, Marley, Boral).
Visit Local Salvage Yards: If your tile model has been discontinued, architectural salvage yards and roofing supply reclaim centers are goldmines for matching historic or out-of-production profiles.
Color Blending: Freshly manufactured tiles will often appear brighter than sun-weathered tiles. You can install newly sourced tiles in less visible roof sections (like back slopes or behind chimney stacks) and move older, weathered tiles to high-visibility front planes for a seamless look.
Step-by-Step Guide to Cracked Roof Tile Repair
If you have decided to perform a DIY repair on an accessible, low-pitch section of your roof, careful preparation is vital.
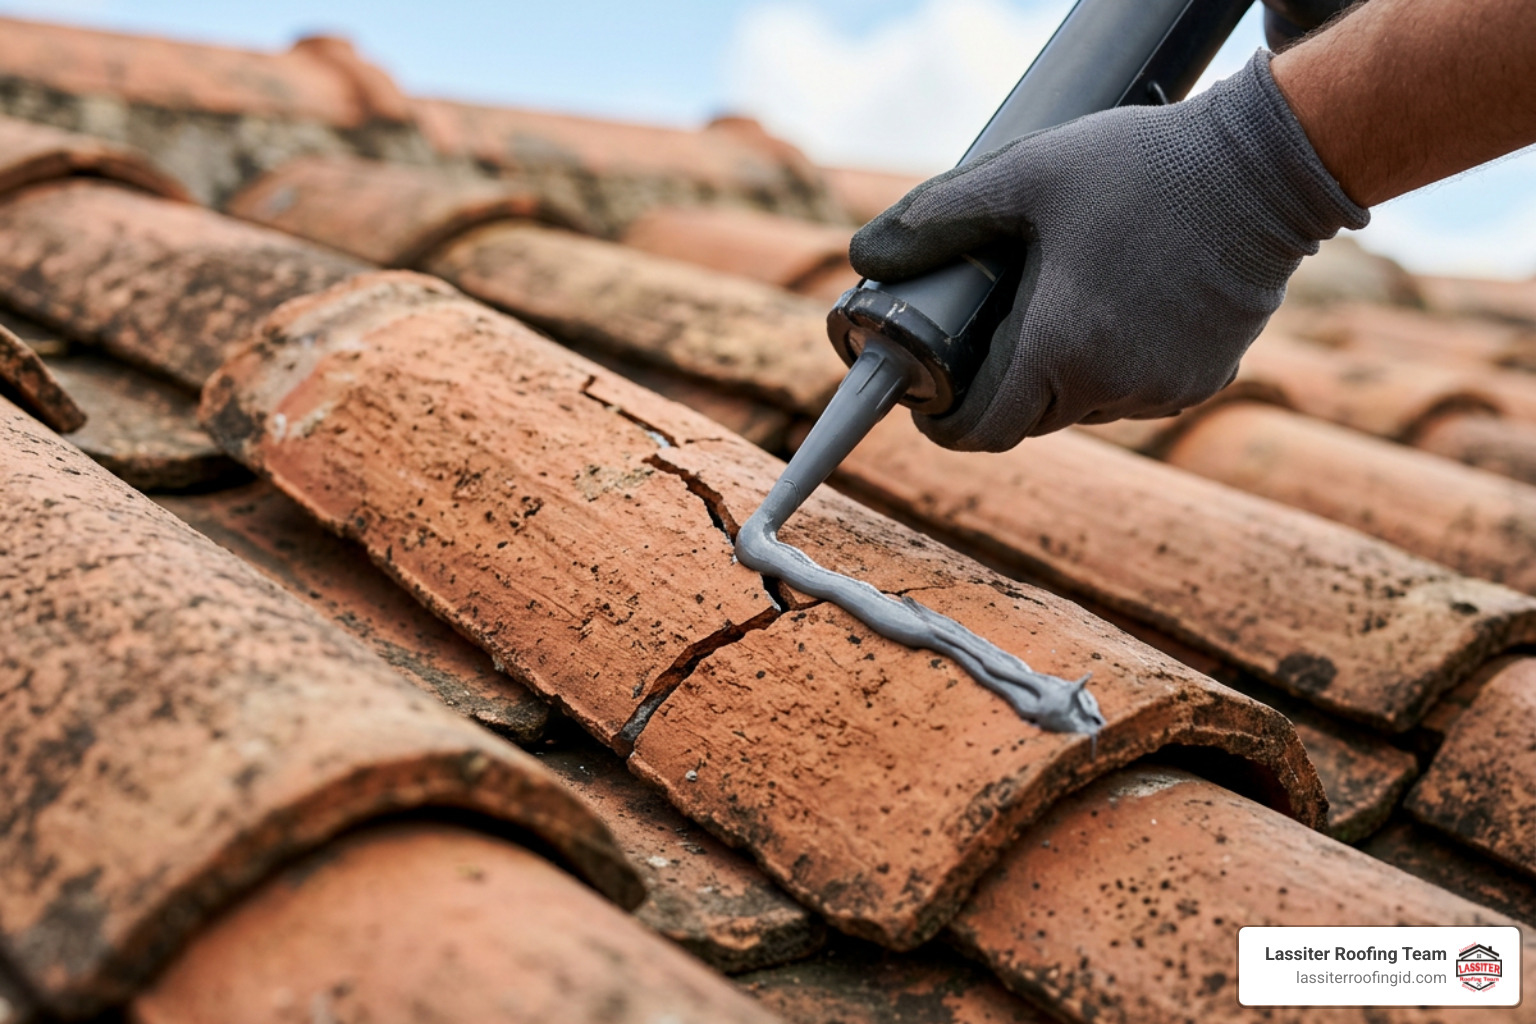
Essential Tools for Cracked Roof Tile Repair
Gather your safety equipment and materials before climbing your ladder:
Sturdy extension ladder with a standoff stabilizer
Fall protection harness and roof anchor (essential for steep pitches)
Stiff wire brush and nylon cleaning brush
High-performance exterior polyurethane adhesive or MS polymer sealant (such as Sikaflex or Geocel)
Heavy-duty caulking gun and flexible putty knife
Flat pry bar (wonder bar)
Two smooth wooden wedges or timber battens (for propping surrounding tiles)
Mineral spirits and clean cotton rags
Heavy-duty work gloves and safety glasses
Method 1: Sealing Hairline Cracks in Place
This method is suitable for hairline cracks where the tile is fully intact and seated properly on the battens.
Clean the Joint Thoroughly: Scrub the fracture and the surrounding 2 inches of tile surface vigorously with a dry wire brush. Remove all moss, lichen, airborne grime, and loose aggregate. Wipe the seam with a clean rag dampened with mineral spirits to remove residual oils, then let it dry completely.
Open and Clean the Crack: If small loose crumbs of concrete or clay sit inside the fissure, blow them out. Adhesives require direct contact with the solid mineral substrate to bond.
Apply the Sealant: Load your polyurethane or polymer sealant into the caulking gun. Cut the applicator tip at a narrow angle. Force the sealant tip deep into the crack, applying steady trigger pressure to inject the compound into the full depth of the fracture rather than just spreading it on the surface.
Tool the Surface: Smooth the bead flat across the seam using a putty knife. Feather the edges so water flowing down the face does not hit an elevated ledge of caulk and pool above the joint.
Cure Undisturbed: Allow the adhesive to cure fully according to the manufacturer guidelines (typically 24 to 48 hours) before exposing it to heavy foot pressure or cleaning.
Method 2: Replacing a Broken Interlocking Tile
When a tile is shattered, broken across its interlocking channel, or displaced, follow this safe removal and replacement procedure:
Prop Upper Tiles: Carefully slide two smooth wooden wedges underneath the overlapping tiles directly above and to the left of the damaged unit. Gently tap the wedges inward to lift the upper courses about 1/2 inch, relieving downward friction without cracking the surrounding tiles.
Release Fasteners: Reach under the lifted tile with a flat pry bar. If the broken tile is nailed or clipped to the batten, gently pry up the nail head or unhook the metal retaining clip. If the nail resists, carefully cut or slide the tile free from the nail shank.
Extract the Broken Tile: Lift the bottom lip of the damaged tile slightly, rotate it clockwise to disengage the interlocking side lap, and slide it downward out of the roof grid.
Inspect the Sub-Structure: Vacuum or sweep away any broken fragments, bird nesting debris, or dirt accumulated on the exposed underlayment and wooden batten. Check the membrane carefully for punctures or tears. Seal any small underlayment tears with flashing tape or a layer of roofing mastic.
Install the New Tile: Slide the matching replacement tile up into position, angling its top hanging nibs over the horizontal wooden batten. Ensure the left-side interlocking drainage channel seats cleanly beneath the adjacent tile's overlapping rib.
Secure and Lower Surrounding Tiles: Fasten the tile through its pre-drilled nail hole using a corrosion-resistant copper or stainless steel roofing nail (do not overdrive the nail; leave it slightly loose to avoid cracking the tile header under thermal stress). Carefully remove the wooden wedges and lower the surrounding tiles back into their flush resting positions.
Handling Active Leaks and Ceiling Protection
If a cracked tile allows rainwater to pour into your home during a severe downpour, do not attempt to walk on a slick, wet tile roof. Manage the moisture from inside the living space first:
Relieve Ceiling Water Pockets: If your plaster or drywall ceiling is sagging from pooled water, place a 5-gallon bucket underneath and carefully puncture the center of the bulge with a small screwdriver. This provides a controlled drain path and prevents an unexpected drywall collapse.
Triage the Attic: Enter the attic space with a flashlight. Move wet insulation batts away from the ceiling drywall and bag them in heavy-duty trash bags to stop moisture retention.
Temporary Exterior Tarping: Once the rain subsides and the roof is dry enough to access safely, drape a heavy-duty UV-resistant tarp over the damaged roof plane. Extend the tarp over the ridge line and anchor it securely using padded 2x4 lumber battens or sandbags. Never nail through good tiles to secure a tarp.
Repair Costs, Building Codes, and Roof System Transitions
Professional tile repairs provide lasting structural security, professional safety compliance, and workmanship warranties that protect your home's equity.
Average Tile Roof Repair Costs in 2026
Tile roofing repair pricing depends on roof pitch, accessibility, tile availability, and the condition of the underlying membrane. Across the United States in 2026, typical tile roof repair investments fall into the following brackets:
Average Overall Repair Cost: $900 to $2,500 (national average sits around $1,700).
Minor Single-Tile Replacement: $300 to $1,000 for isolated repairs involving a handful of broken tiles.
Active Leak Diagnosis and Repair: $400 to $1,500 depending on how much sub-roof framing and underlayment requires localized rebuilding.
Labor Rates: Professional tile roofing specialists charge between $50 and $120 per hour (or approximately $8 to $25 per square foot for specialized repair areas).
Major Structural / Decking Overhauls: $2,000 to $7,000+ when unaddressed leaks have rotted roof rafters, decking, and long spans of underlayment.
If your property includes varied architectural extensions, such as attached flat-deck additions or patio covers, coordinating with experienced flat roof repair contractors ensures that tricky transitions between flat membranes (like TPO or modified bitumen) and sloped tile planes remain watertight.
The 25% Building Code Rule and Structural Limits
When planning extensive repairs, always check local municipality regulations and building codes. For instance, under the Florida Building Code (Section 706.1.1), if more than 25% of a total roof section or plane is repaired, replaced, or recovered within any 12-month period, the entire roofing system must legally be brought up to current code standards.
Furthermore, apply the common roofing 50% Rule: If the combined cost of multiple localized tile, flashing, and underlayment repairs exceeds 50% of the cost of a full roof replacement (which typically averages between $10,000 and $30,000+), investing in a complete system overhaul is usually the better long-term financial decision.
In many older tile homes where the tiles remain structurally sound but the 20-year-old underlayment has failed, you can opt for a "Tile Lift and Re-Underlayment" (Tile Salvage). Roofers carefully remove, label, and stack your existing tiles, install premium modern waterproofing underlayment across the bare deck, and reinstall your original tiles—saving thousands on raw material purchases.
To explore the nuances of when full-scale restoration is required versus isolated patching, reviewing real-world insights on tile roof cracking and repair options provides valuable clarity for homeowners weighing their choices.
Frequently Asked Questions About Cracked Roof Tile Repair
Can you walk on a tile roof without breaking tiles?
Yes, but it requires specialized knowledge and extreme care. Whenever possible, professionals avoid walking directly on tile roofs by utilizing padded crawler boards, roof ladders, or aerial boom lifts. If you must step on a tile roof:
Wear soft, rubber-soled, non-slip footwear.
Never jump or place all your body weight on a single foot.
Step only on the lower third of the tile directly above the overlapping batten support line where structural reinforcement is highest.
Distribute your weight across two high points of barrel/curved tiles rather than landing in the thin middle valleys.
Never step on ridge caps, hips, verge edges, or valley cutaways, as these unsupported edges snap easily.
How long does an adhesive roof tile repair last?
A high-grade, UV-stable exterior polyurethane sealant (such as Sikaflex) or hybrid MS polymer adhesive applied to a properly cleaned and dried joint will routinely last 5 to 10 years. However, temporary silicones, painter's caulks, or standard construction glues will often break down within 6 to 18 months due to intense solar exposure and continuous thermal expansion.
Why is my tile roof leaking if the tiles look intact?
Most tile roof leaks are caused by failures beneath the surface rather than visible tile breaks:
Deteriorated Underlayment: Standard organic roofing felt breaks down after 20 to 25 years, drying out and cracking beneath the tiles.
Debris Dams in Valleys: Pine needles and leaves washing down roof slopes lodge beneath tiles, creating hidden dams that force water sideways over the tile laps.
Failed Flashing and Pipe Boots: Corroded metal valleys, cracked lead flashing around chimneys, or rotted plumbing vent boots allow water to bypass the tiles completely.
Wind-Driven Rain: Strong storms can push mist horizontally underneath undamaged tile overlaps, penetrating aging underlayment.
Conclusion
A cracked roof tile might look like a minor surface blemish, but ignoring it allows moisture to quietly degrade your home's underlying wood deck, ceiling framing, and insulation. Catching fractures early, evaluating whether to seal or replace, and understanding the vital role of your underlayment will preserve the structural health of your home for decades.
If you are dealing with cracked tiles, mysterious roof leaks, or aging underlayment, the experienced team at Lassiter Roofing is ready to help. With over 30 years of hands-on roofing experience across Idaho’s Western Treasure Valley, we provide comprehensive inspections, straightforward assessments, competitive quotes, and an industry-leading 5-year workmanship warranty on our services. Contact us today to schedule your roof evaluation and keep your home protected from the top down.


