


A Homeowner's Guide to Vetting Local Skylight Installation Specialists
Start With a Roofer Who Knows Skylights
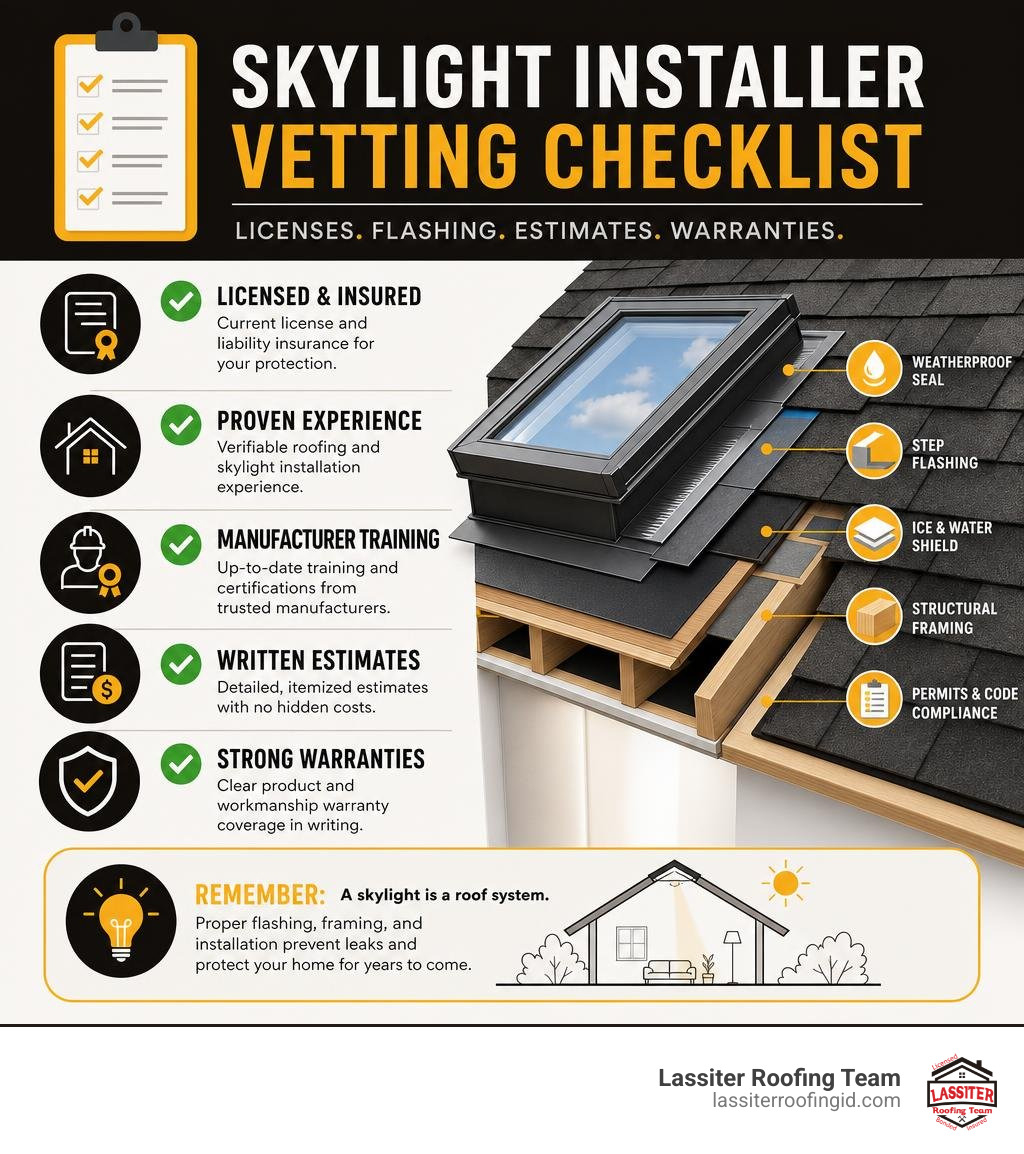
To find the best skylight installers near me, start by shortlisting local contractors who can prove they have:
A current license and liability insurance
Real roofing and skylight installation experience
Manufacturer training, such as VELUX certification
Written, itemized estimates and clear workmanship warranties
A plan for permits, structural framing, and roofing-specific flashing
A skylight is not just a window in the roof. It is a roof opening that must be framed, insulated, and flashed correctly to keep out wind-driven rain, snow, and ice. The right installer will inspect your roof pitch, attic space, rafter layout, roofing material, and the condition of the surrounding roof before recommending a product or price.
For Western Treasure Valley homeowners, cost transparency and leak prevention should be non-negotiable. Ask whether the quote includes the skylight, manufacturer-matched flashing, interior shaft work, cleanup, permits, and both product and labor warranty coverage.
I am Kason Walton, owner of Lassiter Roofing Team, with more than 30 years in roofing, construction, and real estate. This guide will help you compare the best skylight installers near me with the same practical standards we use to protect roofs, budgets, and long-term warranties.
How to Choose the Best Skylight Installers Near Me
Cutting an opening into your roof decking is serious business. While natural daylighting transforms dim living areas and boosts indoor productivity by up to 40%, an improper installation can quickly lead to water-damaged drywall, rotted rafters, and ruined flooring. Choosing the right contractor requires looking beyond surface-level sales pitches and focusing on proven roofing mechanics.
Skylights demand two distinct skill sets: fine interior finish carpentry and rugged exterior weatherproofing. Many general carpenters can build a beautiful drywall light shaft, but they often lack the deep roofing knowledge needed to integrate step flashing, counter-flashing, and ice and water underlayment into your existing roof plane. Conversely, an inexperienced roofer might nail the exterior seal but leave you with an uninsulated, crooked light shaft.
When you evaluate candidates, prioritize established roofing contractors with specialized skylight portfolios who back their craftsmanship with clear written warranties.
Essential Qualifications of the Best Skylight Installers Near Me
The best contractors maintain continuous training and verifiable credentials. When interviewing specialists, look for these foundational qualifications:
Manufacturer Certifications: Top brands like VELUX offer specialized installer tiers (such as Certified or 5-Star Specialists). These programs require dedicated product training, compliance with manufacturer flashing methods, and strict adherence to warranty standards.
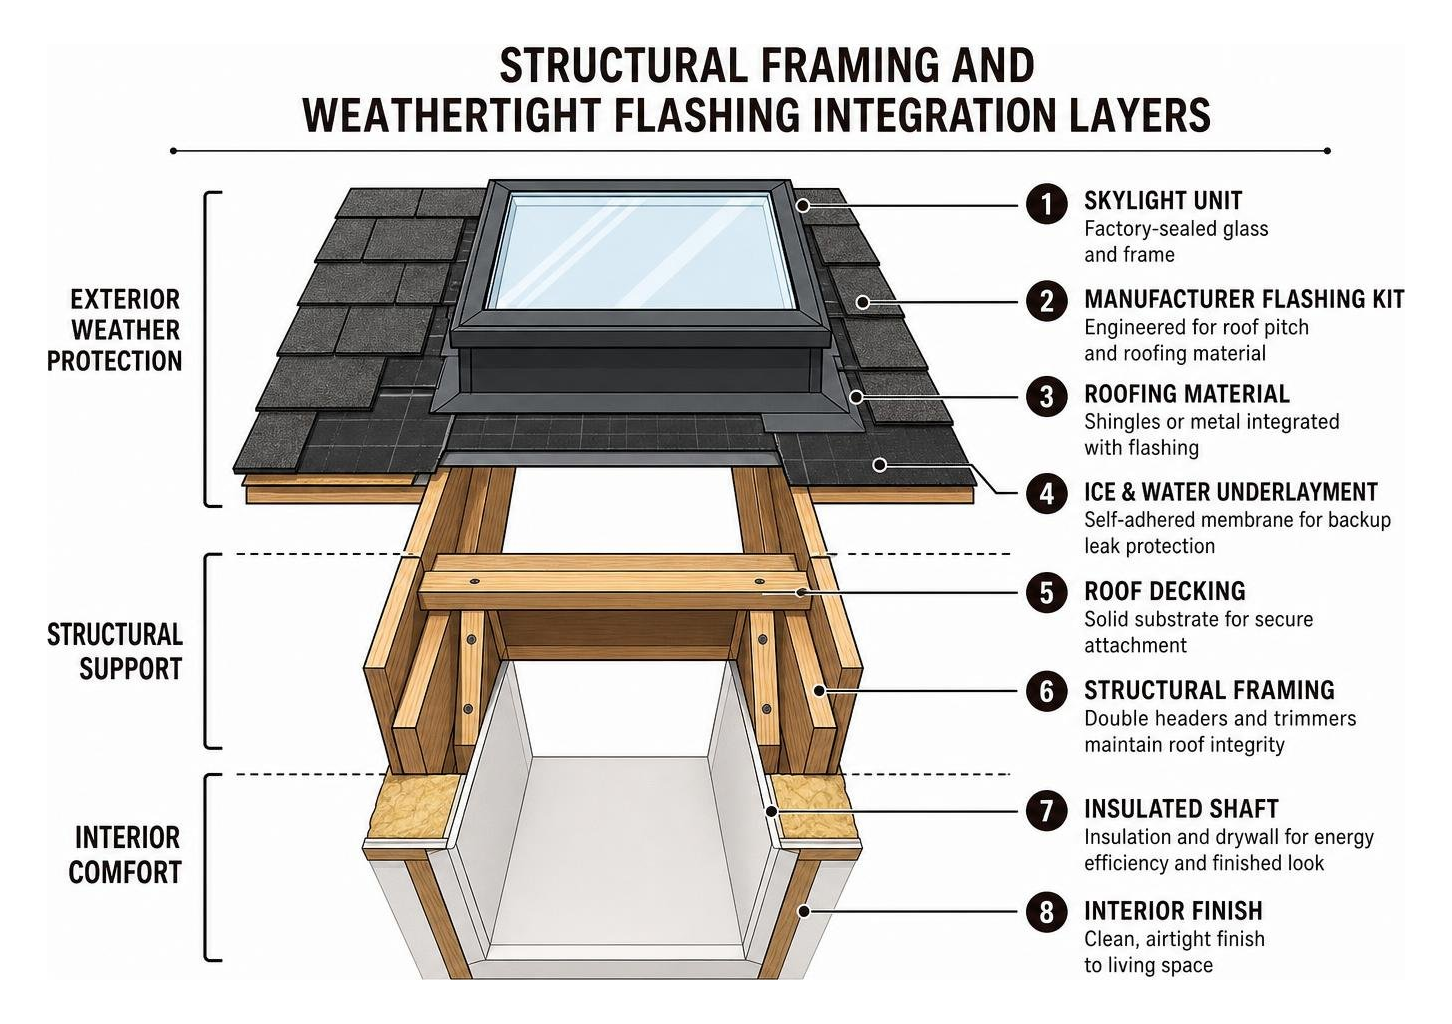
Structural Framing Expertise: Cutting through roof rafters requires structural alterations. A qualified installer understands how to frame load-bearing double headers and stringers to keep your roof from sagging over time.
Roofing Material Mastery: The installation methods used on traditional asphalt shingles do not work on standing-seam metal or flat membrane systems. Installers must have direct experience handling complex installations like shingle roofing installation and metal panel tie-ins.
Licensing, Permitting, and Insurance: Municipalities require building permits for structural roof cuts. Qualified contractors carry comprehensive general liability insurance, active workers' compensation, and handle all local municipal permitting seamlessly.
How to Search for and Verify the Best Skylight Installers Near Me
Do not rely solely on polished marketing. Take deliberate steps to verify contractor reliability before signing any contract:
Check Real Customer Track Records: Read through recent reviews on Google and trade platforms. Look specifically for comments mentioning heavy rainstorms or winter freezes. Did the roof stay bone-dry through seasonal shifts?
Demand Itemized, Written Estimates: Never accept a single lump-sum number scribbled on the back of a business card. Your estimate should detail the specific skylight model, flashing kit SKU, interior light shaft carpentry, insulation R-value, permit fees, waste disposal, and labor costs.
Insist on an In-Person Site Assessment: A contractor cannot accurately price a new skylight cut-in over the phone. They must physically inspect your attic space, measure rafter spacing, examine existing electrical or HVAC runs, and assess the condition of your exterior decking. Scheduling a comprehensive free roof inspection is the smartest first step to verify your roof's structural integrity before planning any daylighting project.
Comparing Skylight Types and Installation Costs
The overall cost of a skylight project is determined by three main elements: the mechanical operation of the unit, the complexity of your interior ceiling architecture, and the vertical distance between your ceiling and roof decking.
Standard replacement projects (swapping an old unit for a new one in an existing opening) are generally straightforward. However, new cut-in installations require building an interior light shaft. Shafts that extend through deep attic cavities (from 4 feet up to 18+ feet) or reach into high vaulted ceilings require additional framing lumber, drywall, taping, mudding, and painting, which directly influences the overall budget.
Skylight Type | Typical Installed Cost Range | Primary Function & Room Application | Key Benefits & Energy Ratings |
|---|---|---|---|
Sun Tunnel / Tubular | $750 – $1,500 | Hallways, walk-in closets, compact laundry rooms, small baths | Fits between rafters without structural framing; captures up to 98% daylight |
Fixed Skylight | $1,500 – $3,500 | Living rooms, cathedral ceilings, stairwells, home offices | Maximizes overhead daylight; low-profile deck mounting; cost-effective |
Manual Venting | $2,000 – $4,000 | Kitchens, upper-floor bedrooms, standard bathrooms | Smooth hand-crank operation; releases rising heat, steam, and cooking odors |
Solar Powered Fresh Air | $3,000 – $6,000 | Master baths, high vaulted kitchens, luxury living areas | Remote/app operation; acoustic rain sensors; eligible for 30% federal tax credit |
Fixed and Vented Skylights
Fixed skylights are stationary glass units designed strictly to deliver maximum overhead illumination. They represent roughly 70% of residential installations because they provide a clean, modern aesthetic with no moving parts to service. Fixed units are ideal for expansive vaulted living rooms and north-facing ceilings where daylight is needed all day.
Vented skylights open to release warm, stale indoor air through the natural "chimney effect." Manual venting units use a telescopic control rod or hand crank, making them dependable choices for accessible ceiling heights.
Solar-powered "Fresh Air" skylights represent the pinnacle of modern daylighting design. Powered by an integrated solar panel and battery, they open and close via wireless remote or automated smartphone schedules without requiring complex electrical wiring.
More importantly, these units feature integrated acoustic rain sensors that automatically close the sash at the first tap of a raindrop. In kitchens and master bathrooms, vented skylights can improve indoor air quality and reduce excess moisture and mold risk by up to 60%.
Sun Tunnels and Tubular Daylighting Devices
When you want natural sunlight in a windowless hallway, half-bath, or walk-in closet, a traditional full-sized skylight might be unnecessary or structurally impractical. That is where Sun Tunnels (tubular daylighting devices) shine.
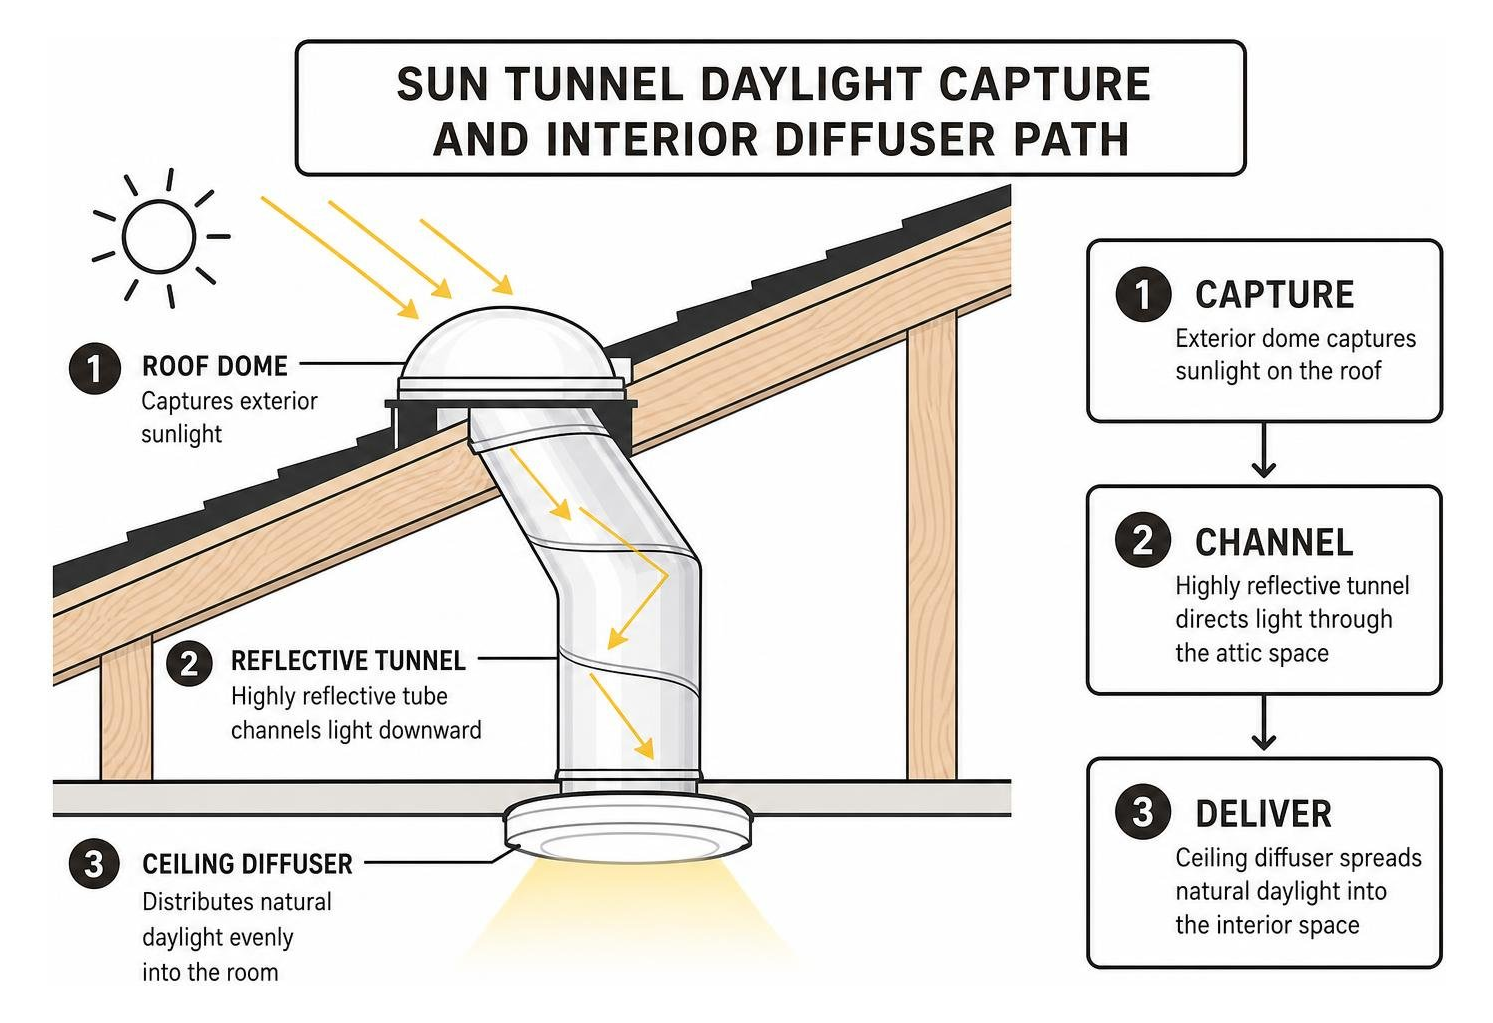
A Sun Tunnel uses an exterior, high-impact roof dome to channel sunlight through a highly reflective aluminum tunnel (rigid or flexible) straight into a ceiling diffuser below.
Minimal Structural Alterations: Because tubular devices range from 10 to 14 inches in diameter, they slide easily between standard 16-inch or 24-inch rafter bays without requiring you to cut or reframe load-bearing roof timbers.
Exceptional Light Output: Modern reflective rigid tubes deliver up to 98% of captured exterior daylight into the living space, eliminating the need to flick on light switches during daytime hours.
Rapid Installation: Experienced technicians can routinely install a complete Sun Tunnel system in less than half a day with virtually zero interior drywall mess.
Evaluating Roof Suitability and Material Compatibility
Not every roof structure accepts a skylight in the exact same manner. Over 80% of residential homes possess roof structures suitable for skylights, but your contractor must account for slope, framing design, and covering materials.
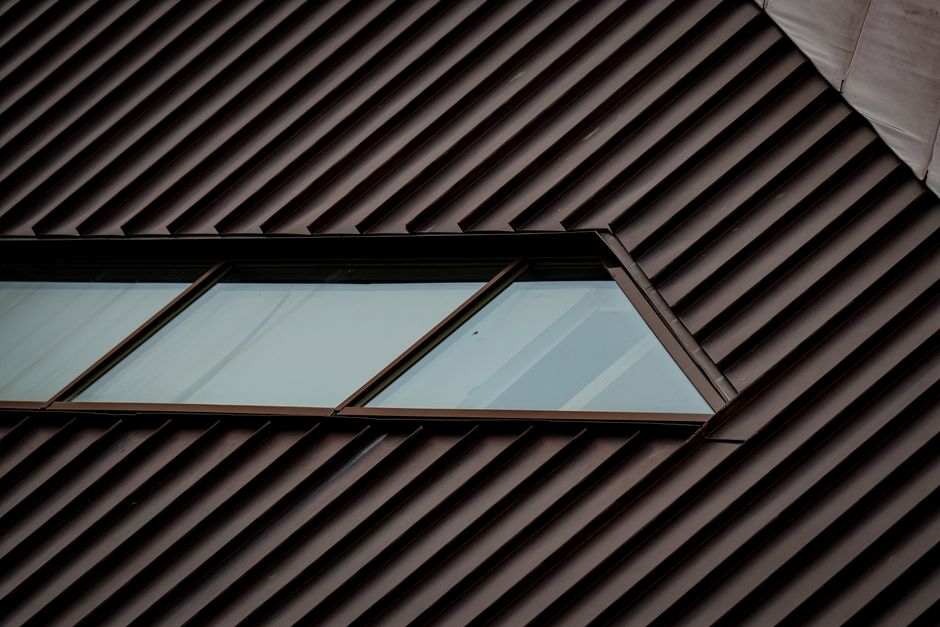
A standard roof installation requires an optimal roof pitch between 15° and 60° (roughly a 3:12 to 20:12 slope). Attic spaces must be examined beforehand to ensure the desired light path is not blocked by major plumbing stacks, HVAC ducting, chimneys, or structural truss webs.
Note: In modern homes built with engineered roof trusses, webbing boards cannot be cut or modified without certified structural engineering plans.
Pitched Roofs vs. Flat Membrane Systems
The slope of your roof directly determines whether your installer will choose a deck-mounted or curb-mounted skylight assembly.
Deck-Mounted Skylights: Designed specifically for pitched roofs (usually 14° and higher), deck-mounted models feature a factory-insulated wood frame that mounts directly flush against your structural roof decking. This setup delivers a sleek, low-profile architectural line from the ground while maximizing thermal efficiency.
Curb-Mounted Skylights: For low-slope roofs, flat roofs, or areas prone to heavy snowdrifts, curb-mounted models are mandatory. The installer constructs an elevated 2x4 or 2x6 wood box (curb) that stands 4 to 8 inches above the roof surface. The skylight sits over this curb like a shoe box lid. This elevation prevents standing water and melting snow from pooling against the glass seals.
When working with commercial or modern flat residential extensions, skylight curbs must integrate into single-ply weatherproofing membranes like TPO flat roof installation setups using heat-welded membrane boots. On steep slopes featuring standing-seam panels, installers must hand-form specialized metal crickets and side pans through precision metal roof installation techniques to divert runoff cleanly around the upper curb.
Preventing Leaks and Managing Weathertight Flashing
Ask any hesitant homeowner why they have not installed a skylight, and you will get the same answer: "I'm afraid it will leak."
It is a fair concern, but modern skylight systems rarely leak due to product or glass failure. Chronic leaks are almost always caused by lazy installation practices, such as relying on superficial tubes of silicone caulk instead of installing mechanical, multi-layered metal flashing kits.

A proper, weathertight installation relies on three synchronized layers of water protection:
Self-Adhering Underlayment: A layer of waterproof ice and water shield is wrapped up the sides of the skylight frame or wood curb, adhering directly to the bare roof decking to stop wind-driven rain.
Interwoven Step Flashing: Individual L-shaped aluminum flashing pieces are layered progressively between each row of roofing shingles, forcing water to flow outward onto the shingle surface rather than beneath it.
Counter-Flashing and Saddle Headers: Top head flashings and sill pans channel water around the top corners of the unit.
For older units suffering from persistent water stains, professional flat roof repair and flashing diagnostics can pinpoint whether the issue is genuine frame leakage or simple internal condensation caused by insufficient light shaft insulation.
The Professional Skylight Installation Process and Warranties
Understanding the step-by-step workflow of a professional installation eliminates project anxiety and helps you hold your contractor accountable to industry standards.
Step-by-Step Installation Timeline
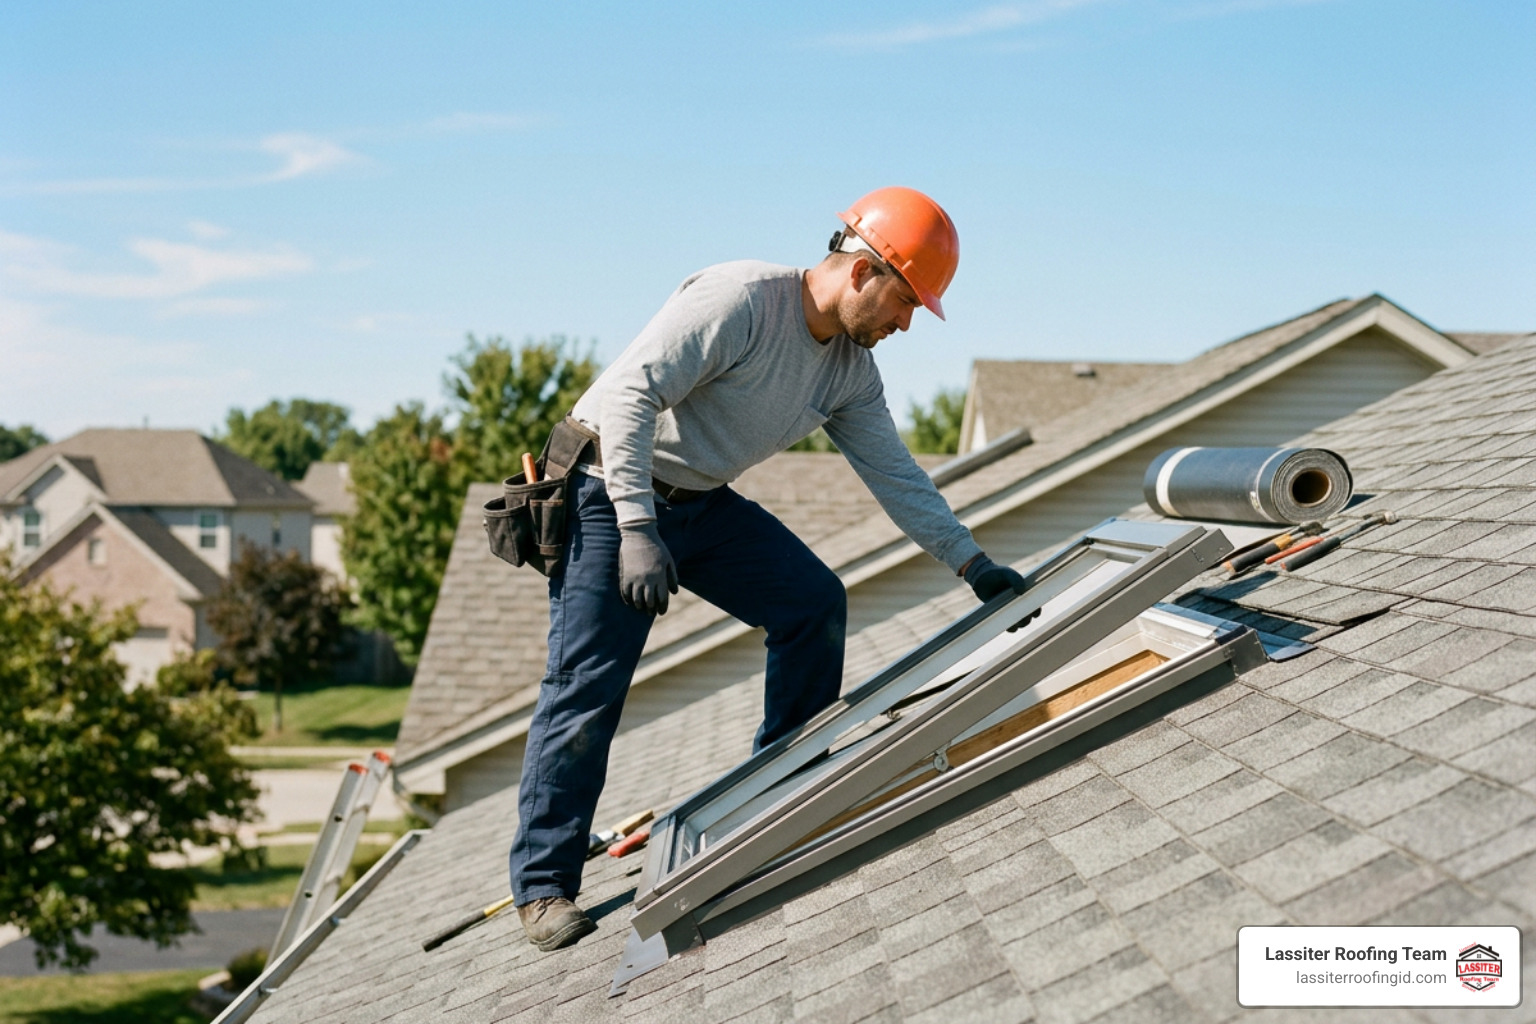
A complete residential skylight installation—from bare ceiling to primed drywall—typically spans one to two full working days:
Pre-Cut Protection and Site Prep: Professional crews begin indoors by laying protective canvas tarps and setting up containment plastic to capture all sawdust and drywall debris.
Roof Penetration and Structural Framing: The crew removes exterior shingles, cuts the structural roof decking, and frames out double headers across the opening to distribute roof loads safely to adjacent rafters.
Mounting and Weatherproofing: The skylight unit is bolted to the deck or curb, wrapped tightly in self-adhering membrane, and integrated with manufacturer-matched metal flashing kits. The roof is fully weatherproofed before the crew leaves on Day 1.
Light Shaft Carpentry and Insulation: On Day 2, carpenters build the interior light shaft, thoroughly pack the cavity with high-R-value batt or rigid foam insulation, install a continuous vapor barrier, and hang drywall.
Drywall Finishing and Walkthrough: Corners are taped, mudded, and sanded smooth. Motorized accessories (blinds, solar remotes) are tested with the homeowner, followed by a magnetic ground sweep to clear every fallen nail.
Manufacturer Guarantees and Workmanship Coverage
When choosing an installer, you should receive two clear, distinct layers of warranty protection:
Manufacturer Product Warranties: Industry leaders back their units with robust coverage, such as the VELUX 10-Year No Leak Promise on properly installed deck-mounted units with manufacturer flashing kits. This covers manufacturing defects, glass seal integrity, and factory hardware against premature failure.
Contractor Workmanship Guarantees: A manufacturer warranty only covers product defects—it will not cover water leaks caused by an installer's poorly nailed flashing. Quality local roofers provide a written workmanship warranty (such as our dedicated 5-year workmanship guarantee at Lassiter Roofing) to ensure that if a flashing seam or structural tie-in ever needs adjustment, your repair is covered at zero cost to you.
Frequently Asked Questions About Skylight Installation
How long does a typical skylight installation take?
A direct skylight replacement (installing a brand-new unit into an existing, framed roof opening) generally takes 4 to 6 hours.
A brand-new cut-in installation on a pitched or flat roof—requiring structural rafter cutting, exterior flashing, interior light shaft carpentry, insulation, and drywall finishing—typically takes between 1 and 2 full business days.
Sun Tunnels are the quickest to install, with skilled technicians completing standard runs through accessible attic spaces in roughly 2 to 4 hours.
Do skylights cause roof leaks or overheating in summer?
Properly installed modern skylights do not leak. Water infiltration issues on older homes almost always stem from corroded flashing, failed perimeter sealants applied by inexperienced handymen, or rotten curb decking that should have been replaced during installation.
As for overheating, older plastic bubble skylights from the 1980s and 1990s acted like giant magnifying glasses. Modern units use energy-efficient, argon-gas-filled dual-pane glass coated with advanced Low-E microscopic metal layers. This glass reflects infrared heat while admitting visible daylight.
Adding factory-installed motorized or manual shades can reduce indoor solar heat gain by up to 45% during hot summer afternoons.
Do solar-powered skylights qualify for federal tax credits?
Yes. Under the current provisions of the federal Inflation Reduction Act, qualifying solar-powered products—including Solar Powered Fresh Air venting skylights and solar-powered motorized blinds—are eligible for a 30% federal tax credit.
This credit applies directly to the total cost of both the product and its professional installation labor. In many instances, taking advantage of the 30% solar tax credit makes installing a fully automated, rain-sensing solar skylight roughly equivalent in net cost to installing a standard manual unit.
Conclusion
Bringing natural daylight into your home transforms dark rooms, enhances indoor comfort, reduces electric utility costs, and elevates your overall property value. But enjoying years of maintenance-free daylight hinges entirely on selecting the right installation partner.
Take the time to verify licenses, insist on manufacturer-matched flashing systems, verify structural carpentry practices, and choose an experienced roofing team that stands firmly behind its work.
If you are ready to illuminate your home with complete peace of mind, request free estimate from the Lassiter Roofing Team. With more than 30 years of dedicated roofing experience across the Western Treasure Valley, we provide transparent, individually quoted pricing, meticulous craftsmanship, and our trusted 5-year workmanship warranty. Connect with our specialists today for expert roofing and skylight solutions tailored specifically to your home.


